|
1.
|
In the Timeline view, add a new drawing layer for each body part to separate. You can press Ctrl + R (Windows/Linux) or ⌘ + R (Mac OS X). |

|
2.
|
In the Timeline view, select the layer's first cell in which you want to draw the part. |

|
3.
|
In the Tools toolbar, select a drawing tool. |
|
4.
|
In the Colour view, select a colour swatch. |

|
5.
|
In the Camera or Drawing view, draw the new part. |
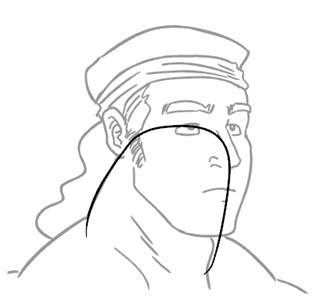
If you are working in the Drawing view, click the Light Table  button in the Drawing View toolbar to display the other layers as washed out colours. You can also press Shift + L.
|
6.
|
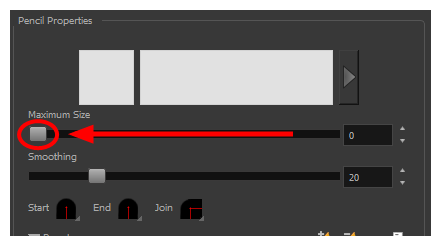
In the Tool Properties view, you can set the Pencil tool width to 0 to create an invisible hairline if you want to close a shape without drawing an actual stroke. |
|
‣
|
Select View > Show > Show Strokes or press K to display the invisible lines. |

|
7.
|
In the Tools toolbar, select the Paint  or Paint Unpainted or Paint Unpainted  tool to colour your drawing. tool to colour your drawing. |
|
8.
|
In the Colour view, select the corresponding colour. |
|
9.
|
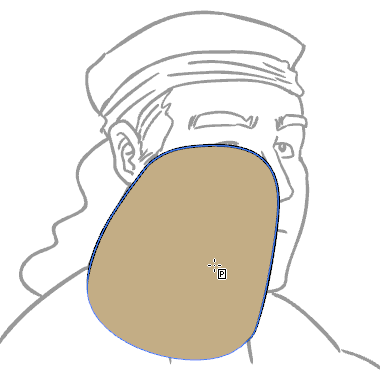
In the Camera or Drawing view, paint your drawing. |
|
10.
|
In the Tools toolbar, select the Select tool. Select your drawing and flatten the lines by clicking the Flatten tool. Select your drawing and flatten the lines by clicking the Flatten  button in the Tool Properties view. button in the Tool Properties view. |
|
11.
|
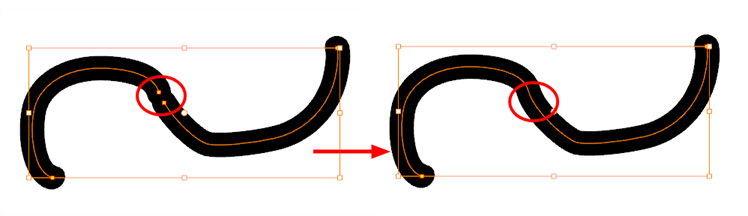
If your lines are composed of several pencil strokes, you might want to combine them into one single smooth pencil line. Using the Select tool, select the pencil lines to be merged and in the Tool Properties view, click the Merge Pencil Lines button. button. |
|
12.
|
Repeat the entire process until the break down is completed. |


