Tools
To understand paperless animation, you must first discover the tools available. There are, of course, drawing tools, but also practical features such as setting a drawing as a key, breakdown or in-between.
When you create hand-drawn animation digitally, there are certain tools you require in order to work efficiently, as you would with an animation table, paper and pencils.
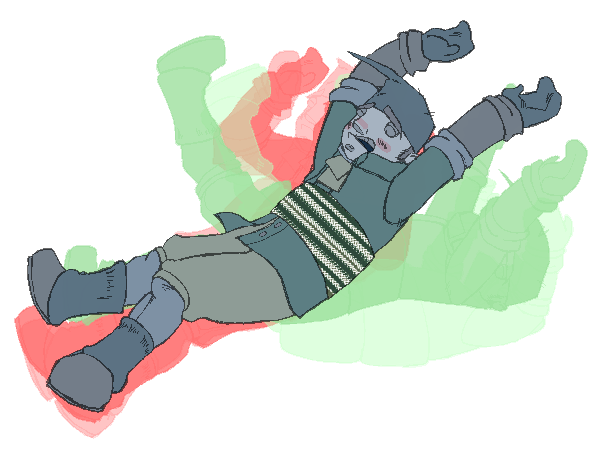
The onion skin and light table are used to preview previous and next drawings, cells, elements and frames. When designing or animating, it is very useful to see your previous drawings. Just as if you were building a cut-out puppet, you want to view other drawing elements to know where to draw the new element.
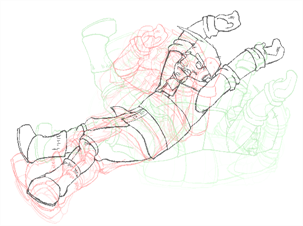
The Onion Skin ![]() tool lets you preview the previous and next drawings. By default, the previous drawings appear in a shade of red and the next drawings are displayed with a shade of green. You can change these colours in the Preferences dialog box.
tool lets you preview the previous and next drawings. By default, the previous drawings appear in a shade of red and the next drawings are displayed with a shade of green. You can change these colours in the Preferences dialog box.
In the Drawing view, onion skinned drawings are based on the actual number of drawings before and after the current drawing. In the Camera view, onion skinned drawings can be based on actual drawings or the drawings in the frames before and after the current drawing.
| 1. | Do one of the following: |
| ‣ | From the top menu, select View > Onion Skin > Show Onion Skin. |
| ‣ | In the Timeline view, click the Onion Skin |
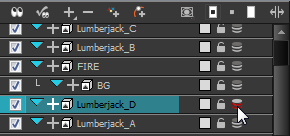
| ‣ | In the Tools toolbar, click the Onion Skin |
| ‣ | Press Alt + O. |
| 1. | Do one of the following: |
| ‣ | From the top menu, select View > Onion Skin > Onion Skinning by Drawing. |
| ‣ | In the Camera view menu, select View > Onion Skin > Onion Skinning by Drawing. |
| ‣ | In the Timeline view menu, select Onion Skin > Onion Skinning by Drawing. |
| 2. | Click an icon, menu operation or keyboard shortcut to edit the display. |
| View > Onion Skin Menu Command | Tools toolbar icon | Keyboard Shortcut |
| No Previous Drawing |
|
~ |
| Previous Drawing |
|
! |
| Previous Two Drawings |
|
@ |
| Previous Three Drawings |
|
# |
| No Next Drawing |
|
Ctrl + ` (Windows/Linux) or ⌘ + ` (Mac OS X) |
| Next Drawing |
|
Ctrl + 1 (Windows/Linux) or ⌘ + 1 (Mac OS X) |
| Next Two Drawings |
|
Ctrl + 2 (Windows/Linux) or ⌘ + 2 (Mac OS X) |
| Next Three Drawings |
|
Ctrl + 3 (Windows/Linux) or ⌘ + 3 (Mac OS X) |
| 3. | In the Camera view, the previous and next drawings appear with the current one. |
| 1. | If they are not visible, display the blue onion skin markers in the Timeline view by doing one of the following: |
| ‣ | From the top menu, deselect View > Onion Skin > Onion Skinning by Drawing. |
| ‣ | In the Camera view menu, deselect View > Onion Skin > Onion Skinning by Drawing. |
| ‣ | In the Timeline view menu, deselect Onion Skin > Onion Skinning by Drawing. |
| 2. | In the Timeline view, drag the blue onion skin markers to select the number of previous and next drawings to display. |

| 3. | In the Camera view, the previous and next drawings appear with the current one. |

| 1. | In the Camera or Drawing View toolbar, click the Top Light |
The Top Light dialog box opens.
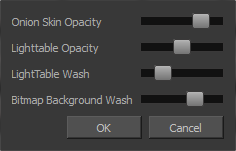
| 2. | Adjust the Onion Skin Opacity slider to modify the opacity value of the onion skin display. |
| 3. | Click OK. |
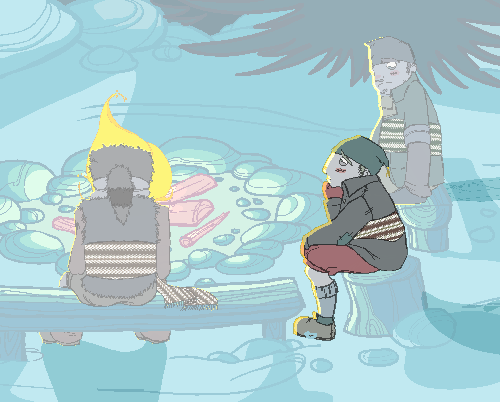
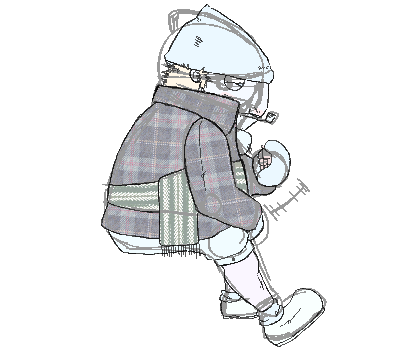
The light table is used to preview the previous and subsequent active layers in washed-out colours. It is useful for seeing the other layers when designing, animating or cleaning up your animation.
In the Camera view, when the light table is activated, all layers but the currently selected one are shown washed-out. The display returns to the normal mode when the Select tool or a scene setup tool is selected.
Only the currently selected drawing is displayed by default in the Drawing view. When enabling the light table, the other layers appear as a washed-out display and are used as a reference. You can not select or manipulate them.
| 1. | Do one of the following: |
| ‣ | In the top menu, select View > Light Table. |
| ‣ | In the Drawing View toolbar, click the Light Table |
| ‣ | In the bottom Camera View toolbar, click the Light Table |
| ‣ | Press Shift + L. |
| 2. | The drawings for the other layers are displayed as washed-out colours in the Camera |
| 3. | In the Timeline view, you can deselect the layers you want to hide from the light table. |

| 1. | In the Camera |
The Top Light dialog box opens.

| 2. | Adjust the Light Table Opacity slider to modify the opacity value of the light table display. |
| 3. | Adjust the Light Table Wash slider to modify the washed-out value of the light table display. |
| 4. | Use the Bitmap Background Wash to modify the washed-out value of bitmap images in the scene. |
| 5. | Click OK. |
Use the rotary table (animation disk) to rotate your Camera
| 1. | Do one of the following: |
| ‣ | In the Camera |
| ‣ | In the Tools toolbar, click the Rotate View |
The rotary table appears.
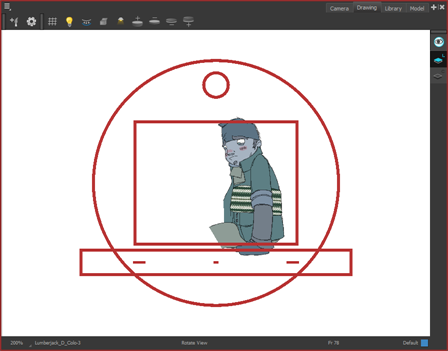
| 2. | Rotate the view to the desired angle. |
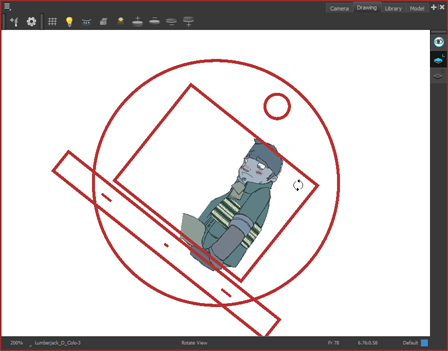
| 3. | Release the keyboard shortcut or switch to a new drawing tool. |
| 4. | Press Shift + X to reset the rotation. |
The Drawing Identification tool can help you stay well organized and save time when identifying key, breakdown or in-between drawings in the Xsheet and Timeline view.
With this tool, you the animator can retain some habits from traditional paper animation, but feel just as comfortable animating in a paperless environment.
When working with several animators, directors, or even other studios, the necessity for retakes will often arise. You can also mark your new drawings as either Retake Key, Retake Breakdown, or Retake In-betweens.
If your production requires that you mark your drawing with a custom marker, you also have the option to create your own.
A key drawing is a visually significant pose in a movement, often an extreme position. For example, if a character that is sitting down falls on his back, the key poses would be the character sitting and the character on his back. Of course, it may vary from one animation to another.
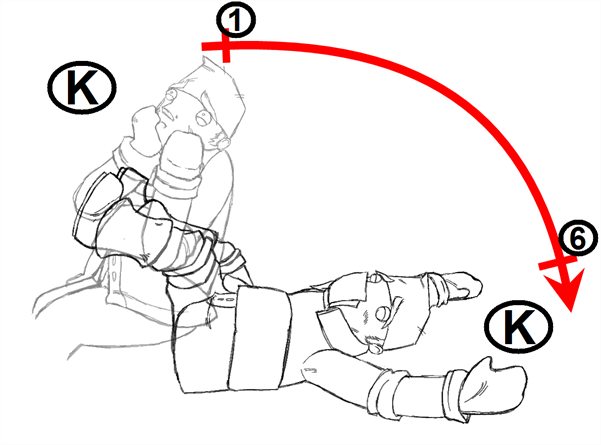
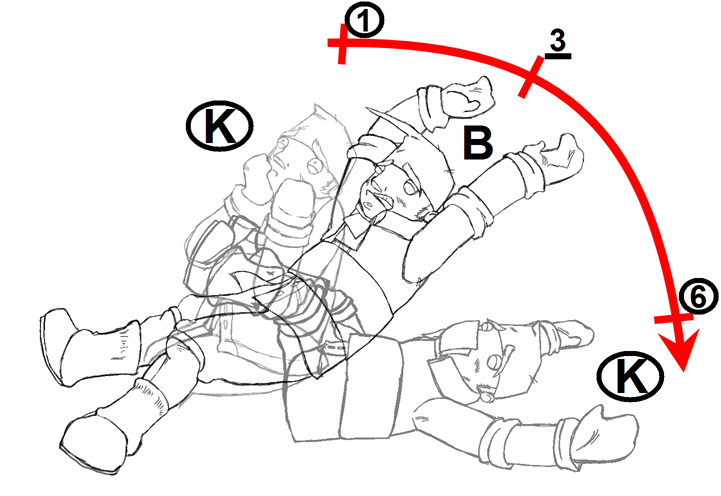
A breakdown drawing is a pose somewhere between two key poses that better shows the movement. Most animation moves are arcs, such as an arm waving, somebody bending, or a leg walking. All of these movements are rotations. The breakdown pose is used to describe this curve better.
The breakdown drawing is then used to indicate secondary poses, also called the follow-through. These actions can be a big stomach jiggle as somebody jumps, a cloak floating behind somebody that is running, or arms moving after the main body action. These moves will generally have a different timing than the primary action. They will mainly start later and finish later. So, the breakdown drawings are used to complete the key drawings.
Note that a breakdown drawing is not always placed exactly in the middle of two keys. It will often be closer to one or the other depending on the timing and the action. Also, you can have more than one breakdown pose between two keys.
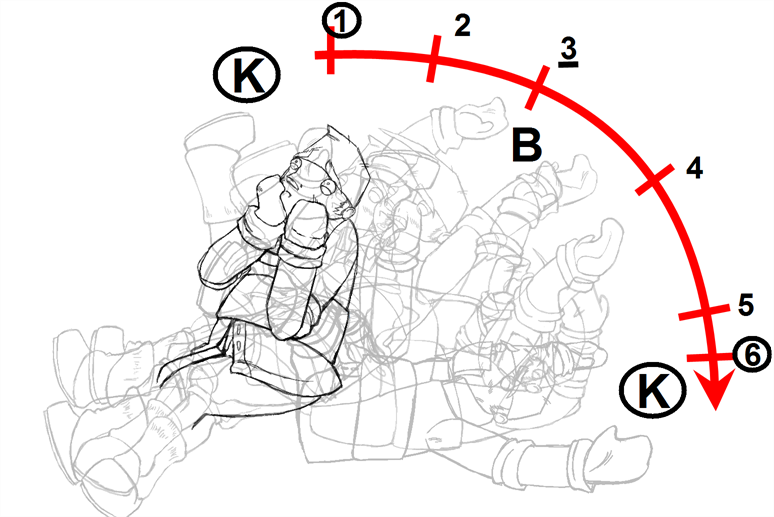
In-between drawings can be considered the filling drawings. Once the timing is established by the key and breakdown poses, the in-between drawings will be added to complete the animation and make it more fluid.
In-betweens do not necessarily need to be placed exactly in the middle of two other poses. They can be placed closer to one or the other to create ease in or ease out of the movement.
| 1. | In the top menu, select Windows > Toolbars > Mark Drawing. |
The Mark Drawing Toolbar appears.

| 1. | In the Xsheet view or Timeline view, select the cell that you want to mark. |
| 2. | Do one of the following: |
| ‣ | In the Mark Drawing toolbar, select an icon. |
| ‣ | In the Xsheet or Timeline view menu, select a command in Drawing > Mark Drawing. |
| ‣ | Right-click the selection and select Drawings > Exposure > Mark Drawing. |
| Mark Drawing Commands | Mark Drawing toolbar icon | Colour of marker in Timeline |
| Key Drawing |
|
Red (default) |
| Breakdown Drawing |
|
Blue (default) |
| In-between Drawing |
|
Not applicable |
| Retake Key |
|
Green |
| Retake BD |
|
Yellow |
| Retake IB |
|
Purple |


If you mark an in-between drawing, there is no icon displayed in the cell since it is used to remove a key or breakdown marker.
You can change the colour of the key and breakdown markers in the Timeline view. Refer to the Preferences Guide to learn how to customize timeline markers.
Make custom marks for the Xsheet by creating your own icons, then cutting, pasting and changing a bit of code. Not only is it possible to have your custom mark appear in the Xsheet and Mark Drawing toolbar, but also in the Onion Skin and Flip toolbars.
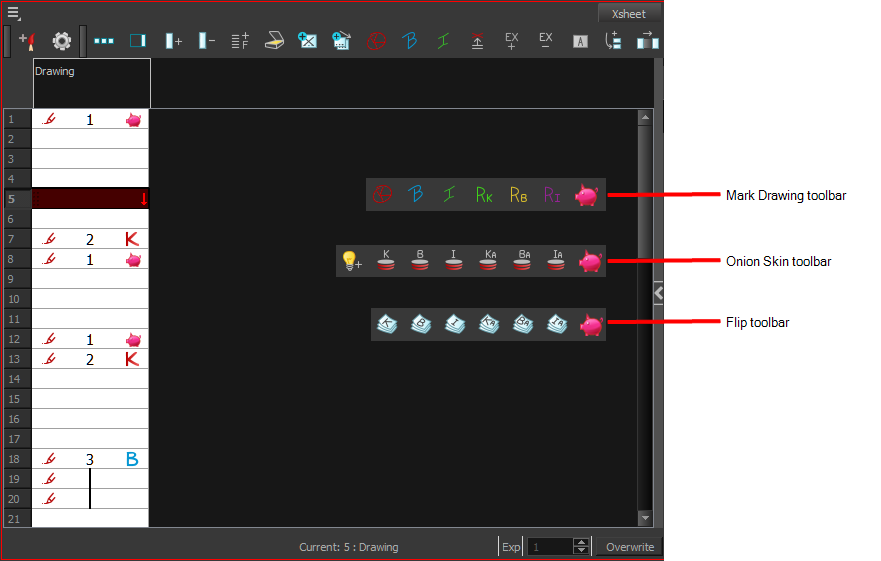
| 1. | With a bitmap editing software, create the following icons in PNG format: |
| ‣ | Mark Drawing Toolbar icon (24 x 24 pixel) |
| ‣ | Onion Skin Toolbar icon (24 x 24 pixel) |
| ‣ | Flip Toolbar icon (24 x 24 pixel) |
| ‣ | Xsheet Column icon (16 x 16 pixel) |
| 2. | Close Harmony. |
| 3. | Once your icons are ready, go to the Toon Boom Harmonyresources/drawingTypes.d directory: |
| 4. | Paste your icons in the resources/drawingTypes.ddirectory. |
| 5. | In that same directory, open the drawingTypes.xml file in a text editor. |
| 6. | For each custom icon you want to create, add the following line. Ensure it is placed before the closing </DrawingTypes> tag. |
| ‣ | <DrawingType text="NewButtonName" pixmapFile="XsheetIcon.png" commandIcon="MarkDrawingIcon.png" flipIcon="FlipIcon.png" onionIcon="OnionIcon.png" />
|
| 7. | In that line, replace the following information with your new icon information: |
| ‣ | NewButtonName: Write the name of your new marker. This name will appear in the button tooltip. |
| ‣ | XsheetIcon.png: Write the name of the icon that you created to appear in the Xsheet column. Include the file extension. |
| ‣ | MarkDrawingIcon.png: Write the name of the icon that you created to appear in the Mark Drawing toolbar. Include the file extension. |
| ‣ | FlipIcon.png: Write the name of the icon that you created to appear in the Flip toolbar. Include the file extension. |
| ‣ | OnionIcon.png: Write the name of the icon that you created to appear in the Onion Skin toolbar. Include the file extension. |
| 8. | Save the file and close it. |
| 9. | Start Harmony. |
The Create Empty Drawing command automatically creates a drawing in the selected cell, replacing any drawing that may already be exposed in that cell and the following ones until it meets another drawing or a blank cell.
| 1. | In the Timeline or Xsheet view, select the cell in which you want to create an empty drawing. |
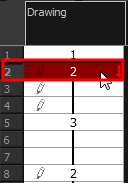
| 2. | Do one of the following: |
| ‣ | In the top menu, select Animation > Create Empty Drawing. |
| ‣ | In the Xsheet view menu, select Drawings > Create Empty Drawing. |
| ‣ | In the Xsheet View toolbar, click the Create Empty Drawing |
| ‣ | Press Alt + Shift + R. |
The new drawing is created in the Xsheet and Timeline views.
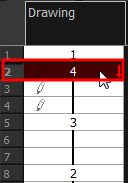
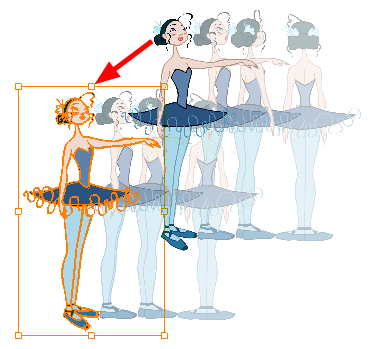
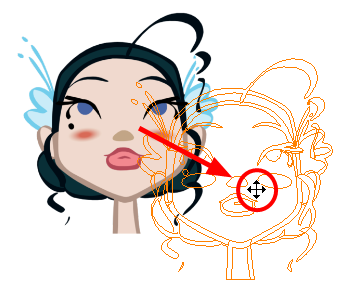
The Reposition All Drawings ![]() option is used to reposition, scale, rotate or skew all drawing strokes on every drawing included in a layer.
option is used to reposition, scale, rotate or skew all drawing strokes on every drawing included in a layer.
| 1. | From the Tools toolbar, select the Reposition All Drawings |
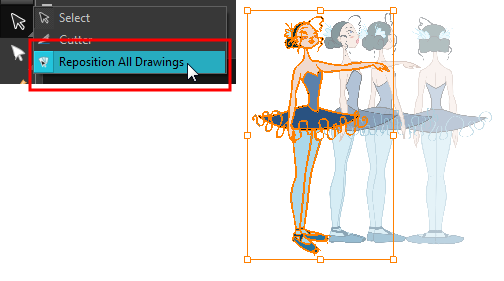
| 2. | Do any of the following: |
| ‣ | To reposition, click and drag your selection to a new area. |
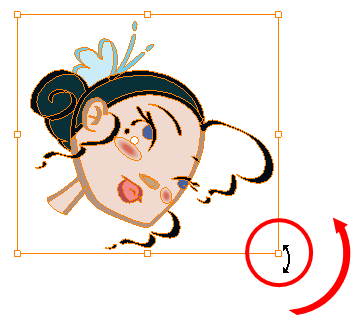
| ‣ | To rotate, rotate the selection box handle. |
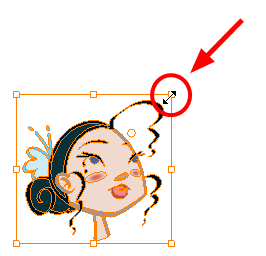
| ‣ | To scale, pull or push on the top, side, bottom or corner control points. Hold down Shift to maintain the selection’s ratio. |
| ‣ | To skew, drag the sides or top and bottom segments, between the control points. |
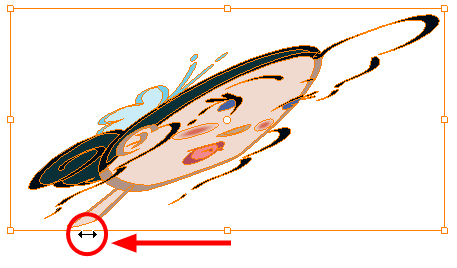
| 3. | When you release your cursor, every drawing in the drawing layer you repositioned, scaled, rotated or skewed will follow the same transformation. |
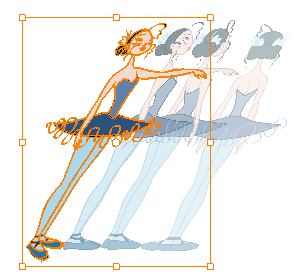
Here are some tips and tricks that you can use to feel more comfortable while drawing:
Texture Pen and Transparent Pen
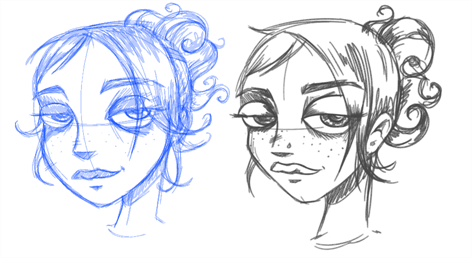
Use the texture pen or a transparent colour for a paper sketch effect.
Pen Tablet
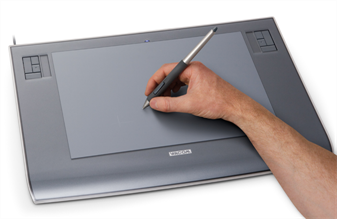
Use a pen tablet to draw with a pen instead of the mouse. This allows for increased dexterity and speed, and accounts for pressure sensitivity.
Field Chart
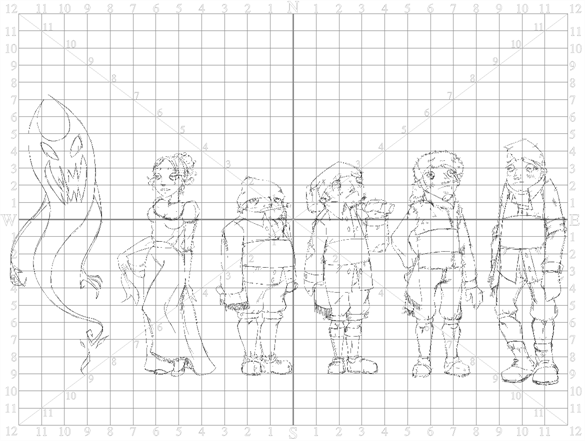
Toon Boom Harmony also has a field chart included in its Camera


