Pencil Tool Options
When you select the Pencil ![]() tool, its properties and options appears in the Tool Properties view.
tool, its properties and options appears in the Tool Properties view.
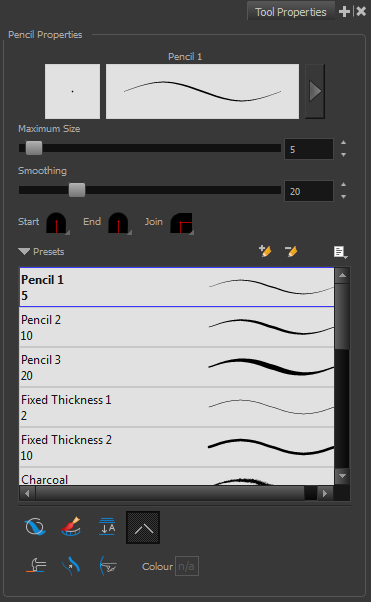
This is where you set the minimum and maximum sizes of your drawing tool which will produce the thick and thin effect on your stroke. This works with the pressure sensitivity of a pen tablet.
| ‣ | Maximum and Minimum Size: Defines the maximum and minimum width of the stroke. |
| ‣ | Smoothing: Defines the number of control points added to the centre line. |
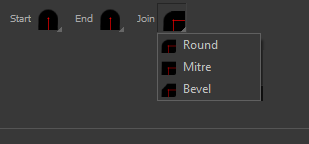
You can adjust the start, end, and joint style of a selected pencil line.
| • | Start: Lets you select the style of the start tip, which is the first tip you drew. You can choose between Round or Flat style. |
| • | End: Lets you select the style of the end tip, which is the last tip you drew. You can choose between Round or Flat style. |
| • | Join: Lets you select the joint style. The joints are where the line curves abruptly. You could also define the Join style as the corner style. You can choose between Round, Mitre and Bevel style. |
Harmony provides a variety of thickness stencils and also lets you create and save your own. It is a good idea to create and save pencils with precise sizes and parameters when you draw and design.
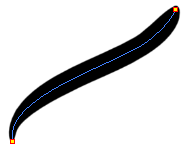
A thickness stencil saves a preset of how the thickness information looks across the length of the line. When drawing with a thickness stencil, the pressure sensitivity of the tablet is discarded in order to apply the thickness stencil.
A thickness stencil can be used while drawing, or applied afterwards.
You also have the possibility to apply different textures to your lines by either using the preset ones or importing your own—see Working with Pencil Presets and Pencil Line Texture.
You can apply a bitmap texture on your pencil line and adjust it as needed—see Pencil Line Texture
As you draw in the Line Art layer, the Create Colour Art Automatically ![]() option automatically creates the corresponding strokes in the Colour Art layer. To access this option, you must be in the Advanced Art mode.
option automatically creates the corresponding strokes in the Colour Art layer. To access this option, you must be in the Advanced Art mode.
When drawing on vector layers, lines do not usually become one object. The Auto-Flatten ![]() mode automatically merges lines created with the existing ones into one single object as you draw.
mode automatically merges lines created with the existing ones into one single object as you draw.
When drawing on a bitmap layer, you are laying down the bare pixels, so they are always flattened. You can no longer access the individual stroke after you draw it.
Using the Select tool, you can use the middle mouse button to select a segment of a flattened pencil line to create a nice finish on the lines and corners of your artwork.

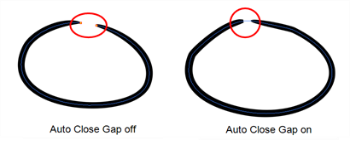
When using the pencil tool, you can automatically close strokes with an invisible stroke.
It is recommended to keep this option enabled when drawing with the Pencil tool.

The Line Building ![]() mode is very useful when drawing long lines and curves in small increments with pencil lines. As the pencil lines are central vector lines and it may be difficult to align the line tips perfectly to create a uniform stroke and close all gaps.
mode is very useful when drawing long lines and curves in small increments with pencil lines. As the pencil lines are central vector lines and it may be difficult to align the line tips perfectly to create a uniform stroke and close all gaps.
In this mode, you can draw lines in small increments and the tips are merge into one single stroke.
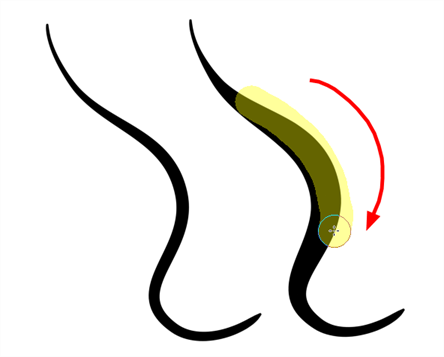
The Auto Adjust Thickness ![]() tool is useful when you want to render a portion of a line thicker. When tracing a drawing on paper, you will often go back to a section of a curve to make it thicker to add dynamism to the line. Using the Auto Adjust Thickness tool, you can draw highlight strokes over the section to make thicker. Once you release the pen or mouse, the line becomes thicker following the shape and curve of the original stroke. This way is much faster and smoother than using the Pencil Editor tool. You do not have to add extra points and adjust the position and Bezier handles.
tool is useful when you want to render a portion of a line thicker. When tracing a drawing on paper, you will often go back to a section of a curve to make it thicker to add dynamism to the line. Using the Auto Adjust Thickness tool, you can draw highlight strokes over the section to make thicker. Once you release the pen or mouse, the line becomes thicker following the shape and curve of the original stroke. This way is much faster and smoother than using the Pencil Editor tool. You do not have to add extra points and adjust the position and Bezier handles.
The default overlay colour is light yellow. If this colour is difficult to see because of the background or drawing colour, you can adjust the colour.
| 1. | In the Tools toolbar, select the Pencil |
| 2. | In the Tool Properties view, click the Auto Adjust Thickness |
| 3. | Click the colour swatch. |
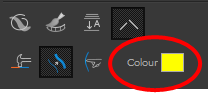
The Colour Picker window opens.
| 4. | In the Colour Picker window, select a new colour. |
The Line Pushing Mode ![]() option lets you draw highlight strokes over existing pencil lines. You can reshape the curves. Depending how you draw the pushing stroke over your line, the highlighted section will be reshaped in one direction or the other.
option lets you draw highlight strokes over existing pencil lines. You can reshape the curves. Depending how you draw the pushing stroke over your line, the highlighted section will be reshaped in one direction or the other.
The default overlay colour is light yellow. If this colour is difficult to see because of the background or drawing colour, you can adjust the colour.
| 1. | In the Tools toolbar, select the Pencil tool. tool. |
| 2. | In the Tool Properties view, select the Line Pushing Mode |
| 3. | Click the colour swatch. |
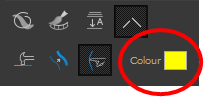
The Colour Picker window opens.
| 4. | In the Colour Picker window, select a new colour. |


