Modifying a Path in the Timeline View
When you select a peg or drawing layer in the Camera view and move it around, Harmony will automatically create keyframes on the corresponding function curves. If you want to modify these curves, you can do it through the peg or drawing layer parameters in the Timeline view.
Harmony lets you also flip between the selected layer's keyframes in the Timeline view.
 How to create the function curve in the Timeline view
|
1.
|
In the Timeline view, double-click on a drawing or peg layer. |
The Layer Properties window opens.
|
2.
|
Identify the section for the type of function you want to create. |
|
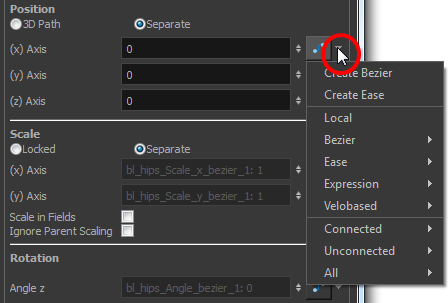
3.
|
Click the drop-down arrow at the end of the corresponding row and select Create Bézier or Create Ease. |
How to delete a keyframe in the Timeline view
|
1.
|
On the right side of the Timeline, select a keyframe to delete. You can [Shift]+click several keyframes to select a group before deleting the keyframes. |
|
2.
|
Do one of the following: |
|
‣
|
Right-click on the selected keyframe and select Delete Keyframes. |
|
‣
|
In the Timeline view menu, select Motion > Delete Keyframes. |
|
‣
|
In the Timeline View toolbar, click on the Delete Keyframes  button. button. |
If you select a keyframe or group of keyframes and press Delete, the corresponding drawings on that cell are also deleted.
How to change the keyframe values in the Timeline view
|
1.
|
In the Timeline view, open the drawing or layer’s parameters by clicking the Expand  button or press Alt + F. button or press Alt + F. |

|
2.
|
At the top of the Timeline view, click the Show/Hide Data View  button. button. |

|
3.
|
Select the parameter for which you want to create a function curve: Path, Velocity, Scale; x or y, Angle, or Skew. |
|
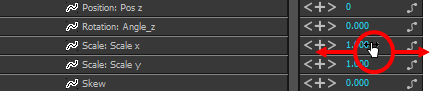
4.
|
Pass the cursor over the blue number value of the parameter layer being modified. |
|
‣
|
Wait until the cursor changes to a white hand with a two-way arrow and then drag the hand slightly to the left or right to decrease or increase the value. |
OR
|
‣
|
Double-click on the blue number and enter a value into the field that appears. |
How to flip through poses
|
1.
|
In the Camera or Timeline view, select the layer that contains the keyframes you want to flip through. |

|
2.
|
From the top menu, select Animation > Go to Previous Keyframe or Go to Next Keyframe or press semicolon (;) and single quote ('). |


