


Animating the Camera
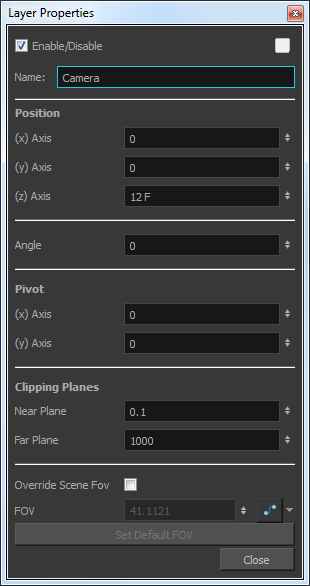
-Harmony has a camera that can move along the X, Y, and Z axes. Having the camera move on the Z-axis offers the possibility to create truck in and truck out, as well as multiplane camera moves. The default camera position is centred and backed up to 12 fields.
It is important to understand the coordinate values in Harmony. Harmony's core is based on the origins of animation. In traditional animation, a scene's size and camera motion are calculated in fields. A field has a 4:3 ratio and measures 0.5 inch in width. A specific grid has been created for this purpose. It is known as a field chart. Harmony uses this unit of measurement as its coordinate system.
A field chart uses cardinal directions. The X axis is the east-west direction, the Y axis is the north-south direction and the Z axis is the forward-backward direction.
The camera is treated the same way as any other element. The same tools and selection modes are used to offset or animate it, but the camera is a static object. To animate the camera, you need to connect it to a peg layer. A peg is a trajectory layer.

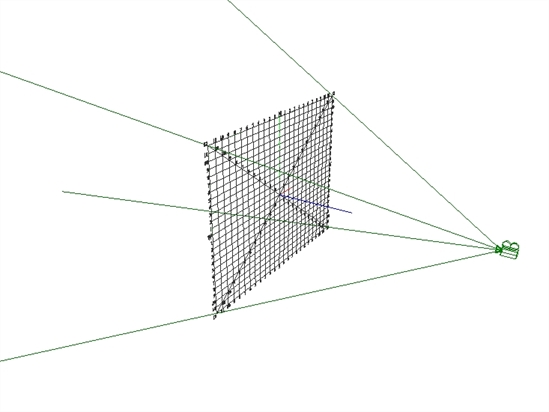
While making camera moves, you can use the Top, Side, and Camera views.
| ‣ | From the top menu, select Windows > Top or Side. |
| ‣ | From any existing window already open in your project, click the Add View |
| 1. | If you do not already have a camera layer, do one of the following: |
| ‣ | From the top menu, select Insert > Camera. |
| ‣ | From the Timeline view layers toolbar, click the Add Layers |
A new camera layer is added to the scene and appears in the Timeline view.
| 2. | In the Timeline view, select the Camera layer. |
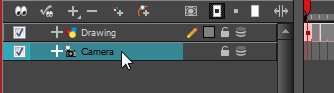
| 3. | From the Timeline View Layer toolbar, click the Add Peg |
A Peg layer appears directly above the Camera layer. The Camera layer is automatically attached to it.
The Peg layer automatically takes the name of the camera and adds the suffix -P to indicate that it is a Peg layer, for example Camera-P.

If the new Peg layer did not appear directly above the camera, you may have clicked elsewhere in the scene, which deactivated the layer on which you want to add the Peg layer.
| ‣ | Select the Camera layer and drag and drop it under the new Peg layer. Or delete the misplaced Peg layer, select the Camera layer and click the Add Peg |
| 1. | In the Tools toolbar, enable the Animate |
| 2. | In the Tools toolbar, select the Transform |
| 3. | On the right side of the Timeline view, on the Camera Peg layer, select the frame at which you want the camera move to start. |
| 4. | Do one of the following: |
| ‣ | Right-click and select Insert Keyframe. |
| ‣ | In the Timeline View toolbar, click the Add Keyframe |

A keyframe appears in that cell. Any frames preceding this keyframe cell will hold the same camera position as in this keyframe.
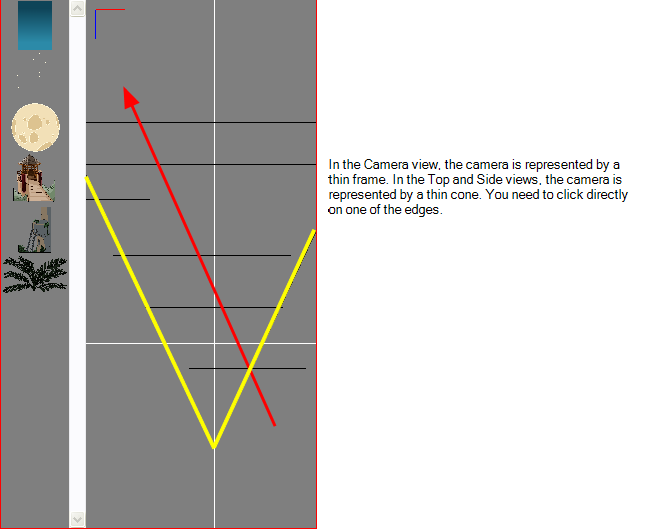
| 5. | In the Top, Side or Camera view, select the camera (the large V-shaped cone) and move it to the desired position. In the Camera view, the camera is represented by a thin frame. You need to click directly on one of the edges. |
| 6. | On the Timeline view, click on another cell a bit further down in time to indicate where the camera move will end. |
| 7. | Select the camera in the Camera, Top or Side view and move it to the desired position. |

A second keyframe appears and a line is created between the two frames to indicate that the subsequent motion between the frames will be calculated and rendered by the program.
| 8. | Play back |