Managing the Views
The Harmony user interface is composed of different views, each one designed for a specific purpose. You can modify the location and accessibility of the views by adding a new view as a tab or as a window. You can also swap the view locations around.
Throughout this chapter you might notice slight differences between your interface and the images used to demonstrate the procedure. This is because the images are taken from Harmony Stage. Draw is a subset of Harmony Stage.
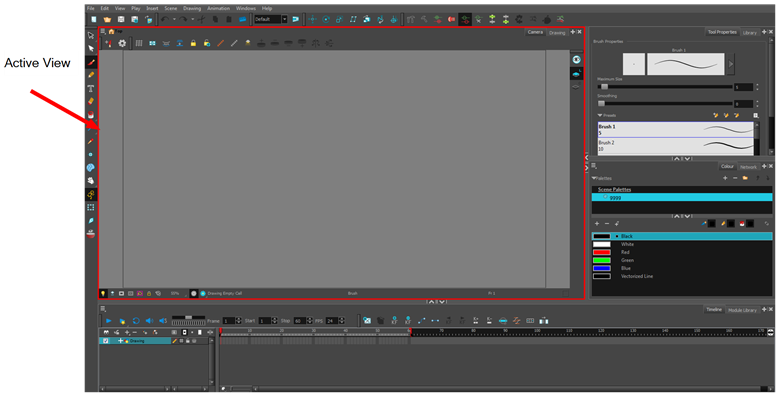
It is important to know about the active view. When a view is active, a red rectangle appears around the view. Keyboard shortcuts and top menu options are linked to the active view. If a menu option is greyed out, it either means it does not apply to your layer, drawing or other type of selection or the option does not apply to the active view.
Workspace modifications are automatically saved when you exit the application unless you deselected the Automatically Save Workspace option in the Preferences dialog box.
 How to add a view
|
1.
|
Select the view you want to add from Windows > the desired view. |
|
‣
|
You can also use the Window drop-down menu button in each view. Click the Add View button and select a view from the list.You can open several instances of the same view except for the Timeline, Tool Properties, Colour and Drawing views.
|

By default, the view appears tabbed.

How to dock a floating window in the workspace
|
1.
|
Drag the window’s tab onto one of the workspace’s views. You can drop the view onto the other existing tabs to tab the view with the other ones. You can also drop the view onto either side of an existing view to insert the floating one beside it. When you get close to one of the edges, a black rectangle will appear, indicating where the view will be inserted. |

How to swap views around
|
1.
|
Select the view's tab and drag it onto one of the view’s separators, top area or onto another view’s tab. |
|
2.
|
When a blue rectangle outline appears showing an available location for the view, release the mouse button and drop the view tab into position. One of three things will happen: |

|
•
|
The view becomes a tabbed window. |
|
•
|
The view becomes a floating window. |
|
•
|
The view becomes a new docked window. |
How to resize a view
|
1.
|
Position your cursor on the edge of the view you want to resize. |
|
2.
|
When you see the Resizing  cursor, click and drag the side of the window to the desired width or height. cursor, click and drag the side of the window to the desired width or height. |

You can also temporarily hide a view to get more working space.
How to temporarily hide a view
|
1.
|
On the edge of the window you want to hide, click the Collapse/Expand button. |
The view is compressed and only the Collapse/Expand button is visible.
|
2.
|
Click the Collapse/Expand button again to redisplay the view. |


