


Upgrading From a Previous Version of Toon Boom Harmony
At this point, it is assumed that the USAnimation, Opus or Toon Boom Harmony binaries (program files) are installed on the Toon Boom Harmony server and are mounted by all the Linux clients. When you update the installation on the server, all clients will load the new binaries from the central mount point.
When upgrading previous installations of USAnimation, Opus or Harmony, pick a time when Harmony production is slow or stopped. During the upgrade, no users can run any of the Harmony or Opus modules and all rendering jobs must be completed.
| • | Restoring Backed Up Files |
| • | Editing usabatch's .cshrc |
| • | Editing Other Users' .cshrc |
| • | Editing the /etc/skel/.cshrc |
| • | Configuring the License Server |
| • | Restarting the Harmony Services |
| • | Updating the nfs Export |
| • | Updating the smb.conf |
| • | Verifying the Parameters Required in the smb.conf File |
| 1. | Verify that no one is running any versions of USAnimation, Opus or Toon Boom Harmony. All of their modules must be closed on the server and all the clients. |
| 2. | Verify that all batch rendering and vectorizing are completed or that the queues are empty. You can check the status of Vectorize and Render queues from the Control Center module. |
| ‣ | In the Control Center module, use the Queue menu, Environment > Vectorize Queue or Render Queue to open the Vectorize queue or Rendering queue for each environment. The queue should either be empty or the status of all jobs should be Completed. |
| 3. | Stop all services running on the server and the clients. Depending on the services you have running, type the following commands in the order presented: |
/etc/init.d/USAnimation_queues stop
/etc/init.d/USAnimation_link_srv stop
/etc/init.d/USAnimation_dbserver stop
/etc/init.d/USAnimation_flexlm stop
It is not necessary to delete the startup scripts from /etc/init.d/ as the Harmony install script will update them automatically.
| • | It is important to stop the queues on all rendering machines. If the queues are running, those binaries will be locked and the installer cannot update them. |
| 4. | Back up Harmony's configuration files by copying them to a location where you can recover them later. Go to the folder where the previous version of Harmony is installed and back up the configuration files in the etc folder: |
| ‣ | Version 7.5 and earlier: /usa/etc |
| ‣ | Version 7.8 and later: /usr/local/ToonBoomAnimation/harmony_[version]/etc
|
Back up the following configuration files:
Manager.conf
Scan.conf (If a scanner was configured to run with the Harmony Scan module on this computer)
server.ini (If the server is configured to receive connections from Windows clients)
VectOptions.conf (If a vectorization preset had been added to it)
If plug-ins were added to the Harmony installation, back up these files as well.
| ‣ | Version 7.5 and earlier: /usa/lnx86/plugins |
| ‣ | Version 7.8 and 9.2: /usr/local/ToonBoomAnimation/harmony_[version]/lnx86/plugins |
| ‣ | Version 10.0 and later: /usr/local/ToonBoomAnimation/harmony_[version]/lnx86_64/plugins
|
You can back up the entire Harmony folder by renaming it to make sure all config files are kept.
| 5. | Clean the KDE menu. The shortcut to start the previous application should be removed from the KDE menu. There are two ways to do this:: |
| ‣ | Use the KDE Menu Editor which you can start from the KDE menu. The location will vary depending on the version of Linux installed. |
| ‣ | Delete them from the command line by doing the following: |
Change to:
/usr/share/applnk/cd/usr/share/applnk/
Delete the old shortcuts:
Version 7.5 and earlier: rm USAnimation-*
Version 7.8 and later: rm ToonBoom-Harmony_*
The shortcuts will be removed from the KDE menu the next time you log in.
| 6. | Uncompress the distribution file: |
tar xvfz [path_to_distribution_file]/[filename].tar.gz
| 7. | Switch to the directory that was extracted from the tar.gz file. |
| 8. | Run the install script specifying the options required for your server. ./install -b -d -l -p -u -kde |
| Parameter | Description |
-b
|
This is mandatory. This installs the binaries required to run Harmony. |
-c |
Installs Harmony Cloud as a service. This parameter is required if this machine is the Harmony Cloud web server. |
-d
|
Configures the tbdbserver for auto startup. Required when installing a server. |
-l
|
Configures the Link_srv for auto-startup. Required if the server has Windows clients. |
-p
|
Configures the tbprocess for auto-startup. Required if the server will perform batch processing. |
-u
|
Updates the dict files in the /USA_DB/dicts. This is mandatory when upgrading a server from a version previous to Toon Boom Harmony 11.2. This option will only work if -d is also selected. |
-kde
|
Installs Harmony menu shortcuts in the KDE menu. |
Restoring Backed Up Files
| 1. | Copy the server.ini, Manager.conf and any other files you backed up to the new installation: /usr/local/ToonBoomAnimation/harmony_11.2/etc/ |
Editing usabatch's .cshrc
Before you can start the Harmony services, you must make modifications to the .cshrc in usabatch's home.
| 1. | If you are not logged in as usabatch, type the following: |
su - usabatch
| 2. | Open the .cshrc file in usabatch's home: |
vi .cshrc
| 3. | Edit .cshrc. |
if ( -f /usr/local/ToonBoomAnimation/harmony_11.2/etc/usa_cshrc ) then
source /usr/local/ToonBoomAnimation/harmony_11.2/etc/usa_cshrc
endif
umask 0
| 4. | Save and quit. |
Editing Other Users' .cshrc
The.cshrc of all other users of Harmony should be edited to remove the lines that are used to source the usa_cshrc file. It is not required to source this file any longer as the path to the application was added to the PATH variable via the files in /etc/profile.d.
| 1. | Remove the following line if it exists: |
Versions 7.8 and 9.2:
source /usr/local/ToonBoomAnimation/harmony_[version]/etc/usa_cshrc
Version 7.3:
source /usa/etc/usa_cshrc
Editing the /etc/skel/.cshrc
| 1. | Open the file /etc/skel/.cshrc (if it exists) and remove the lines that source the usa_cshrc file. |
Configuring the License Server
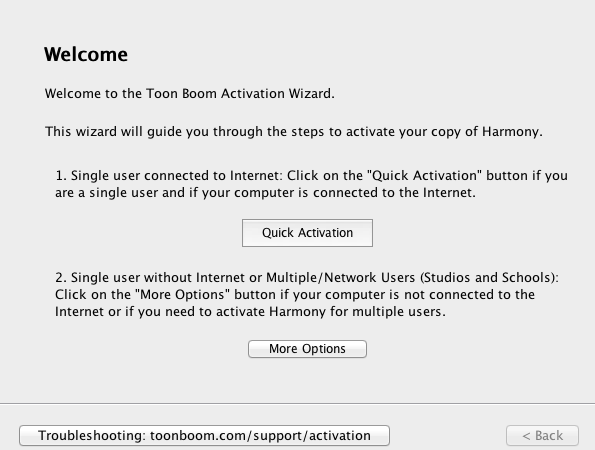
| 1. | Depending on how the License Wizard was started, the first page will be as follows: |
| ‣ | If this screen appears, click More Options. |
| ‣ | If this screen appears, click Activate License. |
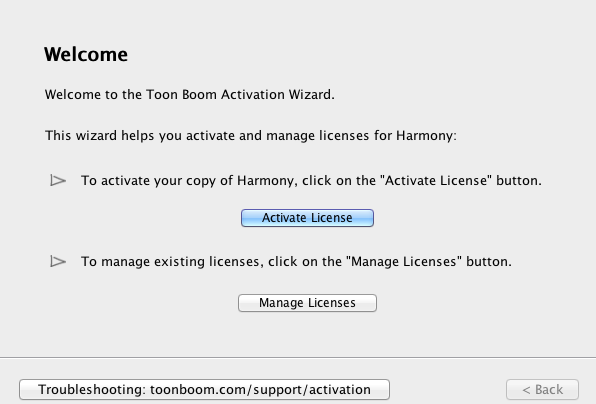
The Activation Options screen appears.
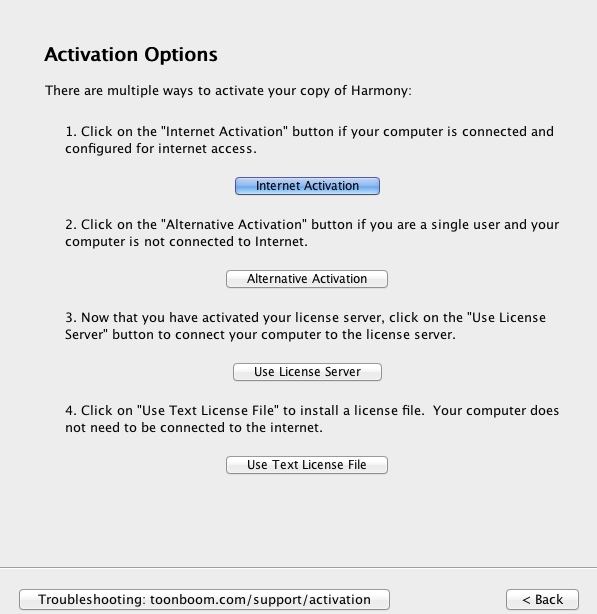
| 2. | Click Internet Activation |
The Internet Activation Options screen appears.
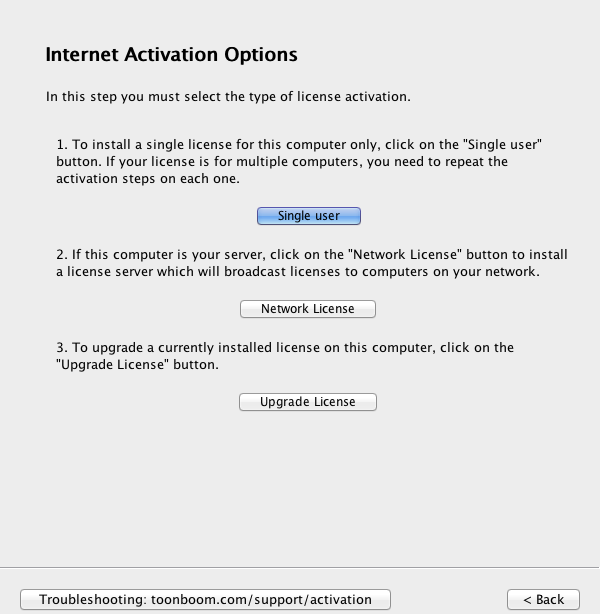
| 3. | Click Network License. |
The Internet Activation - Network License screen appears.
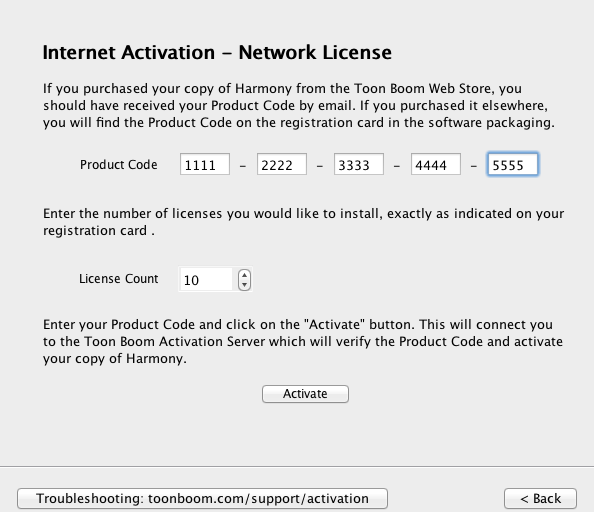
| 4. | In the Product Code fields, enter your product code. |
| 5. | In the License Count field, enter the number of licenses the product code grants you. |
| 6. | Click Activate. |
The Install License Server screen appears.
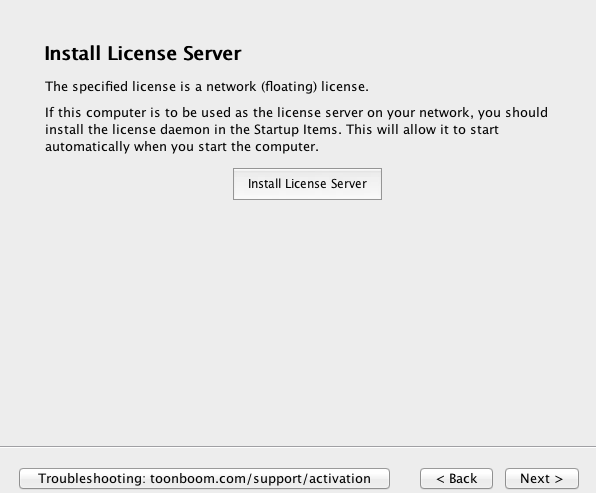
| 7. | Click Install License Server. The license.dat file is created in /usr/local/flexlm/licenses/license.dat. The License Server is also configured and started. |
The license.dat created contains the following:
SERVER this_host 0 ANY
VENDOR toonboom
USE_SERVER
| 8. | Click Finish to exit the wizard. |
| 9. | Verify that the FlexLM license is working properly: |
lmutil lmstat -a
You can can also look at the log:
less /tmp/lmgrd.log
If the FlexLM service needs to be restarted:
/etc/init.d/USAnimation_flexlm restart
Both steps can be done manually if needed.
| ‣ | To configure the License Server to start automatically at boot: |
/sbin/chkconfig/USAnimation_flexlm on
| ‣ | To start the License Server manually: |
/etc/init.d/USAnimation_flexlm restart
The Activation Successful screen appears.
| 10. | Click Finish to exit the wizard. |
| 11. | Verify that the FlexLM license is working properly: |
lmutil lmstat -a
You can can also look at the log:
less /tmp/lmgrd.log
If the FlexLM service needs to be restarted:
/etc/init.d/USAnimation_flexlm restart
Restarting the Harmony Services
| 1. | Once the license is properly configured and started, start the Harmony services that are required on your server in the following order: |
/etc/init.d/USAnimation_dbserver restart
/etc/init.d/USAnimation_link_srv restart
/etc/init.d/USAnimation_queues restart
| 2. | Check the logs to verify that the services started properly. |
/tmp/lmgrd.log
/tmp/tbdbserver.log
/tmp/tbprocess.log
/tmp/Link_srv.log
| 3. | Start Harmony and open a scene to see if the server works properly. |
Updating the nfs Export
If the Linux server has Linux or Mac OS X clients, the nfs exports need to be updated with the path of the new Harmony binaries.
/etc/exports
| 1. | If it exists, change the path of /usa to /usr/local/ToonBoomAnimation/harmony_11.2 |
/USA_DB *(rw,sync)
/usadata000 *(rw,sync)
/usr/local/ToonBoomAnimation/harmony_11.2 *(rw,sync)
| 2. | Run the following command so the change takes effect: |
/usr/sbin/exportfs -r
| 3. | Test the exports: |
/usr/sbin/showmount -e
Export list for [hostname].toonboom.com:
/USA_DB *
/usadata000 *
/usr/local/ToonBoomAnimation/harmony_11.2 *
Updating the smb.conf
| 1. | When upgrading a Linux server, a small modification must be made to the usa share path to point to the new install. "/etc/samba/smb.conf" and change the path under the [usa] share to the path of the new Harmony install. |
[usa]
comment = Harmony binaries & stuff
browseable = yes
read only = no
guest ok = no
create mask = 0777
directory mask = 0777
path = /usr/local/ToonBoomAnimation/harmony_11.2
| 2. | Once the file is saved, verify that you have not made any basic syntax errors. |
testparm
Load smb config files from /etc/samba/smb.conf
Processing section "[homes]"
Processing section "[printers]"
Processing section "[USA_DB]"
Processing section "[usa]"
Processing section "[usadata000]"
Processing section "[tmp]"
Loaded services file OK.
Server role: ROLE_STANDALONE
| 3. | Press Enter to see a dump of your service definitions. |
If the smb.conf was configured according to the 7.3 documentation, the testparm command may return the following error:
Level II oplocks can only be set if oplocks are also set.
To get rid of this error, add the level2 oplocks = No parameter in the global section of the smb.conf—see Verifying the Parameters Required in the smb.conf File for all the parameters required in the smb.conf.
| 4. | Restart smb: |
/etc/init.d/smb restart
Verifying the Parameters Required in the smb.conf File
It is always a good idea to verify the configuration of the smb.conf file.
| 1. | Verify the configuration of the smb.conf. |
/etc/samba/smb.conf
Parameters needed in the [global] section:
encrypt passwords = no
blocking locks = no
oplocks = no
level2 oplocks = no
follow symlinks = yes
unix extensions = no
wide links = yes
Default parameters for the shares:
[USA_DB]
comment = Toon Boom Harmony Database
browseable = yes
read only = no
guest ok = no
create mask = 0777
directory mask = 0777
path = /USA_DB
[usa]
comment = Toon Boom Harmony binaries & stuff
browseable = yes
read only = no
guest ok = no
create mask = 0777
directory mask = 0777
path = /usr/local/ToonBoomAnimation/harmony_11.2
[usadata000]
comment = Toon Boom Harmony data 000
browseable = yes
read only = no
guest ok = no
create mask = 0777
directory mask = 0777
path = /usadata000
| 2. | Always perform a testparm after making changes to the smb.conf. |
testparm
| 3. | Restart the smb service. |
/sbin/service smb restart
| 4. | Reboot the server, if possible, to verify that all the services are properly started. |
| 5. | Once the server is booted, check all the logs to see if the services are running properly. |
/tmp/lmgrd.log
/tmp/tbdbserver.log
/tmp/tbprocess.log
/tmp/Link_srv.log