Partitioning Your Renders
By partitioning renders, you can separate the elements of a scene or character, and render them separately according to group and Z position. This is useful when you want to export part of a character or scene in Harmony so you can add effects and create the final composite using a different software application.You can export part of a character or scene in Harmony and then use other software applications to add
Groups and Partitions
Using the Write module, you can partition the rendering of images based on group and Z position. First, you determine which groups you want to render. Groups are what you connect to a Composite module in the Network view. Then you define the render by their Z position.
The Z position is based on fields. Each field is equal to one partition, which is centered on the absolute value of the range you define. Each partition yields a separate folder that contains your exported, rendered image.
To export images based on group and Z position:
| 1. | In the Module Library, select the IO tab. |
| 2. | Select the Write module and drag it to the Network view. |
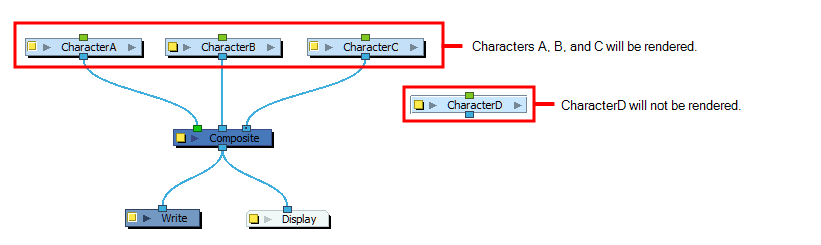
| 3. | In the Network view, attach the groups you want to render to a Composite module. |
In the following example, there are three groups connected one Composite module. They will be rendered simultaneously, producing three separate folders to hold the renders. If you have more groups, you can go ahead and connect them to them if you want to render them. Otherwise, disconnect the ones you don't want to render.
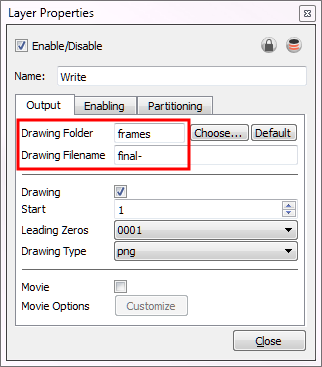
| 4. | Display the Write module properties. Select the Output tab and set the following: |
| ‣ | Drawing Folder: Type in a name for the folder that will hold the renders. |
| ‣ | Drawing Filename: Type in a prefix for the names of the subfolders. |
| 5. | Select the Partitioning tab. |
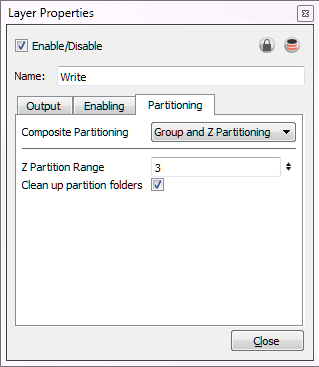
| 6. | Set the following: |
| ‣ | Composite Partitioning: Select Group and Z Partitioning. |
| ‣ | Z Partition Range: Define the range of the partition. In our example, the range was set to 3. This will create three folders for the renders. |
| ‣ | Clean up partition folders: Selected. |
| 7. | Start the render by selecting File > Export > Render Network or press [Ctrl] + [Shift] + [Y] (Windows/Linux) or [⌘] + [Shift] + [Y] (Mac OS X). |
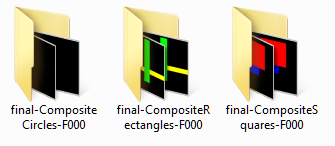
| 8. | To see your renders, navigate to the Drawing Folder you defined in step 4. |
Write Module, Partitioning Tab Properties
| Parameter | Description |
| Composite Partitioning |
Off: Renders the entire network and places separate images of the composite in the Drawing Folder. Group and Z Partitioning: Creates multiple renders and places them folders that correspond to their group in the Network view. |
| Z Partition Range |
Based on the Z position, defines the range of the partition, centered on the absolute value. |
| Clean up partition folders |
When selected, removes the old folders from the Drawing Folder each time you perform an export. When deselected, each time you render, more folders are added to the existing ones. |