Blur - Radial Zoom
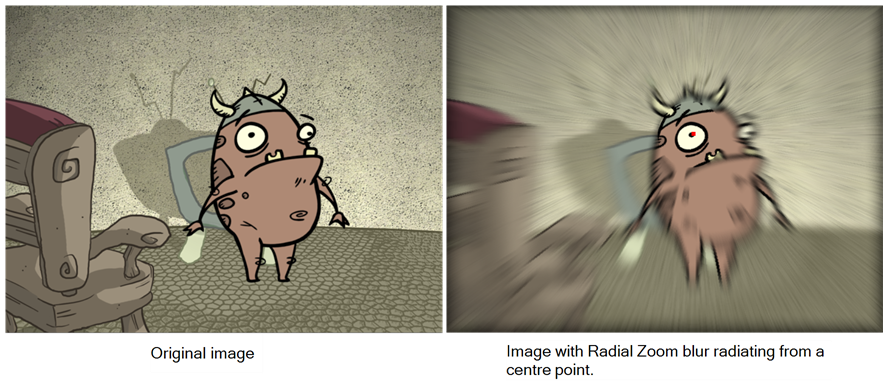
The Blur - Radial Zoom effect creates blurs around a centre point, simulating the look of a zooming or rotating camera. You can use a matte to isolate the area of the image from which you want the effect to radiate from. For example, in the illustration below, a circular matte was created to mask the eyeball and a Negate effect was applied so the blur is outside the matte. Then the centre point was positioned on the character's iris, which is the centre of the matte.
For detailed video tutorials and sample scenes by Adam Phillips, see toonboom.com/resources/video-tutorials/chapter/adam-phillips-harmony-effects.
To create a radial-zoom blur around an isolated area:
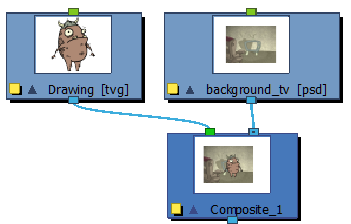
| 1. | Connect a drawing and a background image to a Composite module. |
| 2. | Connect the Composite module to the Blur-Radial Zoom module. |
| 3. | Connect a Blur-Radial-Zoom module to the Composite module and add the Write and Display modules. |

| 4. | Now you will need to create a matte to isolate an area of the image. In the Timeline view, click the Add Layers |
| 5. | In the Drawing view, draw a filled shape. |
| 6. | The blur should radiate outward from the mask. To do this, connect a Negate module to the mask. In the Negate properties, select the Negate Colour and Negate Alpha options. Deselect the Negate Colour Clamp to Alpha option. |
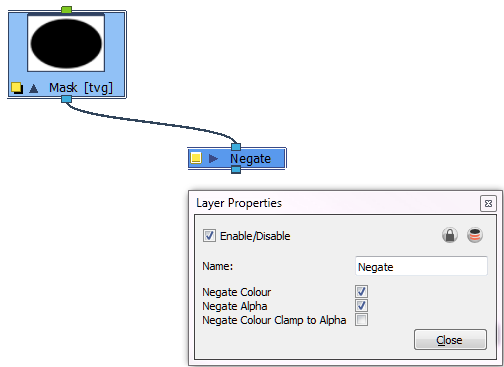
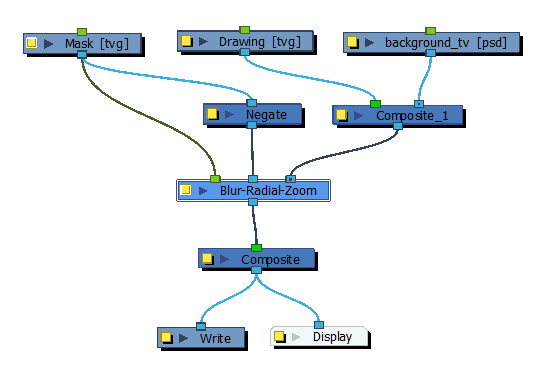
| 7. | Connect these modules to the rest of the tree. Your Network view should look like this: |
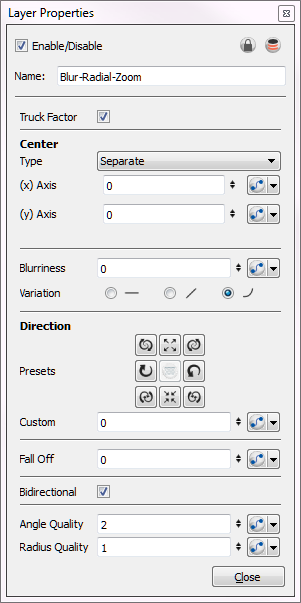
| 8. | Open the Blur - Radial Zoom property editor. |
| 9. | From the Center section, select a type from the Type drop-down menu: |
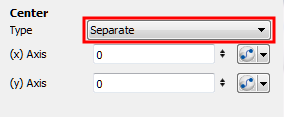
| ‣ | 2D Path: Lets you move the centre point visually in the Camera view. |
| ‣ | Separate: Lets you control the x and y axis by entering values in the fields or by moving the centre point in the Camera view. |
| 10. | Set a value for the Blurriness. |
| 11. | With the Blur - Radial Zoom module selected in the Network view, select View > Show > Control or press [Shift] + [F11]. |
The red centre point appears in the centre of the Camera view.

| 12. | In the Tools toolbar, select the Transform |
| 13. | Click the Animate Mode |
| 14. | Move the centre point to the desired position. In our example, the centre was moved to the centre of the mask. |
| 15. | In the Network view, select the mask you created. |
| 16. | In the Camera view, move the mask to the desired position. |
| 17. | Continue to adjust the blur values until you achieve the desired effect. |
Blur - Radial Zoom Effect Properties
| Parameter | Description |
| Truck Factor | Activated by default, this option readjusts the blur when the elements undergo a change of depth or scale. When this option is deselected, the effect's values remain unchanged regardless of any depth or scale changes. This option should be deselected when multiple drawings are composited and attached to this effect. |
| Centre | Sets the point where the blur will apppear to be "zooming" out from. By default, the centre appears in the middle of the Camera view. |
| Type |
2D Path: Lets you move the centre point visually in the Camera view. Separate: Lets you control the x and y axis by entering values in the fields or by moving the centre point visually in the Camera view. |
| (x) and (y) Axis | When the Separate type of centre is selected, lets you individually set the x and y coordinates for the centre. |
| Path | When 2D Path is selected, indicates that the coordinates are confined to the image. |
| Blurriness | Amount of blur applied to the layer. |
| Variation |
Constant: An equal, constant blur is applied on all pixels. Linear: A gradual blur is applied on all pixels. Quadratic: An exponential blur is applied on all pixels. |
| Direction | Lets you select preset blur types or create a custom blur. |
| Presets | A set of preset radial, zoom, and spiral blurs to get you started. You can then adjust the type to customize the blur. |
| Custom | Create your own blur by entering a value for the direction of the blur lines. |
| Fall Off | The distance where the blur fades from the edge of the image. Select a value between 0 and 1. A fall-off rate of 0 causes the blur to fade out slowly, distributing the blur evenly from the edge of the character to the farthest edge of the blur. A fall-off rate of 1 causes the blur to fade out quickly, so the blur is heaviest closer to the edge of the image. |
| Bidirectional | Applies the blur on both sides of the pixel. |
| Angle Quality |
Affects the quality of the blur by defining how fine the reference radial grid is on the image. This determines the width of all the wedges. A higher quality yields achieve better results, but will be slower to render. |
| Radius Quality | Controls the quality of the blur. A higher quality yields better results, but will be slower to render. |