Chapter 10: How to Animate a Cut-out Character
This chapter is divided as follows:
Animation
To create a simple cut-out animation:
|
1.
|
In the Tools toolbar, select the Transform  tool. You can also press [Shift] + [T]. tool. You can also press [Shift] + [T]. |
|
2.
|
In the Tools toolbar, enable the Animate  mode so that everything you move will be keyframed automatically. mode so that everything you move will be keyframed automatically. |
|
3.
|
In the top menu, select Animation > Stop-Motion Keyframe so that the interpolation is not created automatically between your keyframes. |
|
4.
|
In the Timeline view, collapse your character. |

|
5.
|
In the Timeline view, go to the frame where you want to set your first pose. |

|
6.
|
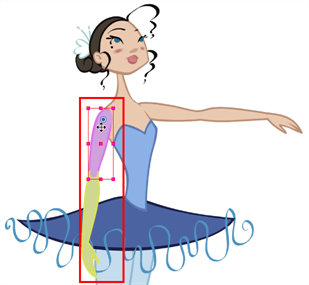
In the Camera view, select the parts to animate. |
|
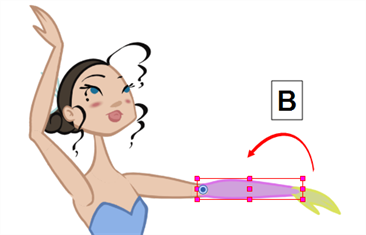
7.
|
Using the Transform tool, rotate, skew, scale or translate the selection to its new position. |
A new keyframe appears in the Timeline view.
|
8.
|
If you want to make sure that nothing will move on your new pose, in the Timeline view, select the frame corresponding to the pose,right-click and select Add Keyframe. You can also press [F6]. |
|
9.
|
In the Tools toolbar, enable the Onion Skin feature. feature. |
|
10.
|
In the Timeline view, go to the frame where you want to set your second keyframe. |

|
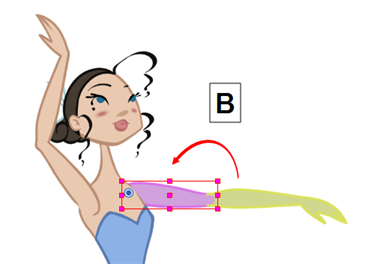
11.
|
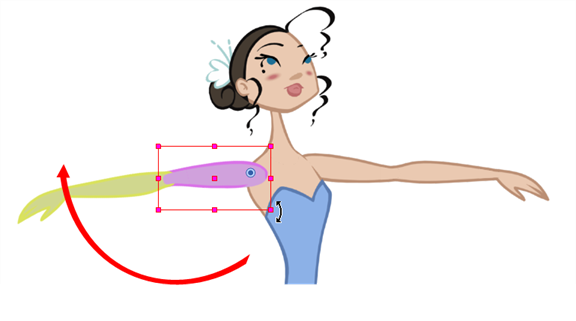
In the Camera view, animate your character. |
|
12.
|
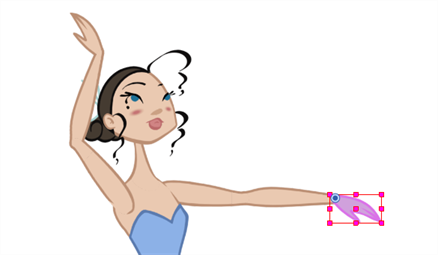
Repeat this process until all your poses are done. |
Navigating the Hierarchy
If you created a layer hierarchy when you built your puppet, you can use the keyboard shortcuts to travel up and down the parent-child chain. You can also travel between the children in a layer.
To select the parent or child layer:
|
1.
|
In the Tools toolbar, select the Transform tool. |
|
2.
|
In the Transform Tool Properties view, make sure the Peg Selection  mode is deselected. mode is deselected. |
|
3.
|
In the Camera or Timeline view, select a layer attached to a hierarchy. |
|
4.
|
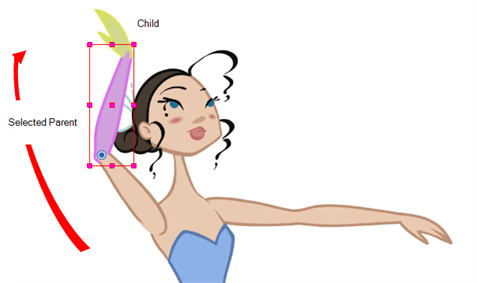
Select Animation > Select Parent or press [B] to select the parent layer. Now select Animation > Select Child or press [Shift]+[B] to select the child layer. The keyboard shortcuts are [B] and [Shift] + [B]. |
These keyboard shortcuts will ignore any effect module encountered in the Network or Timeline view. Only drawing and peg modules will be considered. If you want to navigate the hierarchy including the effect modules, you can create a custom keyboard shortcut in the Preferences dialog box for the Select Parent Skipping Effects and Select Child Skipping Effects commands on the General tab. Refer to the Harmony User Guide to learn how to create custom keyboard shortcuts.
Easing
If you have several functions you would like to adjust the velocity for at the same time, such as the hand, forearm and arm of a cut-out character, you can apply the same velocity parameters to all the selected keyframes in one frame.
To set eases on multiple parameters:
|
1.
|
In the Timeline view, select a keyframe from one or more layers. |
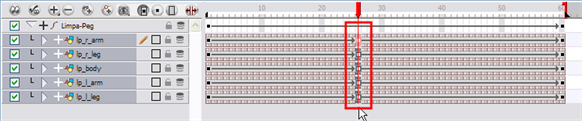
Only the first keyframe selected on a given layer will be considered when using the Set Ease for Multiple Parameter function. If many keyframes are selected on the same layer, the ease values will be applied only to the first one and the rest will be ignored.
|
2.
|
In the Timeline view,right-click (Windows) or [Ctrl]+Click (Mac OS X) and select Set Ease For Multiple Parameters. In the Timeline View toolbar, you can click the Set Ease For Multiple Parameters  button. If the button is not in the Timeline View menu, you can add it through the Toolbar Manager. button. If the button is not in the Timeline View menu, you can add it through the Toolbar Manager. |
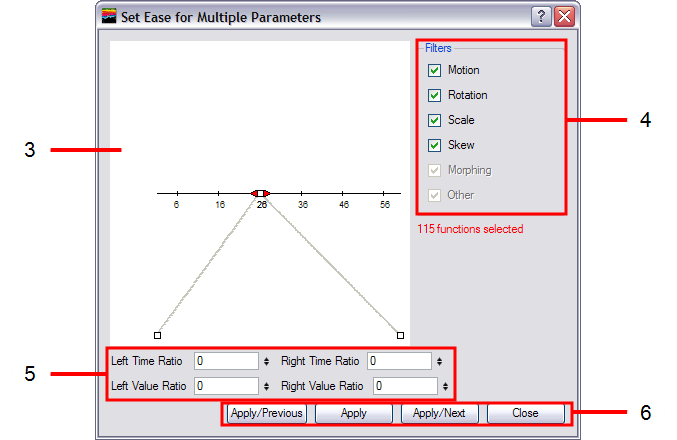
The Set Ease For Multiple Parameters dialog box opens.
|
3.
|
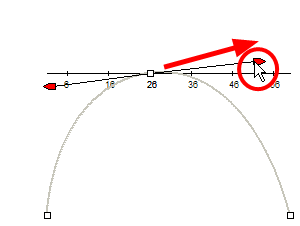
In the graph interface, pull on the Bézier handle to adjust the velocity for all the selected functions. |
|
4.
|
If you want to apply these easing parameters to a certain type of function only, such as Rotation or Scale, in the Filters section, deselect the function types you do not want to affect. |
|
‣
|
Motion: Applies the easing parameters to the selected Position X, Position Y, Position Z and 3D Path functions |
|
‣
|
Rotation: Applies the easing parameters to the selected Angle functions. |
|
‣
|
Scale: Applies the easing parameters to the selected Scale functions. |
|
‣
|
Skew: Applies the easing parameters to the selected Skew functions. |
|
‣
|
Morphing: Applies the easing parameters to the selected Morphing Velocity functions. Note that it applied to the Morphing velocity function in the Layer Properties dialog, not to the basic Morphing ease in the Tool Properties view. |
|
‣
|
Other: Applies the easing parameters to all the other selected functions, such as all functions created to animate effect parameters. |
|
5.
|
You can also adjust the easing by typing values in the Time Ratio and Value Ratio fields. The values are calculated in percentage. |
|
‣
|
In the Left Time Ratio and Right Time Ratio fields, type the percentage value corresponding to the length of time you want the easing to last. The value must be between 0% and 100%. |
|
‣
|
In the Left Value Ratio and Right Value Ratio fields, type the percentage value of how strong you want the easing out. The value must be between 0% and 100%. |
|
‣
|
If your Time Ratio and Value Ratio values are equal, you will have a linear motion. |
|
6.
|
Once done, click one of the following button: |
|
‣
|
Apply: Applies the easing parameters to the selected keyframes. |
|
‣
|
Apply/Previous: Applies the easing parameters to the selected keyframes and then selects the previous keyframe in the timeline. |
|
‣
|
Apply/Next: Applies the easing parameters to the selected keyframes and then selects the next keyframe in the timeline. |
|
‣
|
Close: Closes the dialog box. If you did not apply the modifications, they will be cancelled. |