Alignment Tab
Alignment Rules
|
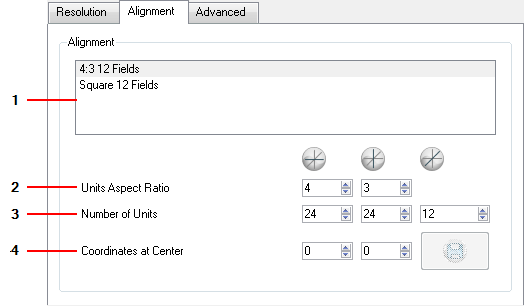
1.
|
The Alignment Presets give you two preset options: |
|
‣
|
4:3 12 Fields: Defines the units of your project to have a 4:3 ratio and sets up 12 of these units to run both vertically and horizontally in four cardinal quarters (NW, NE, SW, SE). This Alignment preset is visible in the FOV and drawing grids. |
|
‣
|
Square 12 Fields: Defines the units of your project to have a 1:1 or square ratio and sets up 12 units to run both vertically and horizontally in four cardinal quarters (NW, NE, SW, SE). This Alignment preset is NOT visible in the FOV and drawing grids. |
|
2.
|
In the Units Aspect Ratio fields, enter the aspect ratio of the grid you will use. The aspect ratio describes the shape of the grid unit. A square grid unit would have the ratio 1:1, whereas a grid unit of aspect ratio 4:3 is a unit with one side 1.33 times as big as the other side. |
|
‣
|
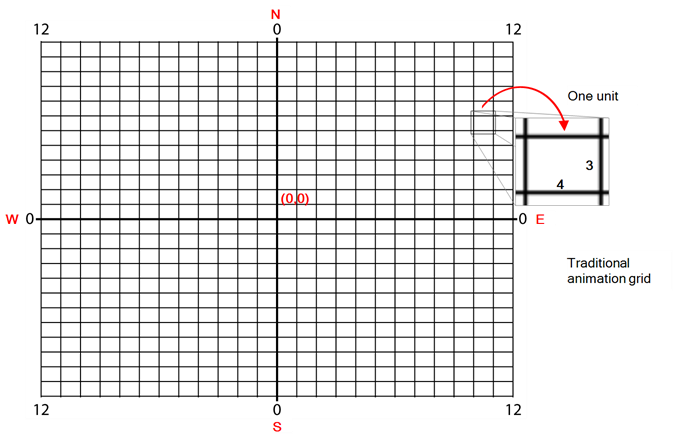
If the aspect ratio you want to use is 1:1, enter 1 in the Left/Right field (X-axis) and 1 in the Up/Down field (Y-axis). The default Aspect Ratio is set to 4:3 as it is the one used by traditional animators, who are accustomed to working with the grid system described above. |
|
3.
|
In the Number of Units fields, enter the number of horizontal, vertical and depth units for your scene’s grid. |
Animators who prefer to work traditionally will understand the default setting of 24 units horizontal by 24 units vertical as it, once again, corresponds to the grid above. Twelve is a common setting for the field depth.
Those who prefer to work in pixels should enter the pixel dimensions (3) of their project. This way if you want to move something over 600 pixels you just need to type in 600 units.
|
4.
|
In the Coordinates at Centre, you can enter a new coordinate for the centre of your scene. |
By default, the (0,0) centre is set in the middle of the grid as shown in the grid above. If you want to change the centre of your grid, for example to the upper left corner, you would enter (-12, 12), -12 units across and 12 units up. That is of course unless you changed the number of units to match the pixel dimensions of your scene. Then you would enter negative half the width and positive half the height.
|
5.
|
Click Save button to save your current Alignment settings and be able to select them later from the list. |
The Choose Alignment Name dialog box opens.
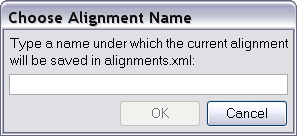
Type in a name for your new alignment settings and click OK.
Related Topics