Greyscale
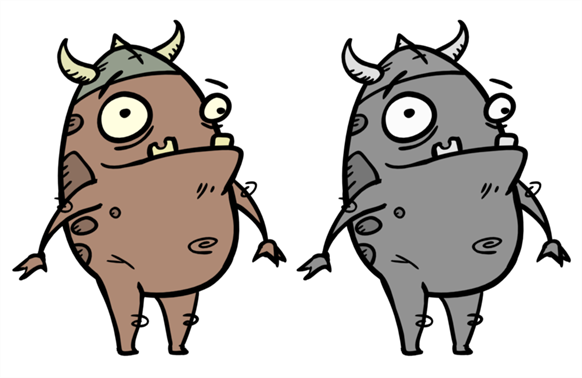
Use the Greyscale effect to convert a colour image to greyscale. This example demonstrates what happens when you set the greyscale to 100% using the Greyscale module. The Contrast module can also be used to adjust the darkness and lightness of the pixels in your element.
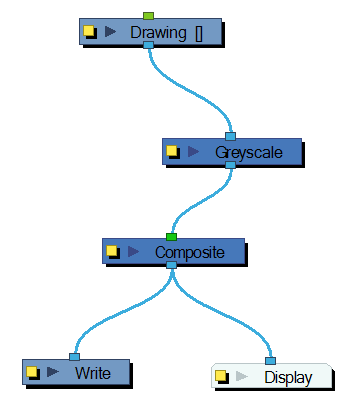
Use the Greyscale editor to enter the percentage of black and white to apply to the image. You can enter a static value in the Percentage field or attach the value to a function curve to change over time.

| • | Matte Output: When this option is activated, the colour values do not change. However, alpha values are read from the colours which you can see in the Camera view Matte View mode. |
How to Use the Matte Output Option
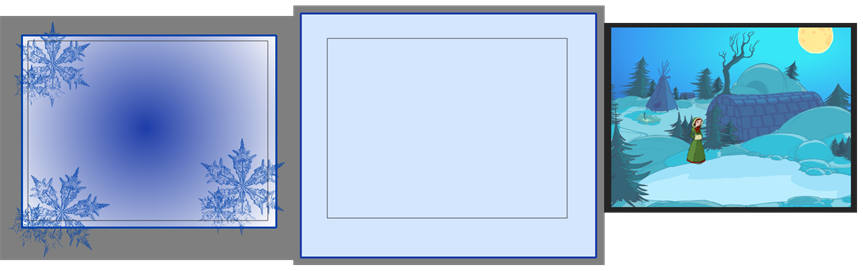
You can see in this section a concrete example on how to use the Matte Output option of the Greyscale module. We created a frosted window using a snowflake image over a blue rectangle and a colourful background.
Here are the three drawings used for the example:
When the snowflake image is connected into the Greyscale module, it turns into a greyscale image. There is no transparency visible in the Camera view Matte View mode.
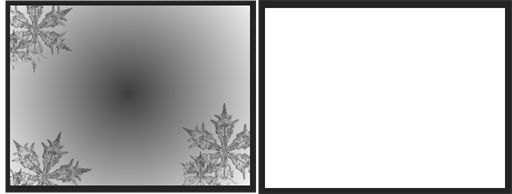
When the Matte Output option is enabled, the snowflake image colours are displayed as normal, but when the Matte View mode of the Camera view is enabled, you can see the transparency levels generated from the colour values.
When you connect the Snowflake images into a Cutter effect's Matte port along with the Window images, the window will be semi-transparent, matching the alpha (transparency) channel generated by the Greyscale module.

Related Topics
| • | Using Effects |