Overriding a Colour with a Bitmap Image Sequence
In production, it will happen that you need to map a live action sequence or bitmap image sequence into a zone or over several zone. For example, you could have a mirror shattered in several pieces and you want to map in it the video or someone talking. You can paint the mirror pieces with a specific colour swatch and use the Colour-Override module to map the image sequence into the pieces. It can also be a single image without having to be an image sequence.
To override a colour with a bitmap image sequence:
|
1.
|
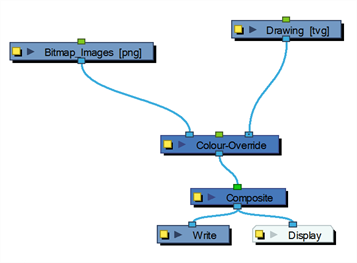
From the Module Library view, drag a Colour-Override module and drop it in the Network view. |
|
2.
|
In the Network view, connect the Colour-Override module under the drawing module you want to animate the line for. |
|
3.
|
Connect the Live Action or Bitmap Image Sequence module in the Colour-Override's left port. The left blue port will input the images into the colour zones. |
|
4.
|
Click on the Colour-Override's yellow button to open the editor. |
|
5.
|
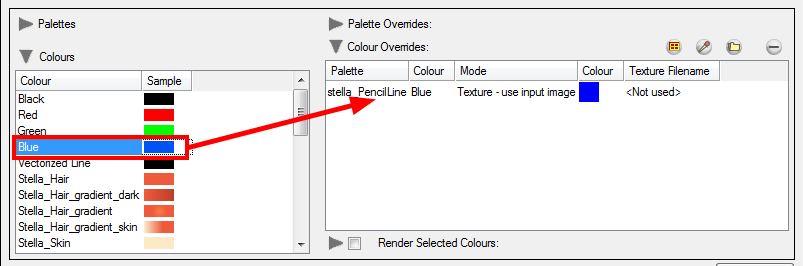
In the Colour-Override window, in the Palettes section, select the palette containing the colour to override. |
|
6.
|
In the Colours section, select the pencil texture you used to draw your lines and drag it to the Colour-Override section. |
|
7.
|
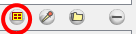
Once the swatch appears in the Colour-Override section, select it and then click on the Select Override Mode button to right-click on the New RGBA word and select Texture - Use Image Input.
 |
|
8.
|
In the Network view, select the bitmap image module. |
|
9.
|
In the Advanced Animation toolbar, select either the Translate  , Rotate , Rotate  or Scale or Scale  tool. tool. |
|
10.
|
In the Camera view bottom toolbar, enable the Render  mode. mode. |
|
11.
|
In the Camera view, move the Bitmap Image position. As you move it, you will see the texture fills getting modified. You can animate the position by adding position keyframes in the Timeline view. |
Related Topics