Configuration
After installing Harmony, you must configure the database parameters and the third party software based on the role this computer will have.
| 1. | Configuring Harmony |
| 2. | Configuring the Licensing |
Configuring Harmony
Once Harmony is installed, additional steps are required to configure the database on the server and to setup the Startup Items and register the application path for the Terminal.
Set Up the Database Server
The database server controls all interactions with the contents of the Toon Boom Harmony 10.3 database. It processes all requests to open, read or update files, keeping track of files that are locked so that others cannot edit them.
If you already have a database set up from a previous installation of Toon Boom Harmony 10.3 you DO NOT need to set up the database server, startup items, or register console application in the path. However, if you are upgrading from a previous version, you need to install the startup items and register console applications in the path. For new installations of Harmony, you must install all of them.
The database server is configured using the Configuration Assistant:
| 1. | From Finder, go to Applications > Toon Boom Harmony 10.3 > Tools. |
| 2. | Double-click Configuration Assistant. |
| 3. | For the server, select all three options if this is the first time you are installing on this machine. |
| ‣ | If you are upgrading from a previous version and a database (/USA_DB) already exists on the server, unselect the Create a new Toon Boom Harmony database option. |
| ‣ | If you are upgrading from an earlier version of Toon Boom Harmony , you will need to update the dict files in the USA_DB. The dict files need to be copied from /Applications/Toon Boom Harmony 10/tba/etc/USADB_templates/dicts/ to /USA_DB/dicts/. |
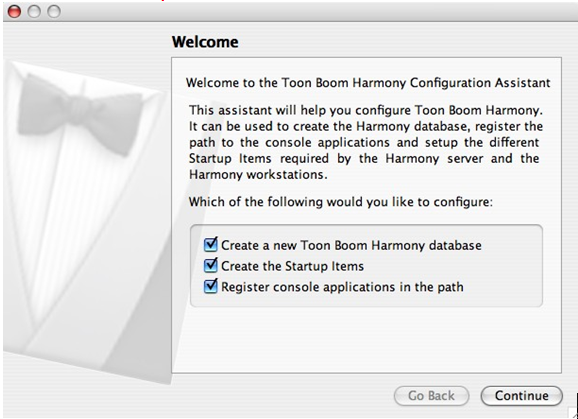
| 4. | Click Continue. |
The Create Harmony Database dialog box opens. The default values shown in this dialog box should be correct and therefore accepted as is.
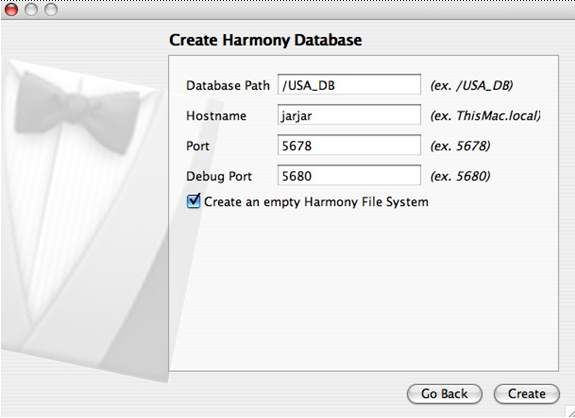
| 5. | Click on the Create button in the Create Harmony Database dialog box. |
cd / [Return]
mkdir usadata000 [Return]
chmod -R 777 usadata000 [Return]
You can make as many data directories as you like. Name these directories using the following syntax, where XXX represents the number of the data directory:
usadataXXX
| 6. | In the Create Startup Item page, select the Startup Items required. |
| 7. | Click Create to continue. |
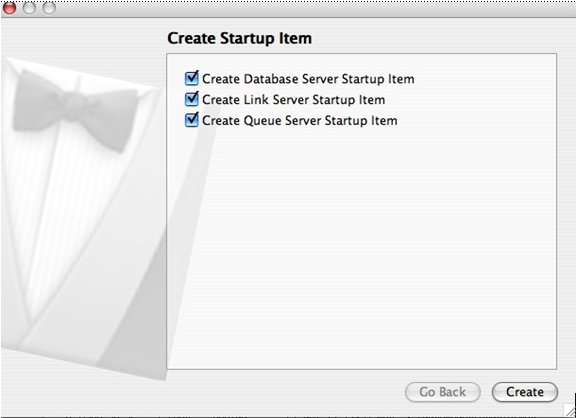
| ‣ | Create Database Server Startup Item: It is mandatory to install the Database Server Startup Item on the server. |
| ‣ | Create Link Server Startup Item: This Startup Item is required when there will be Windows clients connecting to the Mac server. This service creates symbolic links when a scene is created from a Windows client workstation. |
| ‣ | Create Queue Server Startup Item: This is for the batch rendering. Do not install this on the server, as it will slow it down. Install this on a stand-alone machine that will be used for batch vectorizing or rendering. |
| 8. | In the Register Path page, choose whether you want to register the path for the current user or for all users. |
| ‣ | Register Path for all users |
| ‣ | Register Path for my user only |
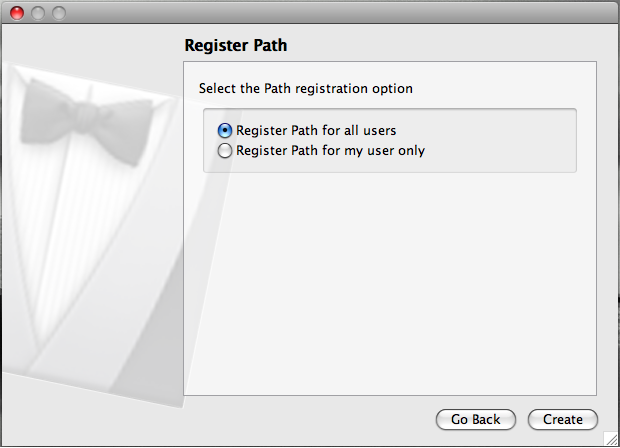
This option appends the path of Harmony's applications to the PATH environment variable in order to run the applications from the Terminal.
| ‣ | Registration Path for all users: registers the path for all accounts on the computer. You only need to run this once. |
| ‣ | Registration Path for my user only: This option registers the path to the current account only. You need to run this for each user that will be using the Terminal and you need to run this each time you create a new user. |
| 9. | Click Create to go to the next page. |
| 10. | Click Done to close the Configuration Assistant. |
Configuring the Licensing
The licensing must be configured before running Toon Boom Harmony 10.3.
You must perform the following tasks on the server:
| • | Setting Up the FlexLM License Server |
| • | Setting up the License on Client Workstations |
Setting Up the FlexLM License Server
To configure the license server:
| 1. | Launch the License Wizard from Applications > Toon Boom Harmony 10.3 > Tools > LicenseWizard. |
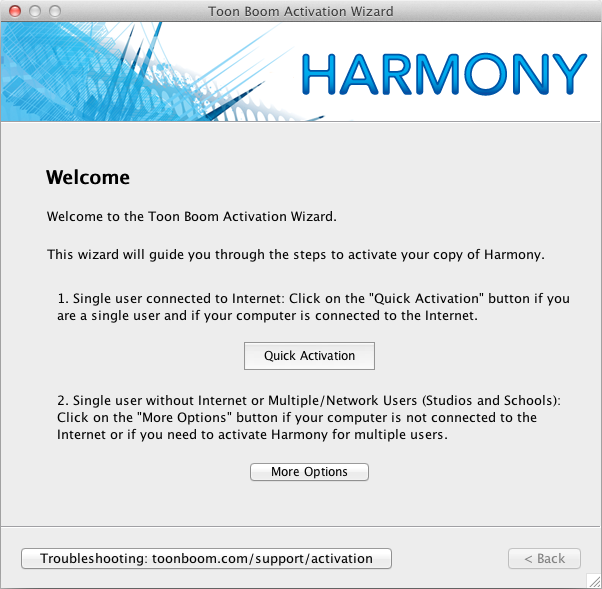
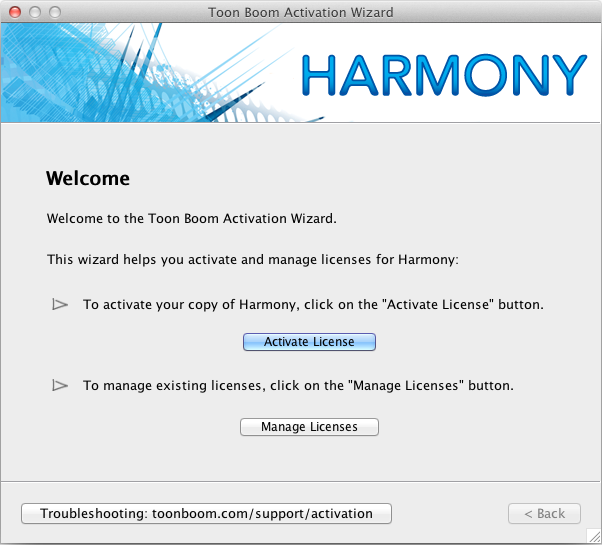
| 2. | Depending on how the License Wizard was started, the first page of the License Wizard will be one of the following: |
| ‣ | If this screen appears: Click on More Options. |
| ‣ | If this screen appears: Click on Activate License. |
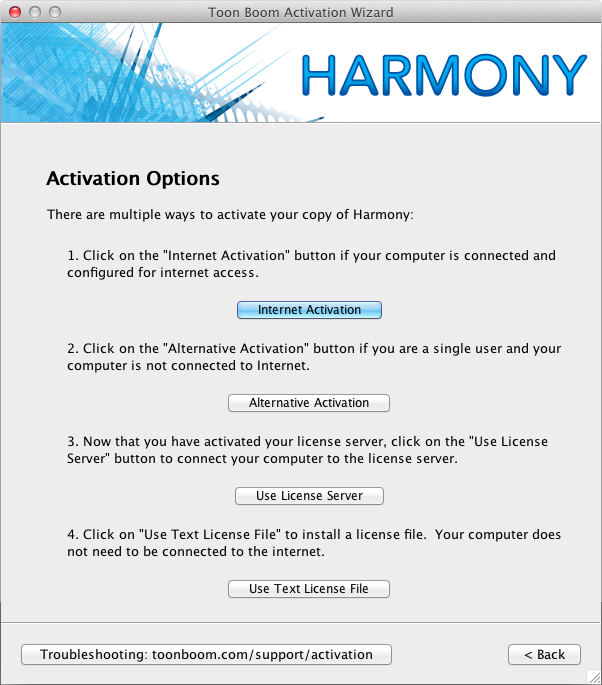
The Activation Options screen appears:
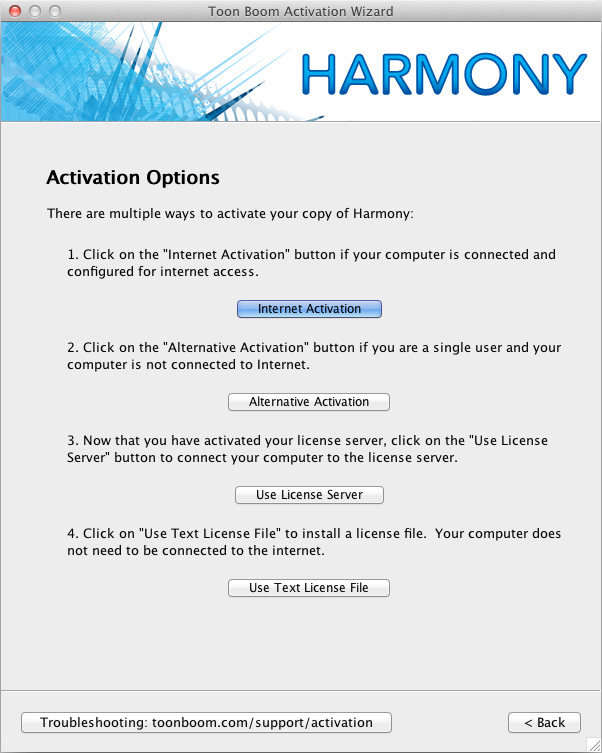
| 3. | Click on Internet Activation |
The Internet Activation Options screen appears:
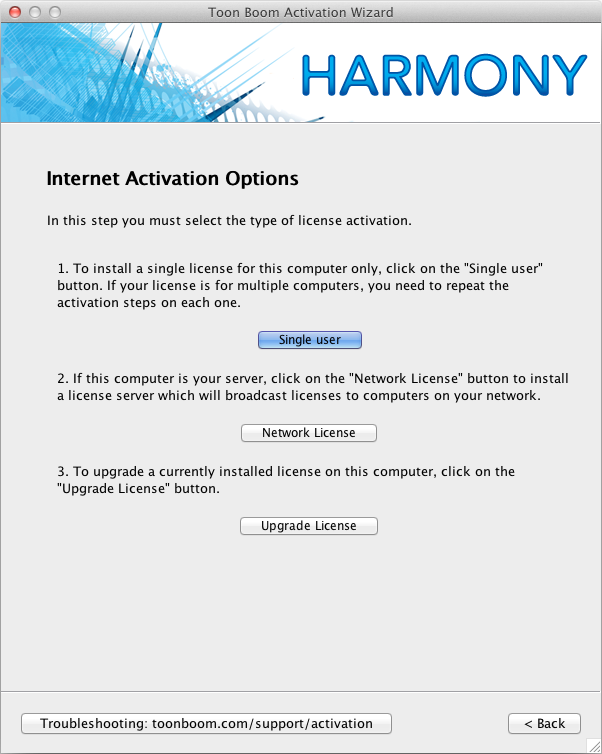
| 4. | Click on Network License. |
The Internet Activation - Network License screen appears:
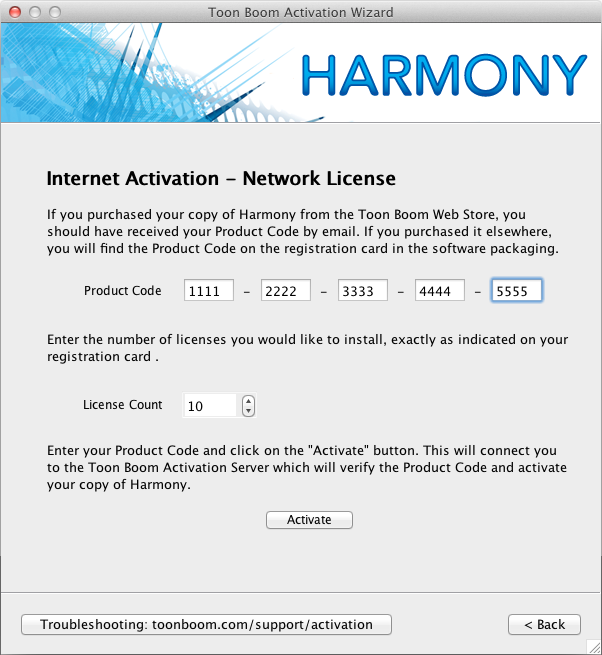
| 5. | Type or copy/paste the Product Code and type in the number of licenses (License Count) this product code grants you. |
| 6. | Click on Activate. |
The Install License Server screen appears:
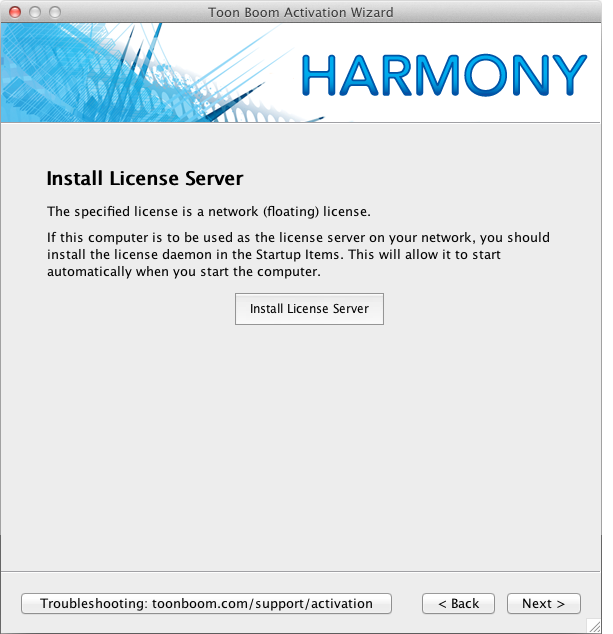
| 7. | Click on Install License Server. This step will create the license.dat file and place it in /usr/local/flexlm/licenses/license.dat. It will also configure and start the License Server service. |
The license.dat created contains the following information:
SERVER this_host 0 ANY
VENDOR toonboom
USE_SERVER
The Activation Successful screen appears:
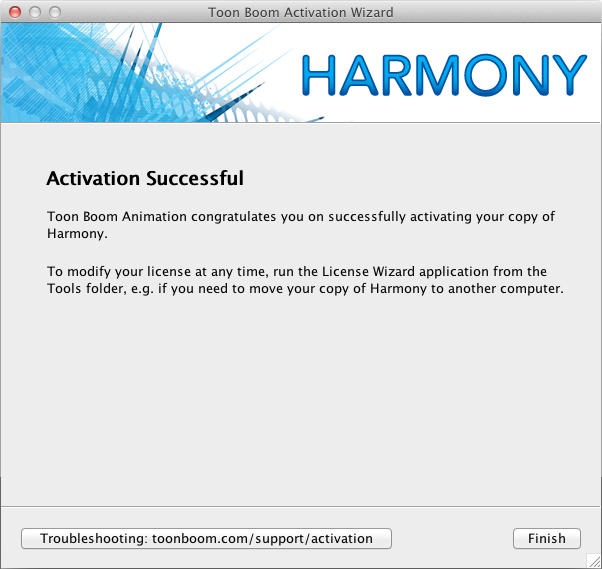
| 8. | Click on Finish to exit the wizard. |
| 9. | Verify that the FlexLM license is working properly by using the lmutil lmstat -a command. |
lmutil lmstat -a
You can also look at the ToonBoomLicense.log that is located at:
/Library/Logs/ToonBoomLicense.log
| 10. | If the FlexLM service needs to be restarted, use the following command: |
sudo /sbin/SystemStarter restart ToonBoomLicense
Setting up the License on Client Workstations
An Admin account is required to set this up. After activation you can login as client.
To set up the license on a client workstation do the following:
| 1. | Open the License Wizard on the Client machine. |
The Toon Boom Activation Wizard appears.

| 2. | Click on Activate License. |
The Activation Options screen appears.
| 3. | Click on Use License Server. |
The Server Activation screen appears.
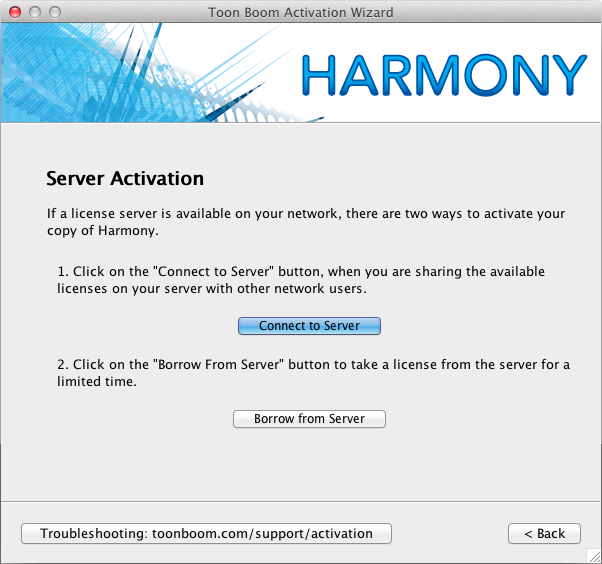
| 4. | Click on Connect to Server. |
The Server Activation - Shared License dialog appears.
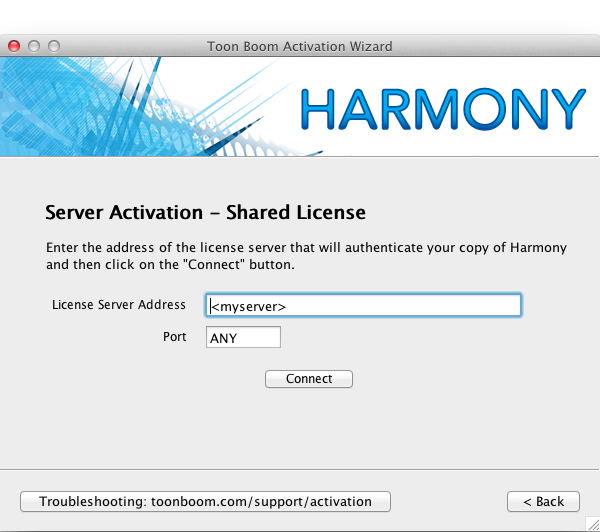
| 5. | Enter the hostname or the IP Address in the License Server address field. |
| 6. | Click Connect. You will be prompted for a password. |
| 7. | Enter the password and click OK. |
| 8. | The Activation Successful screen appears. |
| 9. | Click Finish to close the License Wizard. |
Related Topics
| • | Configuring Harmony to Share Scene Data |