XML Folder Workflow in Unity
In the XML folder workflow, a unique Harmony Importer asset can be created by a developer to reference an XML folder exported from Harmony. This importer can then be used to generate a Harmony Project asset and a new Harmony Renderer prefab.
For each re-exported XML file , developers need to manually set import and export paths and perform the import process from the Harmony Importer asset.
This workflow provides flexibility as to where the XML data can live. For example, it can live either inside or outside the Unity project. However, a disadvantage to this workflow is that more mistakes can be made since there are more steps involved. For example, the file path for the TBG importer will have to be manually updated when moving files around.

The resulting Harmony Renderer prefab allows high-performance character rendering by generating a mesh within a C++ plugin. This is preferable for crowds of characters that don’t require complicated custom rendering features.
-
Within Harmony, find the Export to Sprite Sheet
 button in the Game toolbar.
 -
Select Save and Export. Ensure that the Export as TBG option is unchecked in the Export to Sprite Sheet dialog.
-
Save the XML to a folder inside of your Unity project's Assets folder.
-
In Unity, create a new Harmony Importer asset by doing one of the following:
-
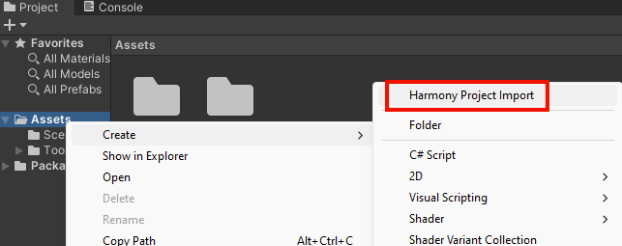
In the Assets drop down in the top menu, select Create > Harmony Project Import.
-
Right-Click the Assets folder in the Project view and select Create > Harmony Project Import.
-
-
Name the Harmony Importer with an "Importer" suffix to avoid future confusion.
-
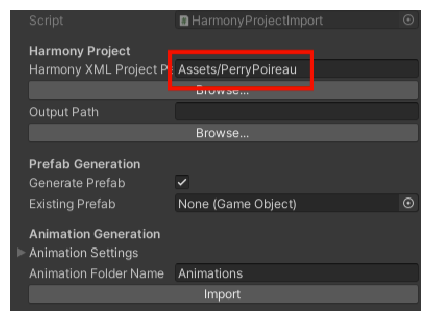
Copy relative path of exported folder, paste into new Harmony Importer.
-
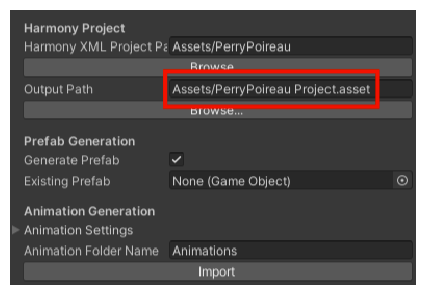
Copy relative path of Harmony Importer asset, paste into Harmony Importer, replace “Importer” with "Project" in the path.
-
Click Import.
A new HarmonyProject asset will be created as well as a new Prefab with Harmony Renderer that references HarmonyProject.
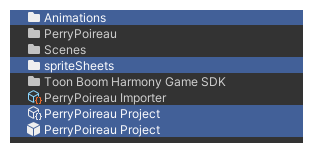
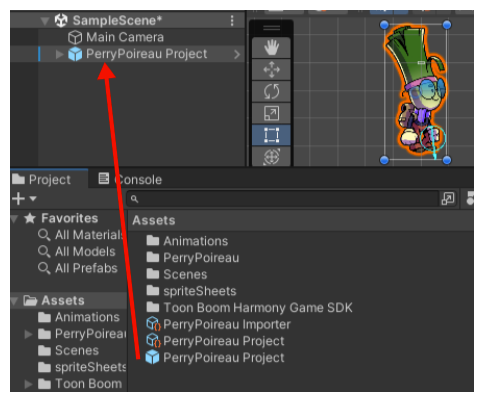
The Prefab asset can be dragged from the Project view into the Hierarchy view and Scene view to show your character in your game
Importing Anchors
In Harmony, Anchors provide a way to indicate which pegs and drawings are positions of interest for gameplay scripts in Unity. Any drawing or peg can be assigned an Anchor.
-
Select a layer in the Timeline view or node in the Node view and select the Toggle Anchor button in the Game toolbar.
-
Import the character to Unity.
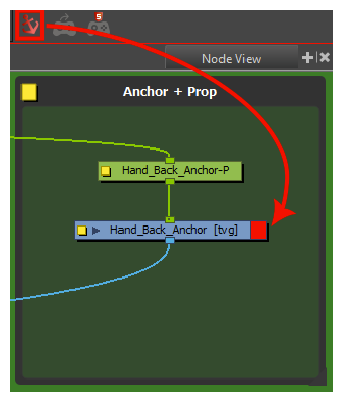
The next time the XML import process is performed, the new Anchor will appear in Unity under the character’s imported Prefab as a new HarmonyAnchor.
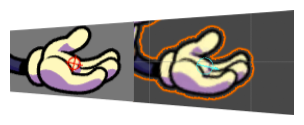
This new GameObject will follow the position, rotation and scale of the current animation playing on the character. This allows you to dynamically attach gameplay objects as children to the anchors to carry, equip and use.
Adding Audio Sources
When you create scene files in Harmony with audio, the audio is exported into the project folder. The Harmony Importer will automatically create an AudioSource and add it to the generated Prefab. The Harmony Renderer can then trigger playback of the AudioClip files at points during animation playback, as was authored within Harmony.