TBG File Workflow in Unity
In the TBG (Toon Boom Gaming) file workflow, Unity will immediately interpret a TBG file exported from Harmony as a new asset that it can reference to derive new Textures, Sprites, project data, and a Prefab from the file. The resulting Prefab can be dragged into the Unity scene to be immediately viewed and animated. When the TBG file is overwritten from a new export in Harmony, the TBG Importer can automatically perform the re-import process to update the existing prefab, sprites and textures. This allows artists to rapidly iterate on their characters and see their results immediately in-game.
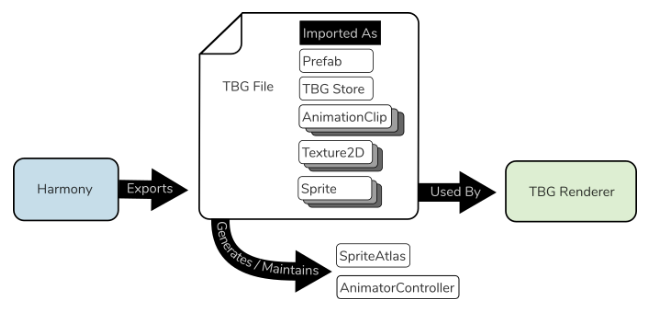
The resulting TBG Renderer prefab contains a full hierarchy of Transforms and SpriteRenderers to display the character in a Unity-friendly rig. Additionally, a TBG Renderer script is included that ensures Sprites are swapped during an animation’s progress and cutters properly apply to relevant SpriteRenderers.
-
In Harmony, find the Export to Sprite Sheet
 button in the Game toolbar.
 -
In the Export to Sprite Sheet window, check Encode as TBG .
-
For the Asset Path, enter the file path where you would like to save your character.
-
Select Save and Export. A loading bar will appear that will complete the export process and generate a new TBG file.
-
Open your Unity project. Unity should automatically load the TBG as a Prefab.
NOTEIf your character is not appearing as a Prefab, please ensure:
-
You have the HarmonySDK installed for your Unity project. It must be installed for every new project created.
-
You do not have a scene marker extending beyond the exposure of a character.
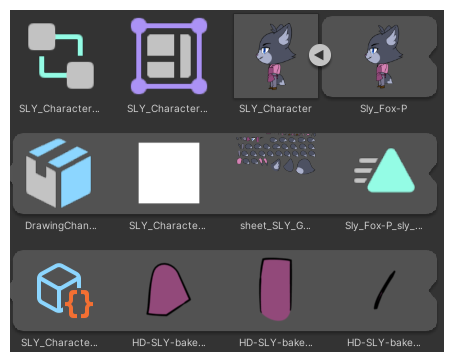
In your Unity project, there should be:
-
Sub-assets for Textures, Sprites, TBG Store data, and AnimationClips.
Two new assets for the file’s SpriteAtlas and AnimatorController beside the TBG Prefab.
The TBG Prefab can now be dragged into the Hierarchy, where it will be displayed and interactable.
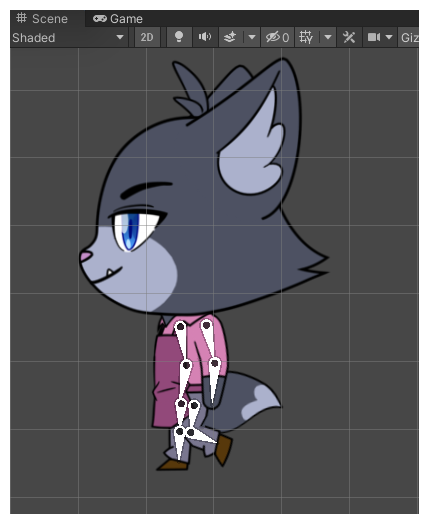
By selecting the Prefab in the Hierarchy, you will be able to view the character’s animations from the Animation view.
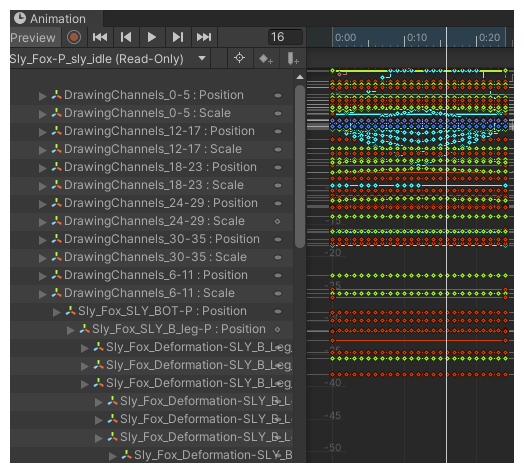
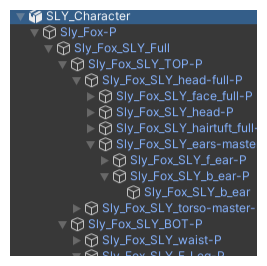
Opening up the Prefab in the Hierarchy view by clicking the small arrow, you will be able to explore the character’s hierarchy very similarly to what is shown in Harmony’s Timeline.
-
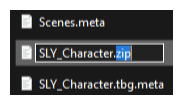
Search for the TBG file in your computer's file explorer
-
If you use Windows or Mac, rename the file extension as the .tbg file extension is not recognized by Windows and Mac computers.
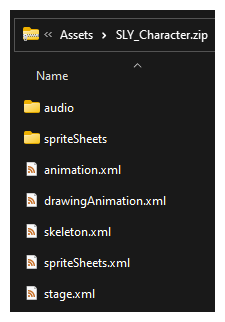
Once renamed, Windows and Mac will allow you to explore the contents of the .zip file, so you can ensure your SpriteSheets are reasonably sized or that your data files have the contents you expect.
Adding Inverse Kinematics to a TBG Renderer Prefab
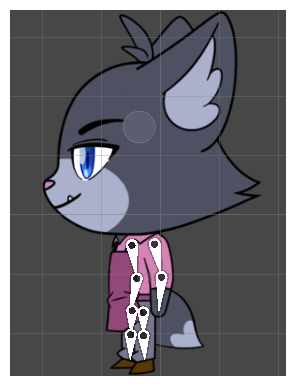
You can utilize Unity’s own 2D Inverse Kinematics feature to add procedural targets to your characters limbs. You can use SLY_Character from the TBG Workflow example scene for this process.
-
Find and drag SLY_Character from the Project view to your Scene view, and press F to frame the character in your view.
 NOTE Ensure the SLY_Character is selected in the hierarchy.
 -
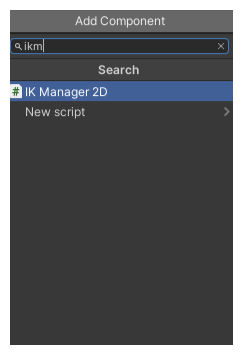
In the Inspector view, add an IK Manager 2D component.
-
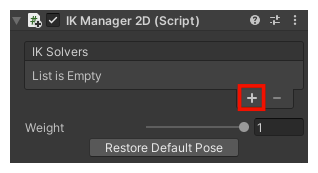
In the IK Manager 2D component, click the + button to add a new IK solver, and select Limb.
-
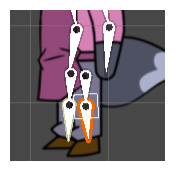
Click the bottom-right bone of Sly’s legs to expose its place in the hierarchy. We will be using its sibling GameObject that has “..._GameBone_1_end” in the name.
-
With the “New LimbSolver2D” Game Object selected, drag “New LimbSolver2D” into the Target slot of the LimbSolver2D script and drag the “_leg_cuff_GameBone_1_end” GameObject into the Effector slot.
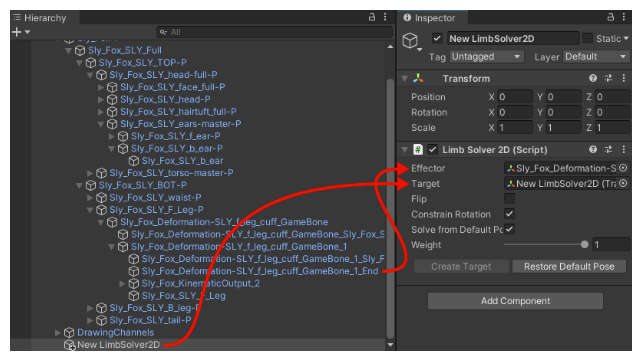
Once this is done, you can move around the New LimbSolver2D transform and see the limb bend to match the target.
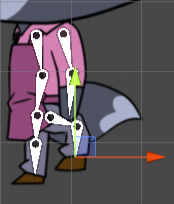
To switch the direction the knee bends, we can click the “Flip” checkbox in the Limb Solver 2D component.