Once you have finished creating your character's skeleton, it is time to switch to the Bone Manipulator tool, reconnect the limbs to the body and animate it.
| • | Reassembling the Character |
| • | Ordering Limbs |
| • | Hiding Bones |
| • | Animating Bones |
| • | Disabling a Bone Animation |
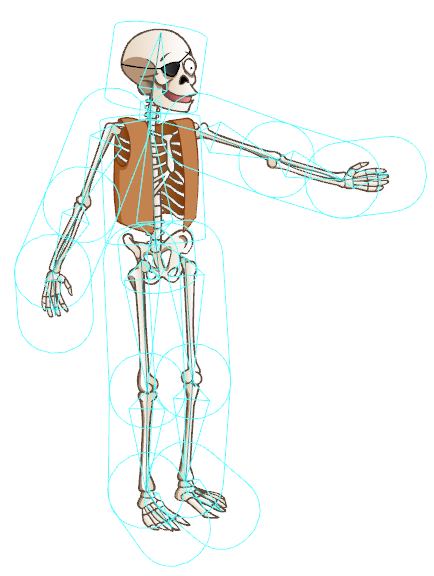
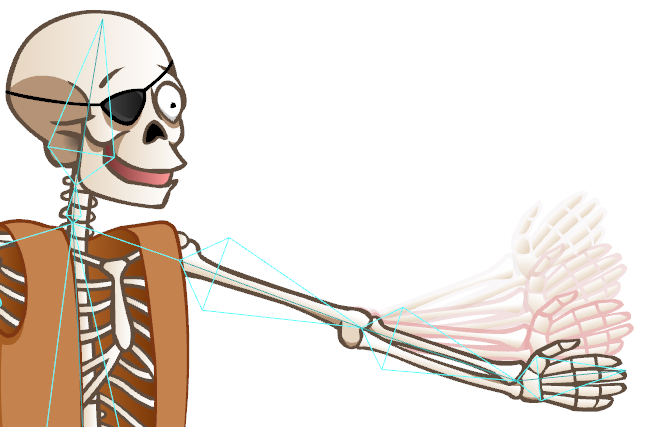
The first step is to reassemble the character so that the limbs do not appear spread apart, as in Setup mode.
To reassemble the character:
| 1. | From the Bone Tools toolbar, select the Bone Manipulator  tool. tool. |
The Camera view changes to Animation mode display.
| 2. | In the Timeline view, make sure the red marker is at the first frame. |
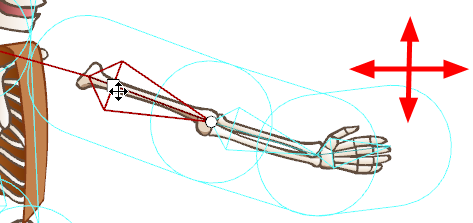
| 3. | In the Camera view, select the main bone of one of the limbs. |
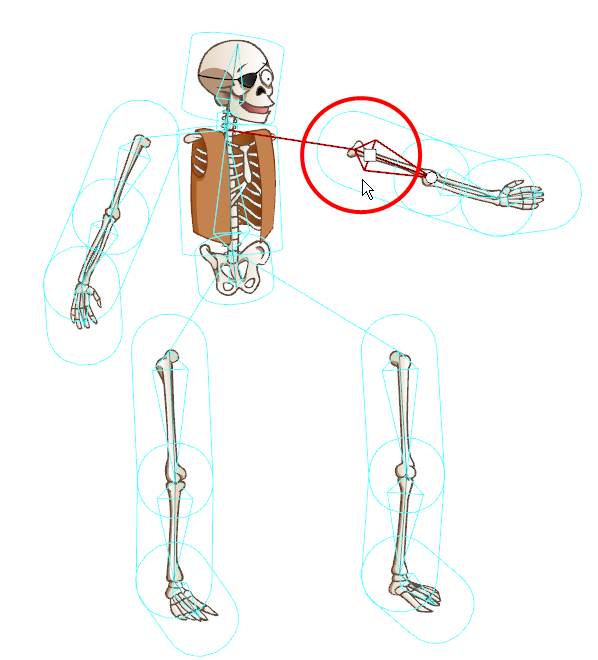
| 4. | Use the square handle to drag the bone chain to the desired position. |
A keyframe is added to the limb's bone layer on the first frame, locking its position in time.

| 5. | Repeat the previous steps for each limb you want to assemble to the body. |
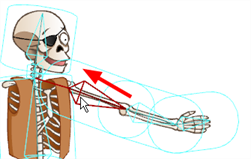
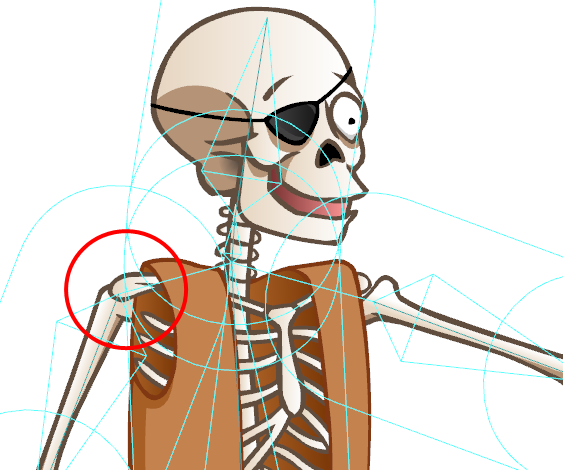
When reassembling your character, you might find a limb that does not appear in the correct order, such as the following arm that appears under the body.
The ordering method will differ, depending on whether your entire character is from a single drawing layer, or if your character's pieces are separated on several drawing layers.
| • | Character with Limbs on Different Drawing Layers |
| • | Character on a Single Drawing Layer |
If your drawing layers are in the wrong order, you can easily change the order in the Timeline view within the Skin Group.
To reorder layers in the Timeline view:
| 1. | In the Timeline view, select the layer you want to reorder. |
| 2. | Drag the layer to the correct position within the Skin Group. Be careful to drop it between layers, and not on a layer as this would parent them. |

You cannot change the order of the limbs when they are all drawn in the same layer. If you want to have an arm pass in front of the torso and the other one behind, you should draw them on separate drawing layers and attach them to the same Skin Group. At that point, you can change the order of your layers within the Skin Group.
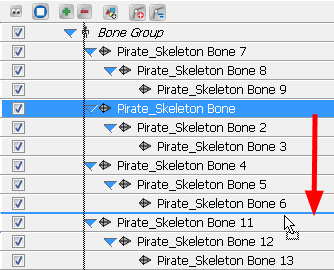
The ordering of the bones determines the ordering of the drawing art that is included in its influence area.
To reorder the bone elements:
| 1. | In the Timeline view, select the layer you want to reorder. |
| 2. | Drag the Bone element to the desired position within the Bone Group. Be careful to drop it between existing bone element hierarchies and not drop it on one as this would parent them. |
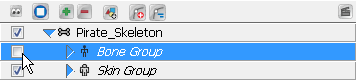
You might need to hide the bones from the Camera view. If so, you can simply hide the Bone Group.
To hide the Bone Group:
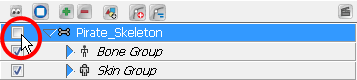
| 1. | In the Timeline view, locate the Bone Group you want to hide. |
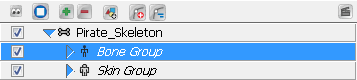
| 2. | Select the layer's check box to hide it. |
Now that the Skeleton puppet is ready, you can start animating it.
To animate bones:
| 1. | From the Bone Tools toolbar, select the Bone Manipulator tool. |
| 2. | In the Timeline view, go to the frame where you want to set the first pose of the puppet. |

| 3. | In the Camera view, select the bone you want to animate. |
| 4. | When a bone is selected you can: |
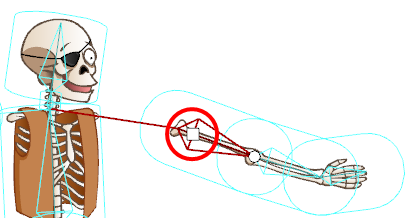
| ‣ | Use the square handle to drag the selected bone to a new position. Note that this handle is only available on the parent bone of a chain. |
Repositioning a bone will create a square black keyframe marker in the Timeline view, on the layer of the selected bone.

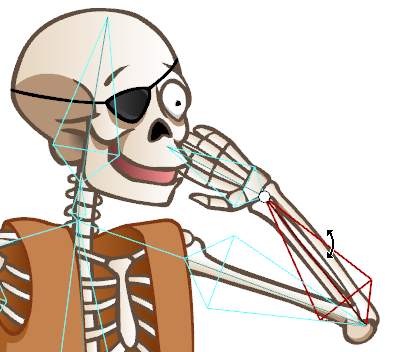
| ‣ | Use the circle handle to squash and stretch the bone. In the example below, notice how the parent bone is unaffected, but the child bone becomes squashed and stretched. |
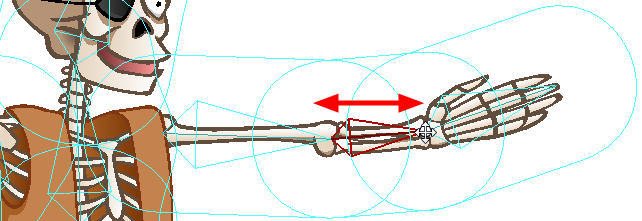
Scaling a bone with the Bone Manipulator tool will create up and down arrow-shaped keyframe markers in the Timeline view, on the layer of the selected bone, as well as on the layer of the child bone. The reason this manipulation produces the same types of keyframe markers that you would typically see for a scale and a rotation, is because the Bone Manipulator tool allows you to scale and rotate in the same movement.

You can also use the Scale  tool from the Animation tools toolbar to perform a different type of scaling. Grab the tip of the bone to squash and stretch it. In the example below, notice that the parent and child bones are unaffected by the scaling, but the child's position changes relative to the scaling of the selected bone.
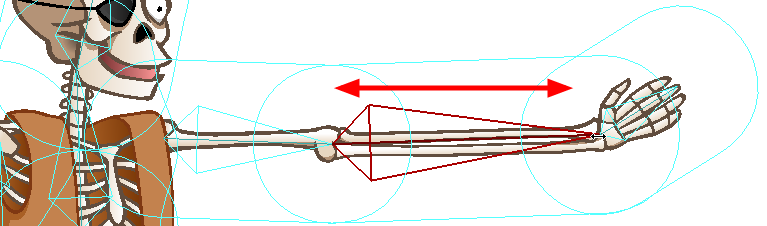
Scaling a bone with the Scale tool will create a down arrow keyframe marker in the Timeline view, on the layer of the selected bone.
| ‣ | With the Bone Manipulator tool, click directly on the bone and drag the cursor to rotate it. |
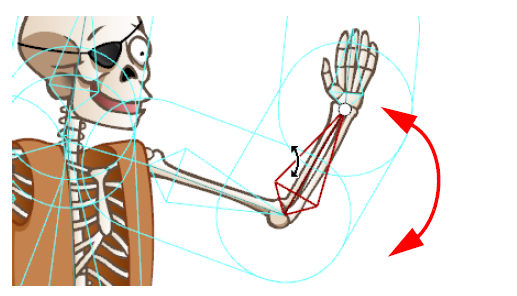
Rotating a bone will create a tiny up arrow keyframe marker in the Timeline view, on the layer of the selected bone.
| ‣ | If the Skeleton Effect is collapsed, note that you will not see the keyframe marker. If you expand the puppet's elements by clicking on the arrow next to the master peg element, notice a red square on the parent element of the bone you moved. This indicates that a child of this bone has a keyframe.  |
| 5. | In the Timeline view, go to the frame where you want to set a second keyframe. |

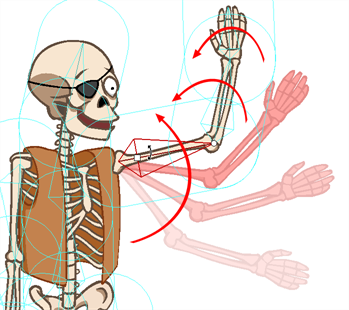
| 6. | In the Camera view, animate the character. |
| 7. | Repeat this process until all the poses are done. |
You can use the Onion Skin toolbar to help you create your animation. It will let you see the previous and next drawings of your animation as a handy reference while animating—see Using the Onion Skin in Cut-out Animation
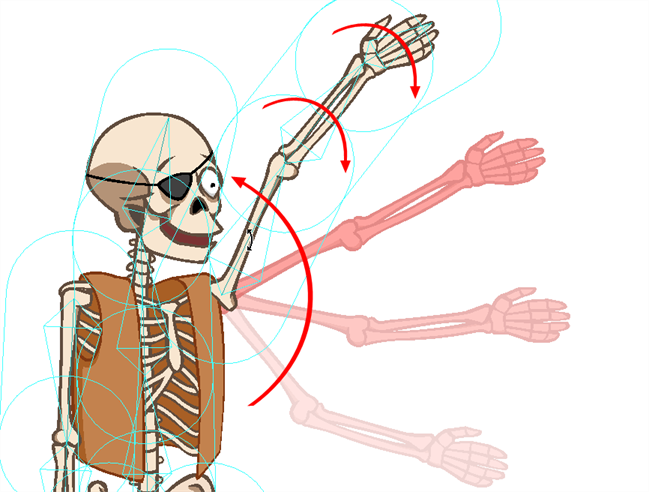
Using the Natural Movement tools, you can easily animate smooth and natural actions. The Natural Movement Forward and Natural Movement Inverse tools let you to rotate the parent bone and the rest of the children in the chain will follow the main movement and also rotate on their own to create fluid motions. Without these little additional rotations, the movement can be stiff and you will have to rotate the children bones on your own to smooth out the movement and make it flow naturally.
There are two natural movement tools:
| • | Natural Movement Inverse |
The Natural Movement Inverse ![]() tool rotates the children bones in the opposite direction from the parent. Therefore, if you rotate the upper arm of a character upward, the forearm and hand also rotate downward.This provides an illusion resistance in the motion as if gravity or air pressure were delaying the rotation of the limbs. This animation principle is called follow through. If you animate a flower bending in the wind, you will use the Natural Movement Inverse tool.
tool rotates the children bones in the opposite direction from the parent. Therefore, if you rotate the upper arm of a character upward, the forearm and hand also rotate downward.This provides an illusion resistance in the motion as if gravity or air pressure were delaying the rotation of the limbs. This animation principle is called follow through. If you animate a flower bending in the wind, you will use the Natural Movement Inverse tool.
| • | Natural Movement Forward |
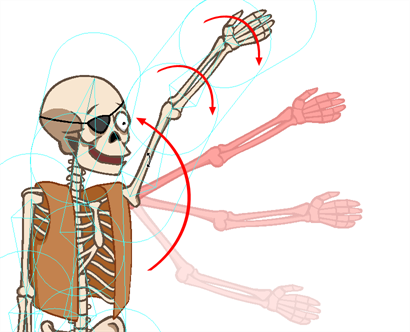
The Natural Movement Forward ![]() tool rotates the children bones in the same direction as the parent. Therefore, if you rotate the upper arm of a character upward, the forearm and hand also rotate upward. There is no illusion of resistance in this motion. The arm is deliberately bending.
tool rotates the children bones in the same direction as the parent. Therefore, if you rotate the upper arm of a character upward, the forearm and hand also rotate upward. There is no illusion of resistance in this motion. The arm is deliberately bending.
To use the Natural Movement Inverse and Forward:
| 1. | In the Bones Tools toolbar, select the Natural Movement Forward |
| 2. | In the Camera view, click the bone you want to animate and rotate it. |
| 3. | To toggle between the Natural Movement Forward and Natural Movement Inverse, hold down [Alt] before you start the motion to select the opposite tool. |
Once you position your puppet, you can create a keyframe for all the bone elements of your collapsed skeleton and block the complete body at a specific frame.
To block the entire body position:
| 1. | Make sure your Skeleton Effect layer is collapsed. |
| 2. | In the Timeline view, on the Skeleton Effect layer, select the frame at which you want to block the puppet's position. |
| 3. | Select Element > Peg > Add Keyframe or press [l]. If you expand the Skeleton effect after adding the keyframe, a keyframe will be added to all children layers. Do not forget to collapse your Skeleton effect before continuing your animation. |

To delete keyframes:
| 1. | In the Timeline view, select the keyframe you want to remove. |
| 2. | Select Element > Peg > Remove Keyframe or press [Ctrl] + [R] (Windows) or [⌘] + [R] (Mac OS X). |
The selected keyframe is deleted.
You can use the Remove All Keyframes option if you need to delete all the keyframes on one or many selected bone elements.
To remove all keyframes:
| 1. | In the Timeline view, select the bone elements you want to remove all the keyframes from. You can select many elements at once. |
| 2. | In the Timeline View  menu, select Remove All Keyframes or right-click in the right side of the Timeline view, and select Remove All Keyframes. menu, select Remove All Keyframes or right-click in the right side of the Timeline view, and select Remove All Keyframes. |
You can adjust the velocity to create ease-in and ease out motions or edit the movement Functions using the Function Editor view. This greatly improves the quality and look of an animation, giving a more organic feel to the movement. You can edit the velocity and function of your skeleton or bones in the Function Editor view.
To display the selected bone or skeleton in the Function Editor view:
| 1. | In the Timeline view, select the Skeleton Effect master element or the bone element whose velocity you want to edit. |
| 2. | In the Properties view, click the Function Editor  or Edit Velocity button. or Edit Velocity button. |
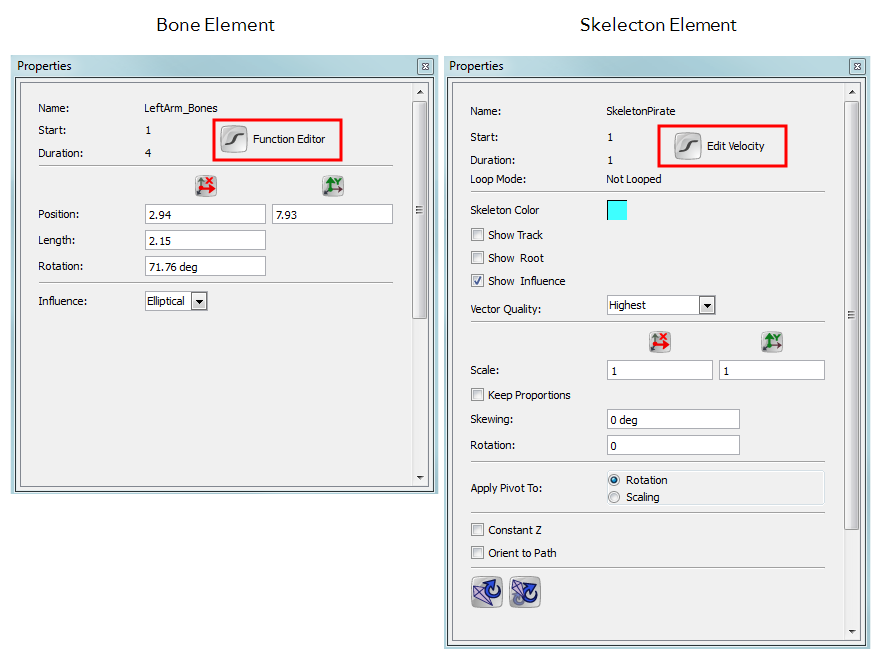
The Function Editor view is displayed and the select bone or skeleton function is selected.
To learn how to adjust the velocity and functions, see:
| • | Adjusting the Velocity |
| • | Function Editor View |
To learn more about the Skeleton Effect Properties view options, see:
| • | Skeleton Effect Properties |
To learn more about the Bone element Properties view options, see:
| • | Setting Up the Bones |
| • | Setting the Influence Area |
At times, you may need to disable the bone animation. If so, you can simply disable the Skeleton effect.
To disable the Skeleton Effect:
| 1. | In the Timeline view, locate the Skeleton effect top layer, it is the one with a bone icon. |
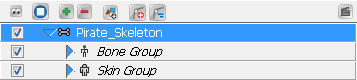
| 2. | Select in the layer's check box to disable it. |