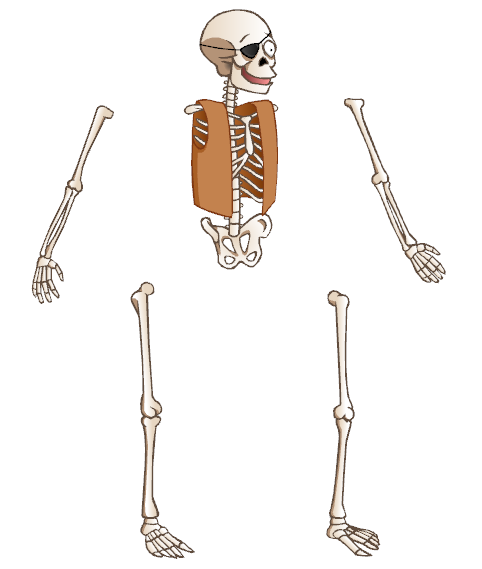
Before building your skeleton, the first thing you need to do is select and prepare your character. If this is your first puppet, then it is best to choose a simple character. A simple character has two legs, two arms, a head and torso. To begin with, you should avoid a character with loose clothing such as a cloak or baggy pants. As you progress and gain experience creating and animating skeleton puppets, you will learn what to do to optimize your animation and workflow.
We chose a skeleton pirate character to demonstrate how to use the Skeleton effect and Bone tools.
You can also create your character from a picture or a bitmap image, however be sure to vectorize the image when importing, otherwise it will not be editable. For more information on importing and vectorizing bitmaps images, see Importing and Vectorizing Images .
When choosing and preparing your character, all parts of the character should be separated in space. This is to ensure the cleanest movement between character pieces when animating bones affected by elliptical influence areas. You should also group each of the separate parts and arrange the ordering of these limbs and body groups inside the drawing.
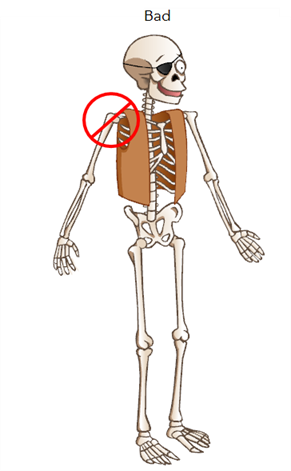
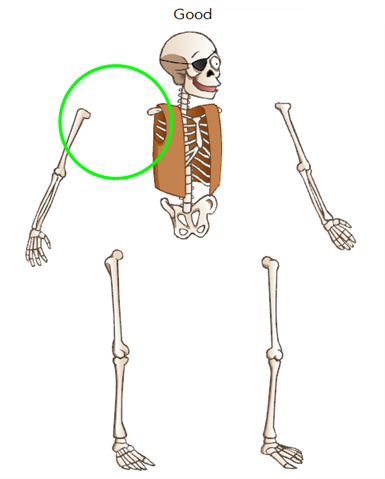
This is an example of what could happen if a character's limbs are overlapping during setup (Figure A), versus one whose limbs were separated from the body during setup (Figure B).
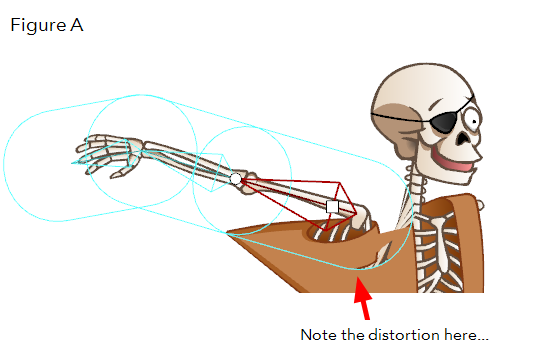
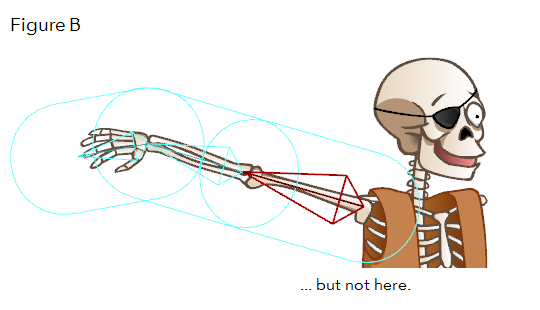
Since the Skeleton effect is applied to any art contained inside a bone's influence area in Setup mode, the following happens:
| • | Figure A: The character's shoulder in this example was overlapping the body at setup. Therefore animating the shoulder will also move any part of the torso that was included in the influence area. |
| • | Figure B: The character's shoulder was not overlapping the torso during setup, so no part of the torso will be influenced by the animation of this bone. |
You can draw all your character's parts on the same drawing element, or you can separate the different parts so each is on a different drawing layer. For example, you could have five drawing elements for your character; one for the body and head combined and one for each of the four limbs. Drawing each part on a separate element simplifies the process of ordering the limbs later.
