
Download Documentation
Traditional Animation Tools
When you animate digitally using traditional techniques, certain tools are needed to work effectively. Just as an animation table, paper and pencils are essential to the traditional animator, the tools listed here are needed for traditional animation when it is done digitally.
 Onion Skin

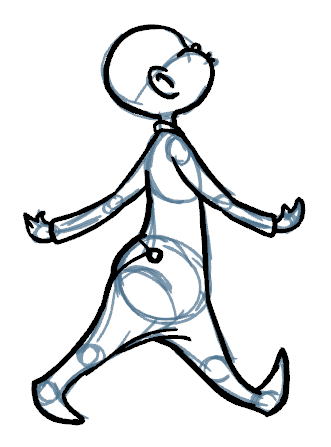
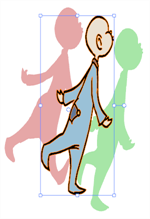
The Onion Skin is used to preview the previous and next drawings. This feature comes in handy when animating because it allows you to see the flow of a movement and lays it out in visible steps. By default, the previous drawings appear with a shade of red and the next drawings are displayed with a shade of green, but you can change the display options in the Preferences panel.
Refer to the
Preferences topic to learn about the Onion Skin preferences.
To use the Onion Skin feature:
|
1.
|
Do one of the following to turn on the Onion Skin feature: |
|
‣
|
Windows: In the Onion Skin toolbar, click the Show Onion Skin  button. button. |
|
‣
|
Mac OS X: In the Top toolbar, click the Show Onion Skin button. |
|
‣
|
Windows and Mac OS X: Select View > Onion Skin > Turn On Onion Skin. |
|
2.
|
You can select the number of previous and next drawings you want to show by clicking the button on the Onion Skin toolbar or by following any of the menu paths listed below: |
|
‣
|
 Select View > Onion Skin > No Previous Drawing or press [Shift] + [Q]. Select View > Onion Skin > No Previous Drawing or press [Shift] + [Q]. |
|
‣
|
 Select View > Onion Skin > Previous Drawing. Select View > Onion Skin > Previous Drawing. |
|
‣
|
 Select View > Onion Skin > Previous Two Drawings. Select View > Onion Skin > Previous Two Drawings. |
|
‣
|
 Select View > Onion Skin > Previous Three Drawings. Select View > Onion Skin > Previous Three Drawings. |
|
‣
|
 Select View > Onion Skin > No Next Drawing or press [Shift] + [W]. Select View > Onion Skin > No Next Drawing or press [Shift] + [W]. |
|
‣
|
Select View > Onion Skin > Next Drawing. |
|
‣
|
 Select View > Onion Skin > Next Two Drawings. Select View > Onion Skin > Next Two Drawings. |
|
‣
|
 Select View > Onion Skin > Next Three Drawings. Select View > Onion Skin > Next Three Drawings. |
The previous and next drawings appear in the Drawing and Camera views.
 Auto Light Table
The Light Table lets you preview the active layers above and beneath the selected layer. It is useful to be able to see the other layers when designing, animating, or cleaning up your animation.
The Light Table feature is only available in the Drawing view.
To use the Light Table feature:
|
1.
|
Do one of the following: |
|
‣
|
When working in the Drawing view, select View > Turn On Auto LightTable. |
|
‣
|
In the Onion Skin toolbar, select the Light Table button. |
The drawings are displayed in the Exposure Sheet view.
|
2.
|
In the Exposure Sheet view, you can deselect the layers you want to hide from the Light Table for the Drawing view. |

Static Light Table

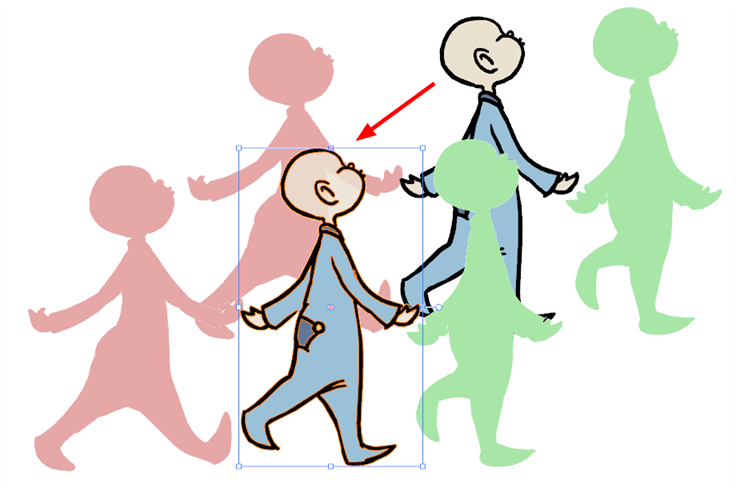
The Static Light Table works differently than the Auto Light Table and can only be accessed from the Exposure Sheet view. By using this feature, you can lock one drawing and have it appear in washed-out colours behind every drawing, existing on any frame, belonging to any layer.
To use the Static Light Table feature:
|
1.
|
In the Exposure Sheet view, right-click on the cell that contains the drawing that you want to lock onto the Static Light Table. |
|
2.
|
Select Send to Static Light Table. |

|
3.
|
Click on another cell where you would like to work with the aid of the drawing locked on the Static Light Table, then proceed to draw in the Drawing or Camera view. |
To display the elements on the Static Light Table:
|
1.
|
From the Exposure Sheet toolbars, click the Toggle Static Light Table  button. button. |

Thumbnails of the drawing appear under the Exposure Sheet columns.
|
2.
|
Send more than one cell containing drawings to the Static Light Table. |
|
3.
|
Use the check mark boxes to show or hide the drawings sent to the Static Light Table. |
|
4.
|
Use the foreground/background swatches button to toggle the drawings sent to the Static Light Table either behind or in front of your other drawings seen in the Drawing view. |
To clear a cell from the Static Light Table:
|
1.
|
Right-click on the thumbnail that you want to delete and select Delete to remove that particular cell, or Delete All to remove all cells from the Static Light Table. |
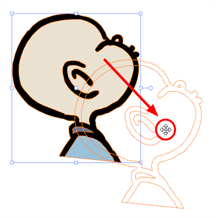
 Reposition All Drawings
The Reposition All Drawings tool is used to change the position, scaling, rotation, or skewing of all the drawing strokes on every frame belonging to the same layer.
To reposition all drawings:
|
1.
|
In the Drawing Tools toolbar, select the Reposition All Drawings  tool or press 1 to alternate between all the tools under the Select Tool drop-down menu. tool or press 1 to alternate between all the tools under the Select Tool drop-down menu. |
In the Drawing view, every stroke that composes your drawing is selected.
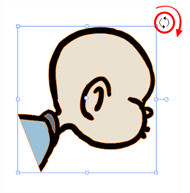
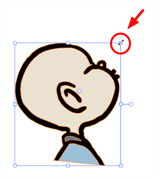
To deform or reposition a selection:
|
‣
|
To reposition, click and drag your selection to a new area. |
|
‣
|
To rotate, move the selection box handle in a circular motion. |
|
‣
|
To scale, pull or push on the side, top or corner control point. Hold down [Shift] to lock the selection's ratio. |
|
‣
|
To skew, drag the sides or top and bottom segments, between the control points. |

When you release the pointer, every drawing contained in the drawing layer you repositioned, scaled, rotated or skewed follows the same transformation.
Lock Drawing
Although the Reposition All Drawings tool can be quite useful, sometimes you may need to reposition all but a few drawings. For example, one or two elements, such as a background or point of reference might have to remain absolutely fixed. The Lock Drawing option is a good way to keep certain individual frames from moving, or from accidentally being drawn on.
To use the Lock Drawing option:
|
1.
|
In the Exposure Sheet view, select the cell that contains the drawing you want to lock. |
|
2.
|
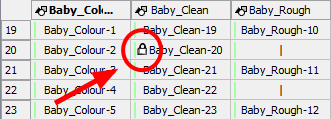
Right-click on this cell and select Lock Drawing. |
The cell containing the drawing is locked as indicated by the lock icon beside the cell name.
|
3.
|
In the Timeline view, you can also right-click on a selected layer and select Lock > Lock or another desired option. |
Clear Drawing
Another feature that makes drawing by hand much easier is the Clear Drawing feature in the Exposure Sheet view. Often when you are drawing with your Wacom tablet directly in the software, you may decide that you want to start a particular drawing in an action sequence from scratch.
If you delete the frame from the Timeline view, there is a gap in your timeline. If you use the Select tool to select all your drawing strokes and delete them, you risk missing a few strokes while taking twice as long to do so.
To use the Clear Drawing command:
|
1.
|
In the Exposure Sheet view, right-click on the cell that contains the drawing strokes you want to delete. |

The Clear Drawing command does not work on Image layers or on extended exposure cells; the command only works on Drawing layers.