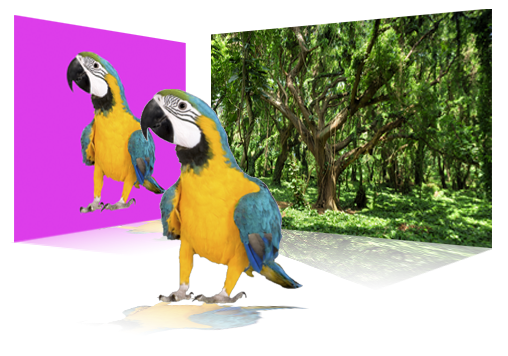
Keying is a concept used in animation but also in live action movies. Keying is the process of picking a precise colour value and removing it from the image to isolate a character or object. The more common use of keying is when filming actors against a green screen in cinema.
In Toon Boom Studio, you can import your images with the keying option, which isolates an element in an image with a single-coloured background.
To import images with keying:
| 1. | In the Timeline view, select an empty cell in a bitmap image layer. |
| 2. | Right-click and select Import Images > Import Images with Keying. |
The Open Browser opens.
| 3. | Select the images you want to import and key. Hold down the [Shift] key while selecting your images to make a multiple selection. |
The Import Images With Keying dialog box opens.
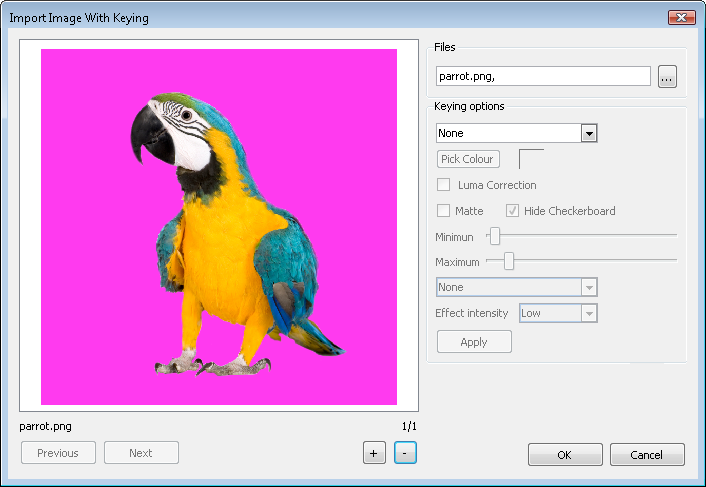
| ‣ | In the Files section, click the Browse button if you want to change the selected images. |

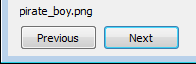
| ‣ | If you selected many image files, use the Previous and Next buttons to display the other drawings. The name of the currently selected drawing is displayed above the buttons. |
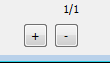
| ‣ | Use the plus (+) and minus (-) buttons to zoom in or out of the Preview area. Above the buttons is displayed the total number of drawings loaded in the Import Images With Keying dialog box. |
| 4. | In the Keying Options section, set the keying parameters: |
| ‣ | In the Keying Type list, select a keying type. |
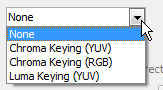
None: Selecting the None option means that there is no keying on this drawing. Selecting None makes the other parameters greyed out.
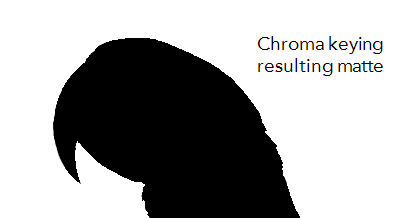
Chroma Keying (YUV): This option makes the pixels corresponding to the selected colour transparent, using the YUV channels.
Chroma Keying (RGB): This option makes the pixels corresponding to the selected colour transparent, using the RGB channels.
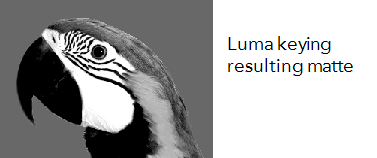
Luma Keying (YUV): With this option, you can set different levels of transparency on your drawing. The level of transparency is determined by the different levels of colours, where the white colour is completely transparent and the black colour completely opaque.
| ‣ | Pick Colour: When you select one of the two Chroma Keying types from the drop-down menu, this option becomes available. |
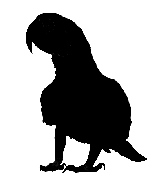
| ‣ | Click Pick Colour to change your cursor to a dropper and select the background colour of your picture you want to illuminate from the preview area. As soon as you click on a colour, this colour is displayed in the colour swatch and is removed from the preview area. A grey checkerboard is displayed to represent the transparent area. 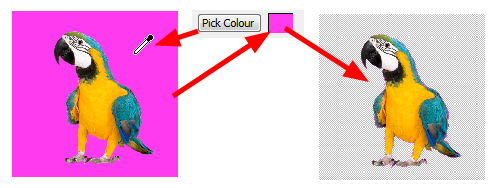 |
Click the colour swatch to open the Select Colour dialog box and select a precise colour from there.
| ‣ | Luma Correction, Matte and Hide Checkerboard |
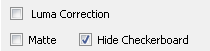
Matte: Displays the matte in the preview area.
Luma Correction: Applies a luma correction filter on your image.
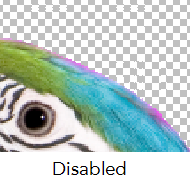
Hide Checkerboard : By default Toon Boom Studio displays a checkerboard pattern in the preview area to represent the transparent zones. You can enable the Hide Checkerboard option to conceal the checkerboard pattern and display the zone as white.
| ‣ | Minimum, Maximum: Lets you adjust the minimum and maximum level values to be considered in the keying process following the parameters you set above. You can see the result in the preview area. |
| ‣ | Filter list: Lets you select an effect to apply on your keying selection to make it more precise. You can also use the Effect Intensity list to choose the level of intensity.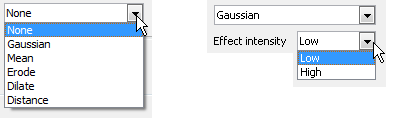 |
None: No filter is applied to your keying selection.
Gaussian: A gaussian blur effect is applied to your selection to soften the edge of the keyed selection.
Mean: A mean filter is applied to your selection to soften the edge of the keyed selection with a minimum of blurry result.
Erode: The edge of the keyed selection is cropped following the effect intensity level chosen below.
Dilate: The edge of the keyed selection is increased following the effect intensity level chosen below.
Distance: The edge of the keyed selection is increased with a blur following the effect intensity level chosen below.
| ‣ | Click Apply if you need to apply multiple passes of keying. Once you set up your first keying pass values and options, click Apply. You are now ready to set up your next keying pass. |
| 5. | Click OK. |