
Download Documentation
More Drawing Options
Toon Boom Studio provides many useful drawing and design options.
Group and Ungroup
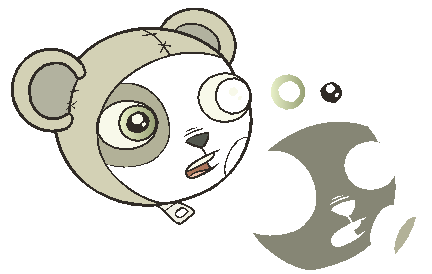
In Toon Boom Studio, each stroke in a drawing can be selected independently until they are flattened, but then each different colour shapes still remain independent from one another. It is useful to be able to edit your drawing one shape at a time, but depending on the current task, it might be useful to quickly select a grouping of these strokes.For example, when you need to reposition or transform the entire head of a character, you do not want to drop the nose or an eye.
To group drawing objects:
|
1.
|
Do one of the following: |
|
‣
|
In the Drawing Tools toolbar, click the Select  tool. tool. |
|
‣
|
Select Tools > Drawing Tools > Select. |
|
2.
|
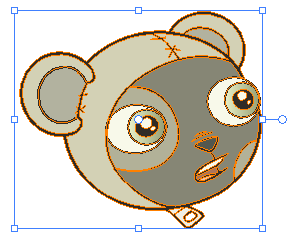
In the Drawing or Camera view, select the drawing objects you want to group. To select all the shapes in your drawing, press [Ctrl] + [A] (Windows) or [⌘] + [A] (Mac OS X). |
|
3.
|
Select Tools > Group or press [Ctrl] + [G] (Windows) or [⌘] + [G] (Mac OS X). |
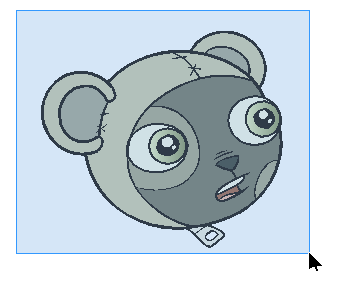
Your drawing objects are grouped and can be selected with a single click.
Grouping is reversible, you can always ungroup selected drawing objects and select the shapes independently.
To ungroup drawing objects:
|
1.
|
Do one of the following: |
|
‣
|
In the Drawing Tools toolbar, click the Select tool. |
|
‣
|
Select Tools > Drawing Tools > Select. |
|
2.
|
In the Drawing or Camera view, select a grouped object and select
Tools > Ungroup or press [Ctrl] + [Shift] + [G] (Windows) or [⌘] + [Shift] + [G] (Mac OS X). |
Smooth
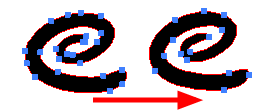
The Smooth operation is used to smooth out a selected drawing object and remove extra vector points.
To use the Smooth operation:
|
1.
|
In the Drawing or Camera view, select a drawing object to smooth using the Select tool. |
|
2.
|
Select Tools > Smooth. |
Flatten and Optimize
The Flatten and Optimize operations are similar. They are used to merge shapes and brush strokes in the same drawing into a single flat layer. If you draw lines to fix a drawing or a line with many brush strokes, or draw a complex shape from many different shapes superposed, it can be useful to flatten them all into a single shape because lines are drawn one of top of each other. If you intend on repainting the shape or line or modifying it, it will be easier if they are merged together as one.
Flatten
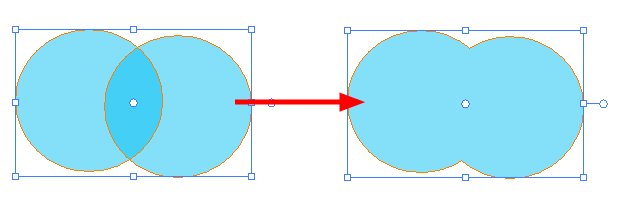
The Flatten operation merges shapes and brush strokes of a drawing into a single flat layer. This means that if you have shapes or strokes of a transparent colour, you will lose the overlapping effect.
To use the Flatten operation:
|
1.
|
In the Drawing or Camera view, select the drawing objects to flatten using the Select tool. To select all shapes in your drawing, press [Ctrl] + [A] (Windows) or [⌘] + [A] (Mac OS X). |
|
2.
|
Select Tools > Flatten. |
|
‣
|
Shapes of the same colour are merged together. In this example, the two circles overlapping one another were painted using a transparent colour. |
|
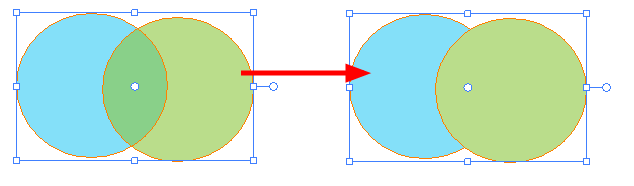
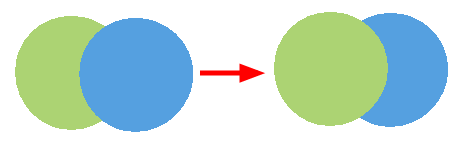
‣
|
Shapes of different colours remain separate. In this example, the two circles overlapping one another were painted using two different transparent colours. The green circle on the right was painted on top of the blue circle on the left. When they are flattened, the parts overlapped by a higher level layer shape are removed, in this case, leaving the blue circle cropped. |
When drawing with the Brush  tool, you can also decide to instantly flatten the strokes as you draw them using the Draw Top Layer option.
To enable the Draw Top Layer option:
|
‣
|
Select Tools > Draw Top Layer. |
Optimize
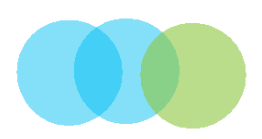
The Optimize operation is used to merge shapes and brush strokes in the drawing into a single flat layer. Unlike the Flatten option, the Optimize command merges the selected drawing shapes or strokes only if doing so will not change the appearance of the final image.
If you have transparent shapes overlapping one another, they will not be merged or flattened. The transparent overlapping effect is preserved.
To use the Optimize operation:
|
1.
|
In the Drawing or Camera view, select the drawing objects you want to optimize using the Select tool. To select every shape in your drawing, press [Ctrl] + [A] (Windows) or [⌘] + [A] (Mac OS X). |
|
2.
|
Select Tools > Optimize. |
Overlapping shapes of the same non-transparent colour are merged together.
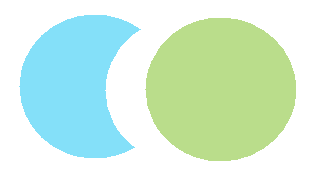
Overlapping shapes of different non-transparent colours are merged and cropped.
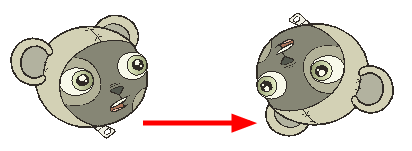
Transform
Use the different Transform operations to apply a specific transformation, such as a flip or a rotation to a drawing shape selection.
To use the Transform options:
|
1.
|
In the Drawing or Camera view, select the drawing object to flip using the Select tool. To select every shape in your drawing, press [Ctrl] + [A] (Windows) or [⌘] + [A] (Mac OS X). |
|
2.
|
Select Tools > Transform and one of the following: |
|
‣
|
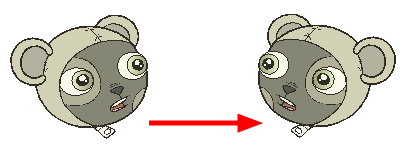
Flip Horizontal: Flips the currently selected shape horizontally. |
|
‣
|
Flip Vertical: Flips the currently selected shape vertically. |
|
‣
|
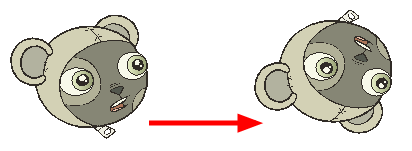
Rotate 90 CW: Rotates the currently selected shape clockwise 90°. |
|
‣
|
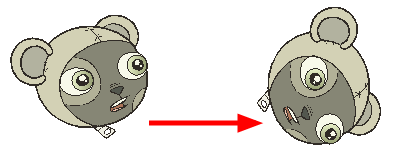
Rotate 90 CCW: Roates the currently selected shape counterclockwise 90°. |
|
‣
|
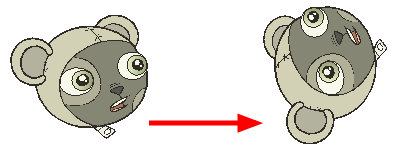
Rotate 180: Rotates the currently selected shape 180°. |
Arrange
You can reorder the shapes and strokes of a drawing.
To reorder shapes in a drawing:
|
1.
|
In the Drawing or Camera view, use the Select tool to select the drawing objects to reorder. |
|
2.
|
Select Tools > Arrange and one of the following: |
|
‣
|
Bring to Front: Moves the currently selected shape on top of all the others. |
|
‣
|
Bring Forward: Moves the currently selected shape one level higher. |
|
‣
|
Send to Back:; Moves the currently selected shape under all the others. |
|
‣
|
Send Backward: Moves the currently selected shape one level lower. |
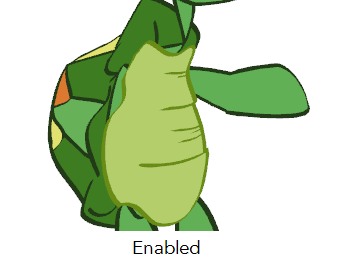
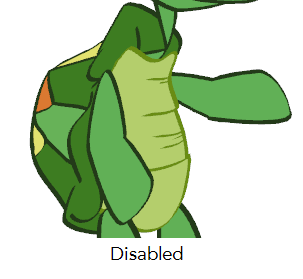
Show Current Drawing on Top
By default, the Show Current Drawing on Top option is enabled. This means that when you are working in the Camera view with a drawing tool, the selected drawing is automatically displayed on top of all the others. This facilitates editing.
If you need to work on the selected drawing while seeing the final composition of your scene, you must place the drawing in the correct order compared to all the others in the scene. In the following example, the belly of the turtle was selected.
To use the Show Current Drawing on Top option:
|
‣
|
Select View > Show Current Drawing on Top. |