
Download Documentation
Managing Toolbars
The Toon Boom Studio user interface contains toolbars which, by default, are located at the top or side of the interface. You can reposition the toolbars to suit your work style or hide unused ones.
This section covers the following topics:
Showing or Hiding Toolbars
To show or hide a toolbar:
|
1.
|
Select Window > Toolbar > the desired toolbar. |
Moving Toolbars on Windows
To move a toolbar:
|
1.
|
Select the toolbar you want to move by clicking on its anchor point and dragging it to another position in the top or side interface toolbar area. |

|
2.
|
When a rectangle outline appears showing an available location for the toolbar, release the mouse button and drop the toolbar into position. |

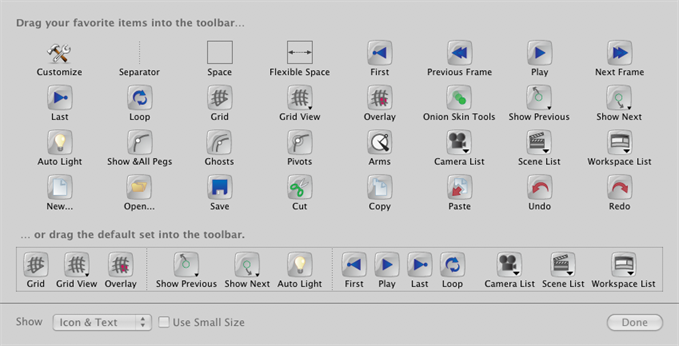
Customizing Toolbars on Mac OS X
On Mac OS X, you can customize toolbars to display buttons that access the commands that you use the most.
To customize toolbars in Mac OS X:
|
1.
|
Select View > Customize Toolbar. |
A window opens displaying all of the buttons available for the view you are currently working in.
|
2.
|
Drag the buttons you want to the toolbar in the current view. |
|
3.
|
You can also use the Show drop-down list and decide to show: |
|
4.
|
By default, the Studio displays large buttons. You can enable the Use Small Icon option to switch to smaller buttons. |
|
5.
|
When you are finished making changes, click Done. |
|
6.
|
To remove buttons, drag them away from the toolbar. |