In Toon Boom Studio, you will find several concepts based on traditional animation. Whether you are new to animation or an existing animator who wants to understand Toon Boom Studio, this section is for you.
You will learn about:
| • | Bitmap and Vector Graphics |
| • | Palettes |
| • | Exposure Sheet and Timeline |
| • | Pegs |
| • | Multiplane Camera |
There are two types of digital images:
| • | Bitmap Image Types |
| • | Vector Image Types |
A bitmap image consists of pixels and has a fixed size. A pixel, short for Picture Element, is a single point in a graphic image. It is a small sample of an image, a dot, a square or a very small section made out of smooth filtering. If you zoom in enough on a digital image, you will see the pixels. They look like small squares of different colours and intensity. So, a bitmap image is composed of pixels and has a single resolution (size); if it is enlarged too much, it will start losing definition and pixels will start to appear. This is known as pixelation.

A vector-based image is composed of points and Bezier curves. The computer reads the points and traces the segments linking them to reproduce the image shape. There is no fixed size or resolution in a vector image. The graphic can be enlarged and distorted as much as desired and the system will simply recalculate the segments and rebuild the shapes. The segment's shape can be controlled with Bezier handles to curve and smooth it. Vector images are translated and displayed in pixels once the calculation is done.
Bitmap images allow a more structured style. Since everything has a fixed size and is already made out of pixels, more effects are possible, such as blur, painting look, texturing, shading, and so on. The bitmap format is excellent for creating backgrounds and overlay elements. However, because of the specific resolution, in order to zoom in on or to work in high resolution such as HDTV, the created file must be large.
Vector-based graphics can be very useful in creating large illustrations, as these graphics are resolution independent. The images can be enlarged significantly without losing definition. A vector-based image generally has a smaller file size than a bitmap, as it is a set of mathematical points. However, if there are many vectors composing the graphic, the result can be larger than a bitmap file. A vector shape can always be modified. It also creates very crisp images.
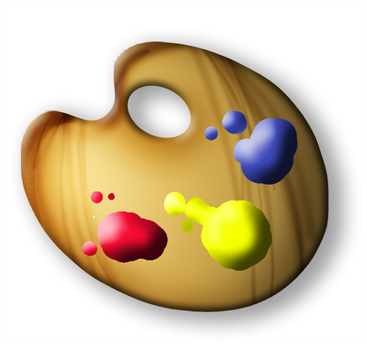
In colour animation, exact colours are used to paint each particular character. In order to maintain consistency between the scenes and episodes, a colour palette is created for each character, prop, and effect throughout the project.
Before computers, painters used real colour pots mixed by a colour palette artist. Now, using computers, a digital colour palette is created. This allows consistent colour accuracy by always having the same group of colours associated with each character.
Using a colour palette has many benefits, including:
| • | Each character consistently retains their dedicated colours. |
| • | You cannot accidentally use a colour which is not related to the character. |
| • | Standardization and colour consistency throughout the project. |
| • | Multiple artists can use the same colour palette and produce the same results. |
The exposure sheet o rXsheet and the timeline will be used a lot as you work on your project. This section explains what they are and how you can make use of them.
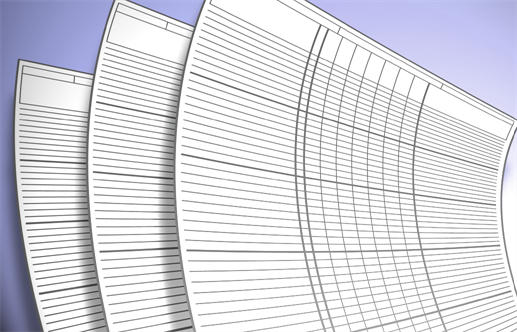
The exposure sheet, also known as the Xsheet or Dope Sheet, is used when an animator is planning a scene. The animator enters the layers, the name of the drawings and their exposure into the Xsheet. The exposure sheet allows the user to see the timing in detail.
The exposure sheet is composed of columns corresponding to the different layers. Each column is split into rows representing the frames in the scene. A paper exposure sheet usually has eighty rows and ten columns. This enables the animator to associate a layer with a certain element and record the frame in which each drawing appears.
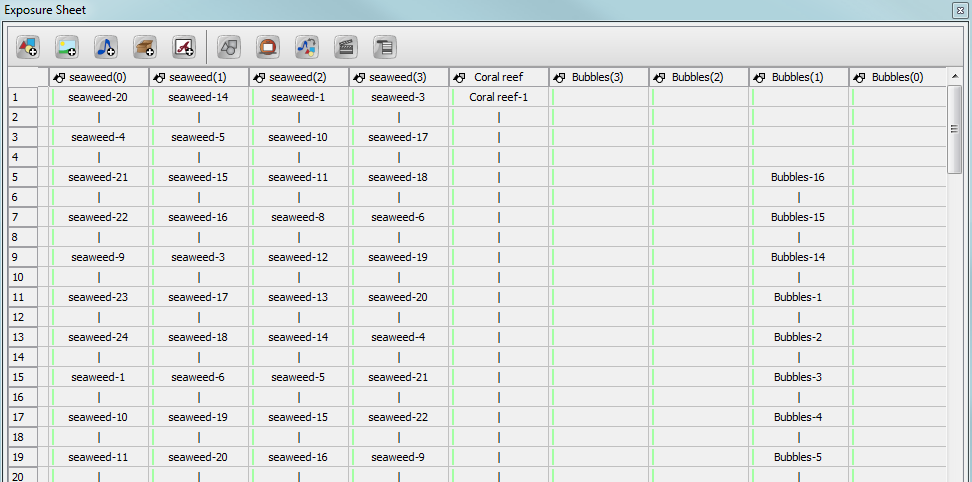
The traditional paper exposure sheet was mainly created for the animator to write down the drawing timings and main actions. Toon Boom Studio uses a digital exposure sheet for the same purpose.
A timeline is a horizontal and chronological representation of events occurring within a particular period.
In animation or digital process, the timeline is quite similar. The timeline is read from left to right and helps you to understand the scene and its timing. The frames or time codes are placed at the top and the elements or layers on the left. There is no drawing name or value information. The timeline displays the timing and elements in a simplified and systematic manner, making it easy to read globally. The timeline can be considered to be a quick overview of the whole scene.
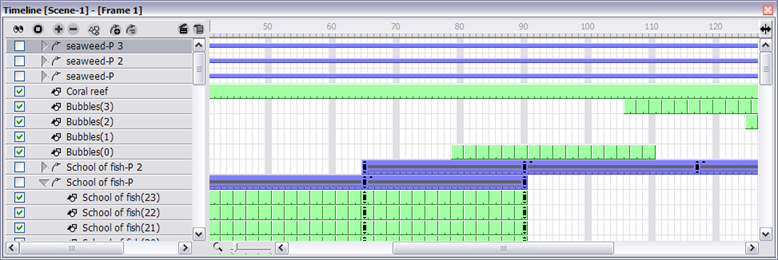
Exposure sheets and timelines are used for different tasks. With hand-drawn animation, the exposure sheet is useful for keeping track of the drawings' ordering, names, and timings. The exposure sheet is used to reproduce the animator's work in the digital software or the camera.
For puppet animation, compute-generated trajectories, and distortions, there is a lot of extra information involved, including keyframes, velocities, function curves, and so on. A keyframe is a computer-generated key pose that contains values for the element's on-screen positioning; keyframes can be displayed in the exposure sheet as values. If there are too many keyframes, modifying one can be difficult due to all of the values present. This is why there are digital timelines. Their simplified version of the timing is quite useful in these situations. The timeline does not display drawing names or keyframe values, instead it represents them as symbols, making it much easier for the eye to detect the desired element for modification. Although the name and value information is not directly displayed, the exposure sheet is still very valuable when retrieving this type of information.

Pegs have been used for a long time in the animation process, mainly for registration purposes. Peg holes at the bottom or top of animation paper are used to keep all of the sheets even and at the same registration.
There are three peg holes in regular animation paper. The centre one is circular and the left and right ones are rectangular and situated 4 inches on either side of the centre one.
To keep the drawings together, we use a peg bar. This bar has three pins shaped exactly like the peg holes. Peg bars are normally found at the bottom and top of animation discs.
Before computers, the peg bars were also used to move layers under the camera stand. They were the equivalent of the digital trajectories. Toon Boom Studio makes use of these concepts to create animation and camera moves.
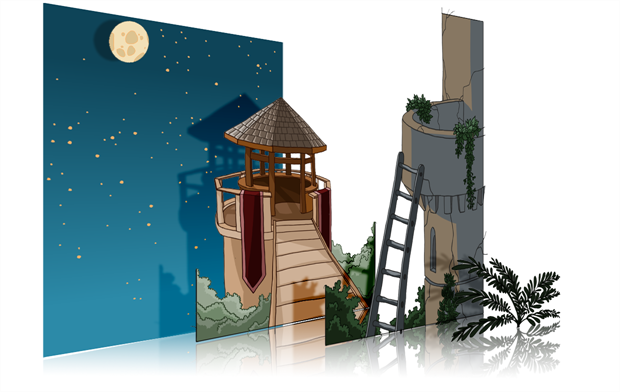
In an animation context, multiplaning is used to create a scene with a multiple planes placed at different distances from the camera to recreate a perspective illusion. A plane is a layer or an element. In regular flat 2D scenes, all the elements are at the same distance superposed one on top of another. So, when the camera moves, all the elements are moving at the same speed. In real life, all objects and elements are placed at different distances from our eyes so when we walk past, the closest objects appear to be moving away faster. The farthest ones, like mountains, are barely moving. In animation, that perspective effect has to be reproduced manually.
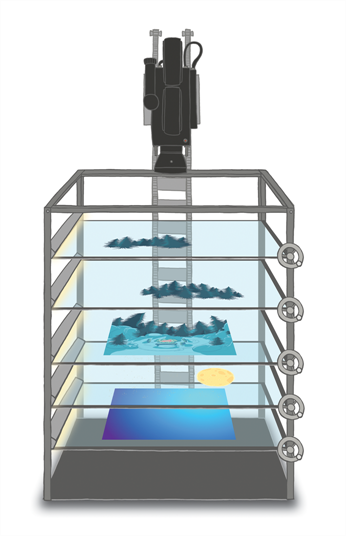
In 1933, the Walt Disney Company invented the multiplane camera. They got the idea from looking at methods used in the theatre to introduce perspective into a space with limited depth. In the theatre, cutouts and flat pieces were placed in a variety of layers in front of a backdrop which allowed actors to move through the various sets while giving the illusion of depth. Walt Disney's final design for the multiplane camera used this same concept. The multiplane camera which was set up vertically, much like a photographic enlarger, would shoot down through as many as five planes attached to vertical posts that allowed four of the planes to move independently of one another. The first two planes were used for animation, the next two were for backgrounds, and the fifth was fixed and used for sky backgrounds. The finished result produced a depth of perspective which had not previously been seen in animated film.
Multiplane camera effects can be created digitally. There is no longer a need to use the big multiplane camera. Multiplane shots are normally used to add depth to a scene to reproduce perspective effect more easily. They can also be used on a smaller scale to make elements pass in front of and behind certain objects like trees or a chair.