This chapter is divided as follows:
| • | Importing Sound |
| • | Lip-Sync |
When you decide that you want to add sound to your movie, you must prepare this sound outside of Toon Boom Studio. Then, in Studio, you add a Sound element to organize sound files in your animation.
A sound will play in the movie until it reaches the end of the file or a stop frame created in the Sound Element Editor. If the sound extends into multiple scenes, it will continue to play.
You can import as many sound files as you like. However, if you will be delivering your movies over the Internet, the more sounds you add, the larger the file size of your final movie.
Toon Boom Studio imports, exports and plays sounds using QuickTime. Studio only supports the sound formats recognized by Qt®, with one exception: Flash ADPCM format, which is supported natively.
| 1. | Do one of the following: |
| ‣ | From the Sound toolbar , click the Import Sound  button button |
| ‣ | From the top menu, select File > Import File. |
| ‣ | In the Exposure Sheet view, right-click on any cell and select Import Sound File. |
| ‣ | In the Timeline view, click on the Add New Elements button. In the dialog box, select the Sound type, name the layer and click on OK. In the Properties view, click on the Import Sound File button. |
| ‣ | In the Exposure Sheet view, in the top toolbar, click on the Sound button. In the Properties view, click on the Import Sound File button. |
The Open dialog box displays.
| 2. | From the Open dialog box, browse for your sound file (*.aiff, *.mp3, *.wav, or *.m4a) and click Open. |
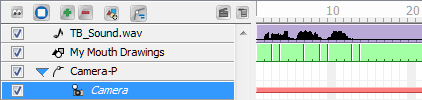
The sound layer appears in the Timeline view and is displayed as a waveform. The sound file also appears in Exposure Sheet view.

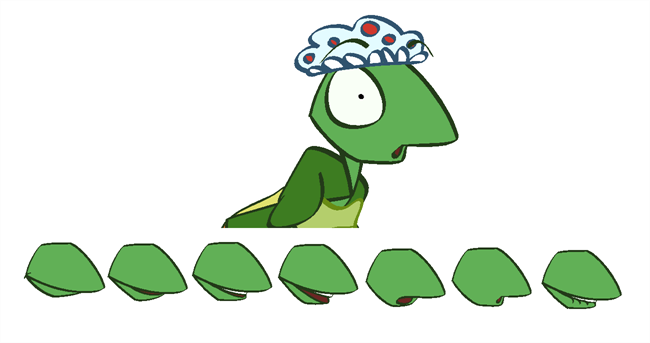
Adding a lip-sync to a project can really enhance its quality and storytelling. However, it can be difficult to shape a character's mouth so it matches the sound at the precise frame. To solve this problem, Studio provides a lip-sync feature which analyzes the content of a sound element and generates a mouth chart based (see below) on the eight animation phonemes (A, B, C, D, E, F, G, and X, which is used to represent silence). You can lip-sync the traditional way or let the Studio automatically create the basic detection.
The mouth shapes used by Studio are based on the conventional mouth chart used in the animation industry. The letters used to represent the shapes do NOT correspond to an actual sound.
Here is an approximation of which sound each mouth shape can produce:
|
Mouth Shape |
Approximate sound the mouth shape matches to |
|
A |
b, m, p |
|
B |
d, h, i, j, k, s |
|
C |
a, e |
|
D |
A, E |
|
E |
o |
|
F |
oo, u |
|
G |
f, ph |
|
X |
Silence, undetermined sound |
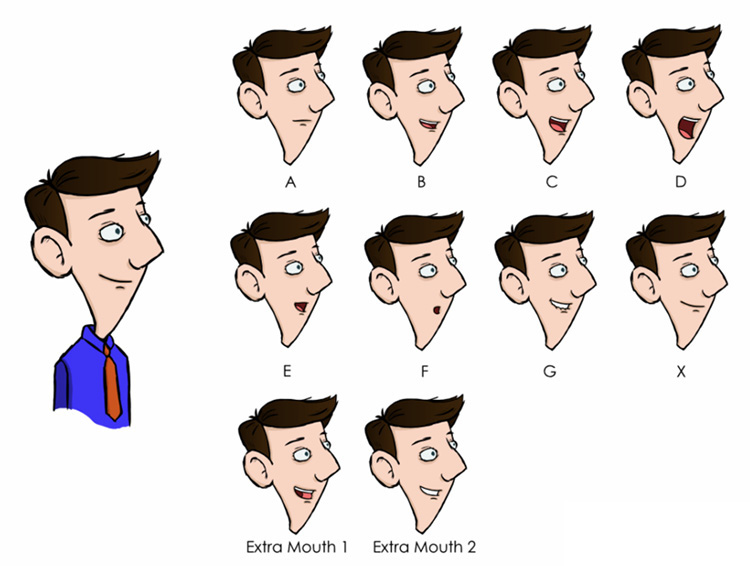
You can refer to the mouth chart positions as you draw the shape of your character's mouth.
Studio comes with a variety of mouth templates that you can play and experiment with on your characters. You can create a lip-sync and use an existing sound layer or create the lip-sync and then import the sound.
To create a lip-sync using a mouth template:
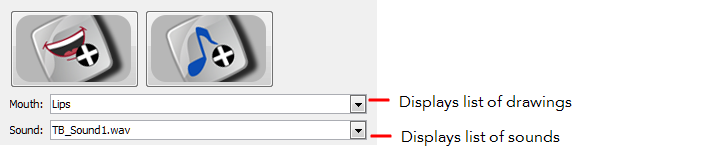
| 1. | From the Sound toolbar, click the Lip-sync  button . button . |
| 2. | Do one of the following to add sound: |
| ‣ | Click the Import Sound  button. From the Open dialog box, select a sound file and click Open. button. From the Open dialog box, select a sound file and click Open. |
| ‣ | From the Sound list, select a sound file you have already imported. |
| 3. | If needed, edit the sound by clicking the Edit Sound  button and making any adjustments in the Sound Element Editor. button and making any adjustments in the Sound Element Editor. |
| 4. | Click the Import Template  button. button. |
The template dialog box opens to display the mouth templates.
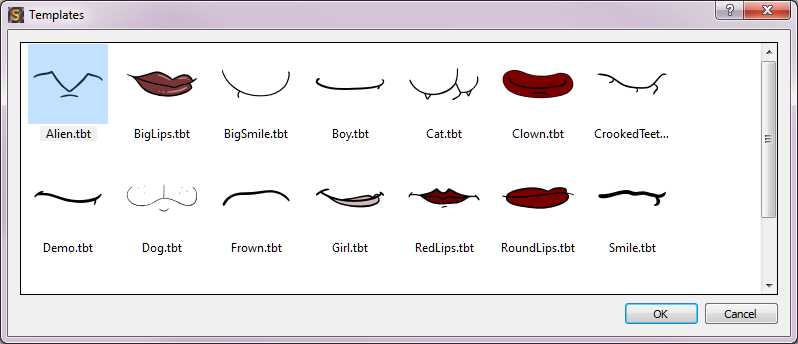
| 5. | Select a mouth template and click OK. |
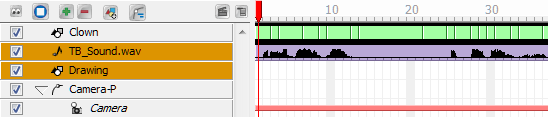
In the Timeline view, a Drawing layer is created containing eight mouth drawings.

| 6. | In the Lip-Sync view, click Apply to generate the lip-sync with the sound file. |
The mouth shapes are synced with the sound file.
| 7. | In the Drawing view, use the Select tool  in the Animation Tools toolbar to scale the mouth drawings on the layer. in the Animation Tools toolbar to scale the mouth drawings on the layer. |
| 8. | In the Camera view, place the mouth at the correct location on your character. |
You can use your own drawings to generate a lip-sync.
To create a lip-sync using your own drawings:
| 1. | In the Timeline view, select the drawing layer that contains your eight mouth drawings. |
| 2. | From the Sound toolbar , click the Lip-sync button. |
The Lip-sync view displays. Your eight mouth drawings are automatically mapped with the animation phonemes.
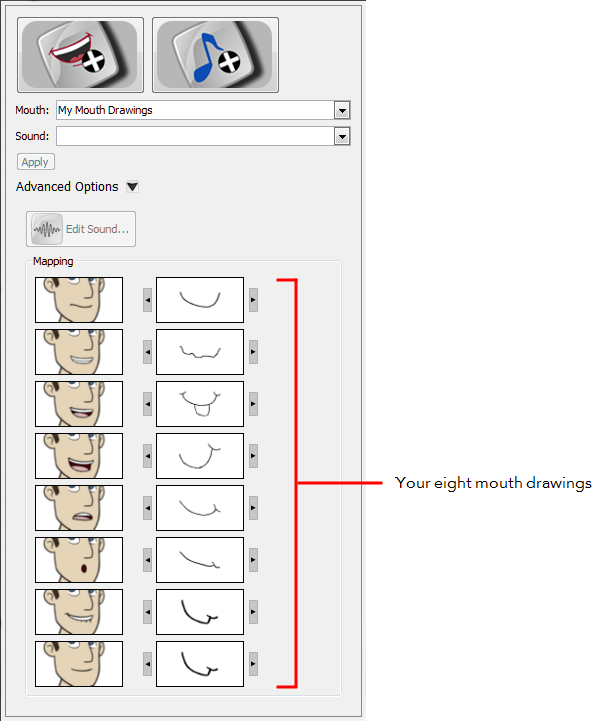
| 3. | Do one of the following to add sound: |
| ‣ | Click the Import Sound button. From the Open dialog box, select a sound file and click Open. |
| ‣ | From the Sound list, select a sound file you have previously imported. |
| 4. | If needed, edit the sound by clicking the Edit Sound button and making any adjustments in the Sound Element Editor. |
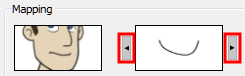
| 5. | If needed, you can adjust the mouth mapping by clicking the Previous Drawing and Next Drawing arrows beside any of the mouths. |
| 6. | Click Apply to generate the lip-sync with the sound file. |
The mouth shapes are synced with the sound file.