This topic is divided as follows:
| • | Drawing the Pieces |
| • | Ordering the Layers |
| • | Parenting Pieces |
| • | Adding a Master Peg |
| • | Setting the Pivots |
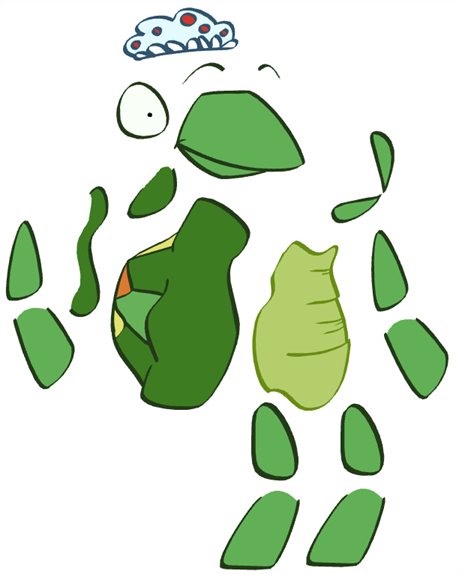
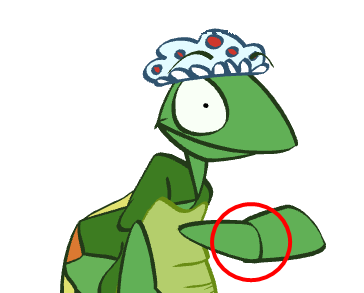
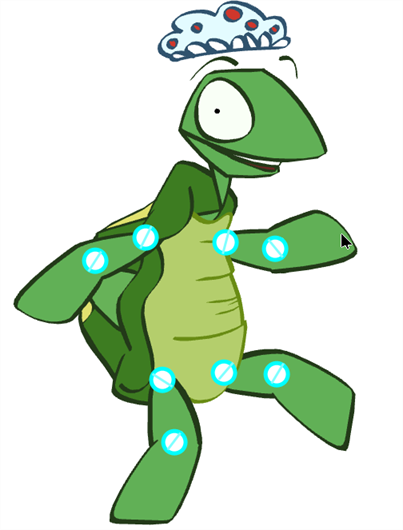
To cut up your character into pieces, you must first decide which parts of the final character will move.
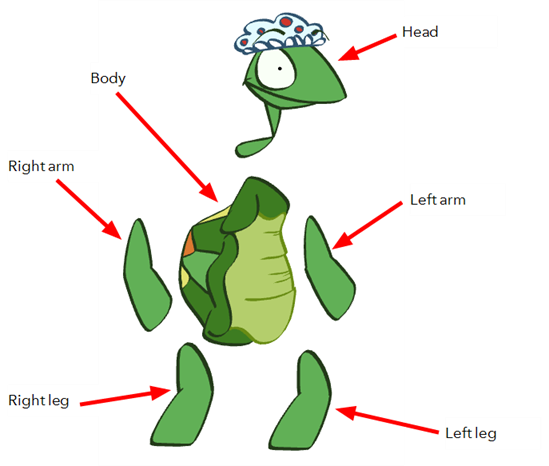
If you are building your first puppet, start with a very simple breakdown. Most of the time, you will want to animate the arms, legs and head. It is not necessary to separate all the facial features from the head or to break down the knees and elbows to get a working puppet. Breaking down the character into six pieces is enough to produce a basic animation.

If you like, you can extend the amount of the puppet's articulation. You can bend the arms and legs, and separate the head into several different pieces to animate the eyebrows and make the eyes blink.
To draw your pieces:
| 1. | In the Timeline view, click the Add Drawing Element  button and rename the new layer corresponding to the new piece you want to create. button and rename the new layer corresponding to the new piece you want to create. |
| 2. | On the right side of the Timeline view, select the new layer's first cell. |
| 3. | In the Drawing Tools toolbar, select the drawing tool of your choice. The Brush  tool is recommended. tool is recommended. |
| 4. | In the Onion Skin toolbar , click the Light Table  button to see your original drawing while you draw. button to see your original drawing while you draw. |
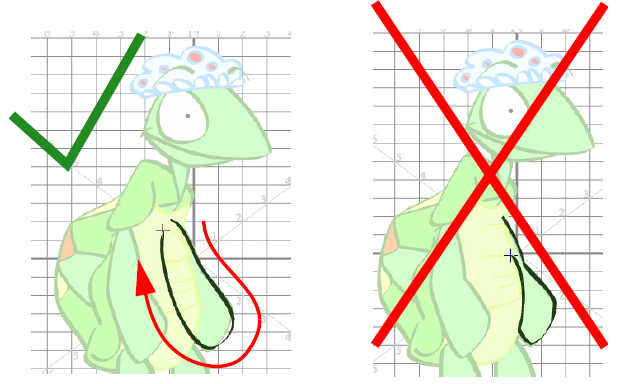
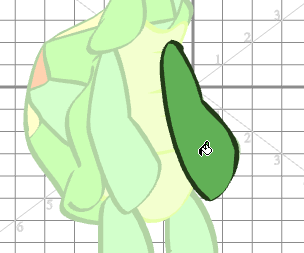
| 5. | In the Drawing view, trace the new piece. Make sure to draw a complete shape overlapping with the other body parts. |
| 6. | In the Tools toolbar, select the Paint  tool. tool. |
| 7. | In the Colour Palette view, select the colour needed. |
| 8. | In the Drawing view, paint your new drawing. |
| 9. | Save your project. |
| 10. | Repeat the same process for each new piece to create. |

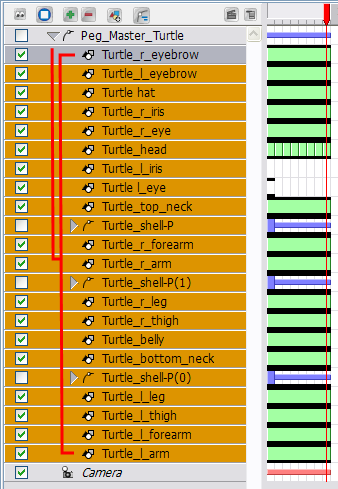
Once you have finished drawing all your pieces, you may find that your drawings need to be reordered. You can place these pieces in the correct order before attaching your pieces to each other.
To reorder your layers:
| 1. | In the Timeline view, select the drawing to bring in front of the others. |

| 2. | Drag the selected layer and drop it BETWEEN the existing layers. Do NOT drop it onto a layer because it will connect them, and in this case, you do not want to connect them. |

| 3. | Repeat this process until the entire character is in the correct order. |
To attach a layer to another one, drag the layers one onto the other in the Timeline view.
To attach a layer to another one:
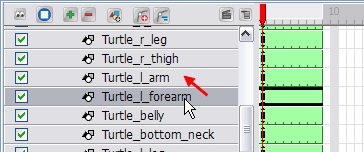
| 1. | In the Timeline view, select the layer you want to attach to another one. For example, select the forearm layer to attach it to the upper arm. |
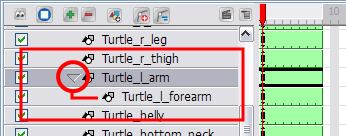
| 2. | Drag the selected layer ONTO the one you want to attach it to. |
Once the layer is attached to another one, it is pushed to the right.
| 3. | If the piece you connected is supposed to be in front of the layer it is attached to, you can push it in front using a keyboard shortcut, which is explained below. |
| ‣ | In the Animation Tools toolbar, select the Transform |
| ‣ | In the Camera view, select the part to bring in front. |

| ‣ | Hold down the [Alt]key and press the [Down Arrow] key to nudge the drawing forward. Doing so moves the drawing very slightly forward. If you press on the key several times, the drawing will move forward even more. You can also use the [Up Arrow] key to send the drawing backward. |
| 4. | Repeat this process until every piece is connected. |
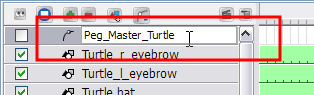
A good element to add to your puppet is a Master Peg. This is a trajectory on which you attach your puppet to make it travel through your scene. t is also used when you want to scale the entire character up or down without doing it on each individual piece. For example, you could animate your puppet walking on the spot then use the Master Peg to get it to move from left to right.
To add a Master Peg:
| 1. | In the Timeline view, click the Add Parent Peg  button. button. |
| 2. | Double-click the new Peg and name it myCharacterName-Peg. |
| 3. | In the Timeline view, select all your puppet's layers. |
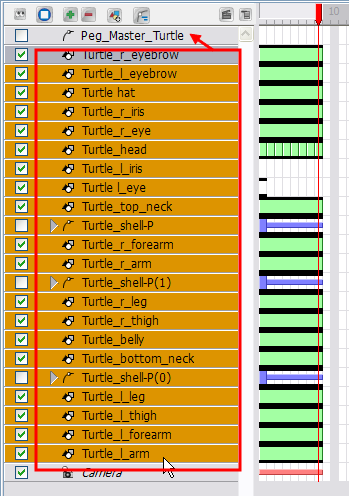
| 4. | Drag the selection ONTO the new peg. |
All the layers are connected to the peg and moved slightly to the right.
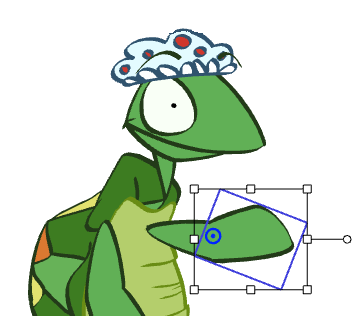
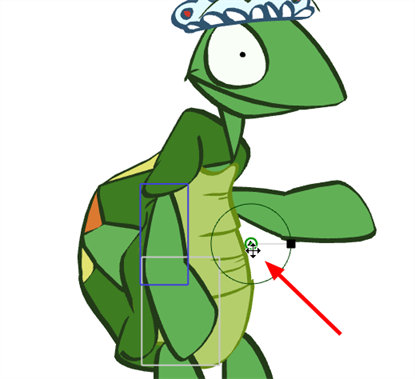
In order for your pieces to rotate properly, it is important to set the pivots at the right location. The pivot is the point from where the body part will rotate, they generally correspond to an articulation. To know where to position a pivot point, think of your own body. If you are moving an arm, notice that your own arm rotates from the shoulder. So, the pivot point for the puppet's arm must be located at the shoulder. The pivot point for the forearm will be the elbow, etc.
You can apply this technique to anything you want to animate that contains a joint or pivot. For example, if you are animating a spider, study a real spider or a film of a spider moving to determine where you should place the pivot points correctly in your animation.
To position the pivots:
| 1. | In the Animation Tools toolbar, select the Rotate  tool. tool. |
| 2. | In the Timeline or Camera view, select the first layer on which to set the pivot. |
| 3. | In the Camera view, click the green pivot point and drag it to a new position. |
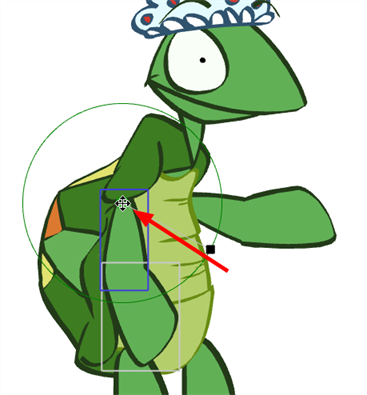
| 4. | In the Camera view, rotate the part to see if the point is well positioned. If not, relocate it. |
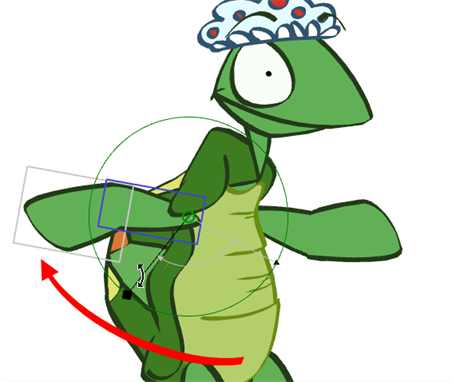
| 5. | Repeat this process for each piece. Do not forget to set a pivot for the eyes and mouth. This is generally located at the centre of the drawing. |
Do not forget to do this for your master peg. Positioning the pivot between the feet is often a good option.