Preferences
To customize your interface, you will use some of the preferences located in the Interface category.
Interface Preferences
To customize your interface, open your preference panel and select the interface tab.
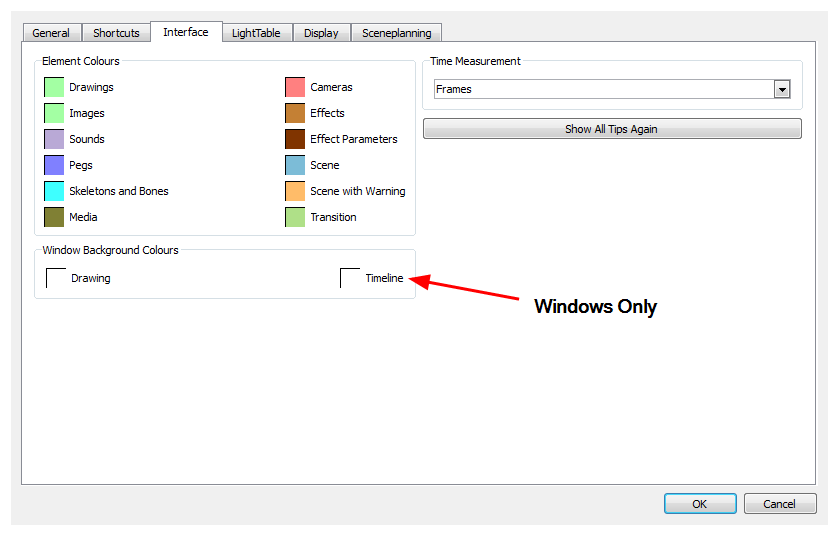
Element Colours
Double-click on the colour swatches to modify the colour of the different elements listed in the section. For example, you can change the colour of the Camera in the Timeline view.
Window Background Colours
Double-click on the Drawing or Timeline colour swatch to modify the colour of the background in the Drawing or Timeline view. If you do not want to have white as a background colour and would prefer to use a grey colour, change the colour swatch to grey.
Show All Tips Again
Toon Boom Studio prompts you to provide information about certain situations. You can select the Do Not Show This Message Again option to avoid getting message prompts.
If you want to see these messages, click Show All Tips Again.
Keyboard Shortcuts
To speed up your work, all of Toon Boom Studio's keyboard shortcuts can be customized.
You can customize most of the shortcuts by opening the Preferences panel and going to the Shortcuts tab.
To set a shortcut:
| 1. | Open the Preferences panel. |
| 2. | In the Preferences panel, select the Shortcuts tab. |
| 3. | In the Category list, select the menu containing the command you want to modify. |
| 4. | In the left window, select the command to modify. |
| 5. | Click the shortcut button to modify the shortcut. The currently assigned shortcut is displayed on this button. If no shortcut is currently assigned for the selected command, the word "None" is displayed instead. |
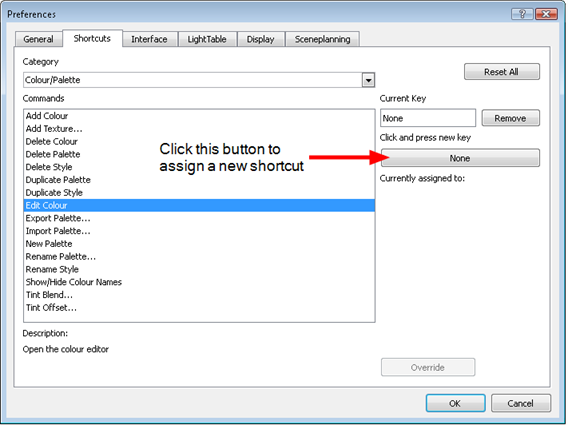
| 6. | On your keyboard, press on the desired key for the new shortcut. |
| ‣ | To remove any keyboard shortcut associated with a command, click Remove. |
| ‣ | To reset all the keyboard shortcuts to their default values, click Reset All. |
| 7. | If a keyboard shortcut is already in use, a message appears in the Currently Assigned To window notifying you of the command to which it is already associated. |

| ‣ | Click Override to ignore the previous association and assign the shortcut to the selected command. The other command's shortcut is set to None. |
| ‣ | If you click the OK button before overriding the shortcut assignation, the action is cancelled. |
| 8. | Click OK. |