
Working with Layers
There are many ways to work with layers within your storyboard project.
This section includes the following topics:
| • | Adding Layers to a Panel |
| • | Copying Layers |
| • | Duplicating Layers |
| • | Renaming Layers |
| • | Deleting Layers |
| • | Locking and Unlocking Layers |
| • | Showing and Hiding Layers |
| • | Changing Layer Opacity |
| • | Arranging Layers |
| • | Converting Layers |
| • | Blurring Layers |
| • | Changing the Resolution of Bitmap Layers |
| • | Aligning Layers with the Camera |
| • | Toggling Background Layers |
| • | 3D Object Layer Display |
| • | Setting a Layer Layout as Default |
Adding Layers to a Panel
You can add an unlimited number of layers to a panel.
To add a layer to a panel:
- From the Thumbnails view, select the panel to which you want to add a new layer.
- Do one of the following:
| ‣ | Select Layer > New Vector Layer or New Bitmap Layer. |
| ‣ | Click the New Vector Layer |
Copying Layers
You can reuse drawings from other panels throughout your storyboard. You can also modify drawing objects and transformations after they have been copied to a new layer, rather than redrawing objects that are similar.
When you copy a layer, it is placed on the clipboard, so you can paste it in many different locations if needed.
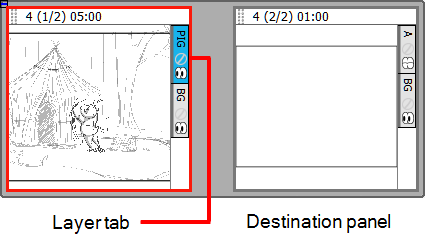
To copy a layer to another panel by dragging:
- Click the tab of the layer you want to copy. You can copy multiple layers simultaneously by holding [Ctrl] (Windows) or [⌘] (Mac OS X) while you make your selection.
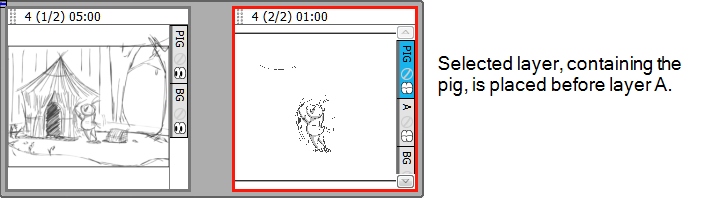
- Drag the selected layer to the layer section of the destination panel. Drop the layers at a specific position to place it in the desired layer order.
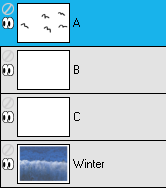
When you copy a layer, it retains its original layer name in the new panel. If a layer with the same name already exists, then you will be prompted to give it a new name or overwrite the existing layer.
For example, if layer A is copied to a panel, where a layer A already exists, the copied layer will be named A_1 by default. If it is copied into the panel a second time, the new layer will be named A_2.
To copy a layer to another panel by using copy and paste:
- Select the layer you want to copy. You can copy multiple layers simultaneously by holding [Ctrl] (Windows) or [⌘] (Mac OS X) while you make your selection.
- Do one of the following:
| ‣ | Select Layer > Copy Layers. Select the destination panel, and from the top menu, select Layer > Paste Layers. |
| ‣ | Right-click the layer tab and select Copy Selected Layers. Select the destination panel, right-click the layer tab and select Paste Layer. |
Duplicating Layers
Duplicating layers is a quick way to do a quick copy and paste in one operation. Unlike copying a layer, you cannot paste multiple copies of a layer on other panels. Duplicating layers is only available within one panel. Duplicated layers retain their names and are appended with a number.
To duplicate a layer:
- Select a layer and do one of the following:
| ‣ | Right-click the layer and select Duplicate Selected Layer. |
| ‣ | In the Stage view or Layers panel, click the Duplicate Selected Layer |
| ‣ | Select Layer > Duplicate Layers. |
Renaming Layers
When layers are named appropriately, you can work faster and keep track of all the layers.
To rename a layer:
- Select the panel with the layer you want to rename.
- Do one of the following:
| ‣ | Select Layer > RenameLayers. |
| ‣ | Right-click the layer’s tab and select Rename Layer. |
| ‣ | Double-click the layer tab. |
- In the Change Layer Name dialog box, type in a new name for the layer.
Deleting Layers
You can delete layers you no longer need. This keeps your project clean and tidy.
To delete a layer from a panel:
- Select a layer.
- Do one of the following:
| ‣ | Select Layer > DeleteLayer. |
| ‣ | Right-click the layer’s tab and select Delete Layer. |
| ‣ | In the Layer toolbar, click the Delete Layer |
| ‣ | From the Layers panel, click the Delete Layer |
| ‣ |
 button. button. |
Locking and Unlocking Layers
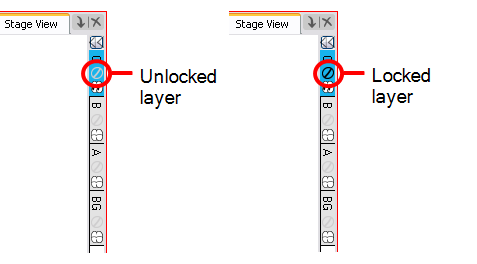
You can lock the currently selected layer to protect any objects on it from being changed. Once locked, you can unlock the layer to make changes to any objects on it.
To lock or unlock a layer:
- Select the tab of the layer you want to lock or unlock.
- Click the Lock icon, located directly under the layer name.
Other ways to lock or unlock a layer:
| • | Select Layer > Lock/Unlock Layers. |
| • | In the Layer toolbar, click the Lock/Unlock Layers |
| • | Press [Alt]+[L]. |
Showing and Hiding Layers
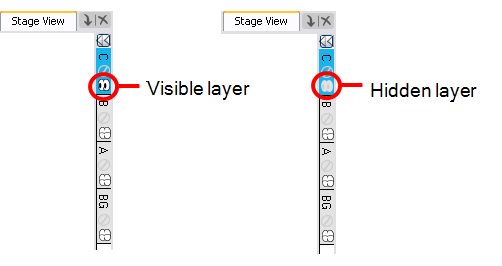
Working with many layers, it may be useful to hide certain layers.
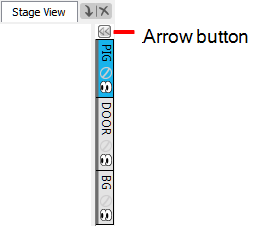
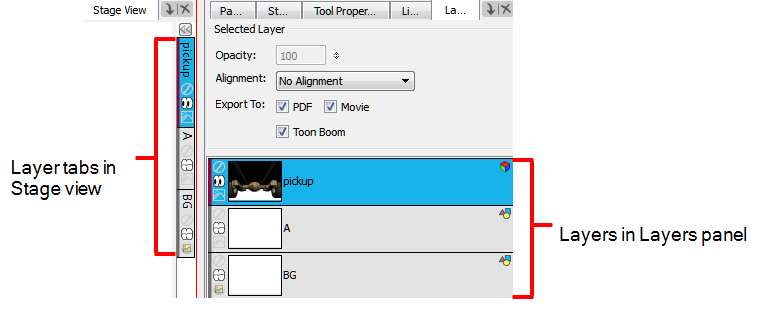
To view layers in the Stage view:
| ‣ | In the Stage view, click the arrow button to expand the layer tabs. |
To show or hide a layer:
- Select the tab of the layer you want to show or hide.
- Do one of the following:
| ‣ | Click the Show/Hide Layer |
| ‣ | Select Layer > Show/Hide Layers. |
| ‣ |
|
Changing Layer Opacity
If necessary, you can modify the opacity of layers.
To change the layer opacity:
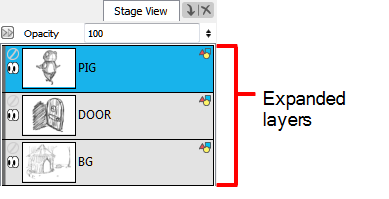
- Expand the layer section by clicking the arrow button.
- Select the layer whose opacity you want to modify.
- Type in a new opacity between 0 and 100, or click in the Opacity field and use the up/down arrows on your keyboard to set the opacity.
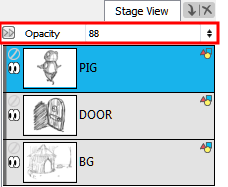
The changes you make are reflected in the Stage view.
Other ways to modify the layer opacity:
| • | Right-click a layer and select Change Layer Opacity. |
| • | Select Layer > Change Layer Opacity. |
In the Change Layer Opacity window that opens, enter a new opacity.
Arranging Layers
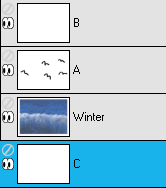
Layers can be rearranged. They can be brought closer to the front or the back in relation to the other layers in a panel. For example, if you want to have a character move to the front of a shot, you can move the character layer above the others. In Storyboard Pro, the layers at the top of the list are displayed above the other layers in the Stage view. The layer order will be reflected in the final export.
There are several different ways to change the order of layers in a panel. You can reorder layers by selecting a layer and dragging it to a new location, or reorder layers through the Layers menu.
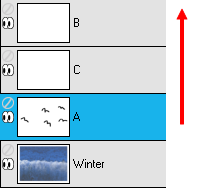
To arrange a layer by dragging:
You can also change the order of layers by clicking and dragging them to a new location, above or below another layer.
- Select a layer to move.
- Drag the layer above or below other layers to change their display priority in the Stage view.
To arrange a layer using the Layers menu:
- Select a layer to modify.
- Select one of the following:
| ‣ | Layer > Arrange > Bring Layer to Front to move the selected layer in front of all other layers in the current panel. |
| ‣ | Layer > Arrange > Bring Layer to Forward to move the selected layer up one spot in the current panel. |

| ‣ | Layer > Arrange > Send Layer to Back to move the selected behind all other layers in the current panel. |

| ‣ | Layer > Arrange > Bring Layer Backward to move the selected layer down one spot in the current panel. |

Converting Layers
If you started with one type of layer, such as vector, you can always switch it to use a bitmap layer and vice versa.
To convert a layer:
- Select one or more layers to convert.
- Do one of the following:
| ‣ | Right-click the selected layer and select Convert Vector Layer, Convert to Bitmap Layer or Convert to Drawing Layer. |
| ‣ | Select Layer > Convert Vector Layer, Convert to Bitmap Layer or Convert to Drawing Layer. |
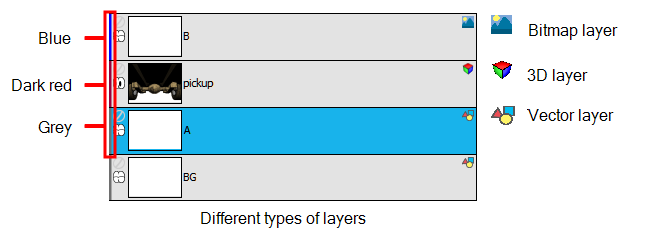
The layer is converted as indicated by the layer indicated colour and icon.
Blurring Layers
If the layer you want to blur is on a vector layer, you must first convert it to a bitmap layer
To blur a bitmap layer:
- Select the layer(s) to blur.
- Right-click the layer(s) and select Blur Bitmap Layer, or select Layer > Blur Bitmap Layer from the top menu.
The Blur Bitmap Layer dialog box opens.
- Enter a value from 0 to 100 to blur the contents of the layer.
Changing the Resolution of Bitmap Layers
You can change the resolution of bitmap layers to better suit the needs of your project.
To change the resolution of a bitmap layer:
- From the Layers panel, select a bitmap layer whose resolution you want to change.
- Right-click the layer and select Change Bitmap Layer Resolution, or select Layer > Change Bitmap Layer Resolution from the top menu.
The Change Bitmap Layer Resolution dialog box opens. The current project resolution is displayed.
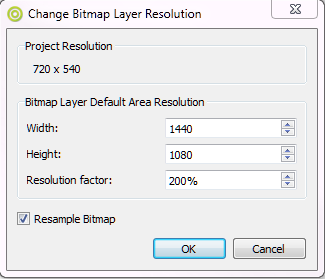
- Adjust the Width, Height, or Resolution Factor. These three parameters are linked; changing one, changes the others.
- Select the Resample Bitmap option to change the resolution of the bitmap layer without changing the area it covers.
Aligning Layers with the Camera
While working with layers, you may want to align specific layers with the camera, so that any time you adjust the camera, the layer is always in full view. You can set a different alignment for each layer. The default behaviour is that the camera is not aligned with layers.
To align a layer with the camera:
- In the Layers panel, select a layer to align with the camera.
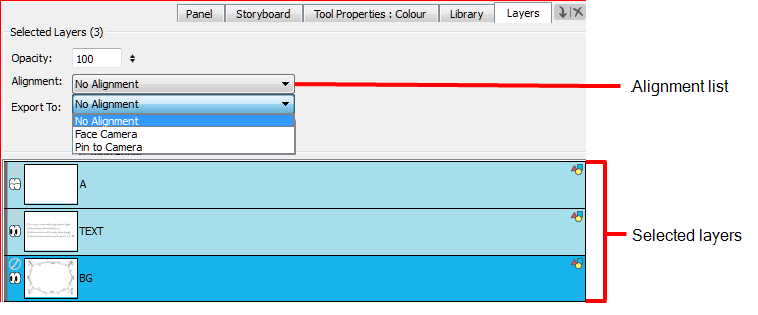
- From the Alignment list, select one of the following:
| ‣ | No Alignment: The layer is independent of the camera. |
| ‣ | Face Camera: The layer is oriented to face the camera, so that it rotates around its pivot point to always face the camera, but does not move with the camera. |
| ‣ | Pin to Camera: The layer is oriented to the camera's perspective. Essentially the layer always moves with the camera. |
Toggling Background Layers
Sometimes it is helpful not to have onion skinning applied to certain layers while working. You can set certain layers as background elements, so they will not interfere with onion skinning.
To set a layer as a background element:
- In the Onion Skinning toolbar, click the Onion Skinning
 button.
A Toggle Background Layer button appears on each layer.
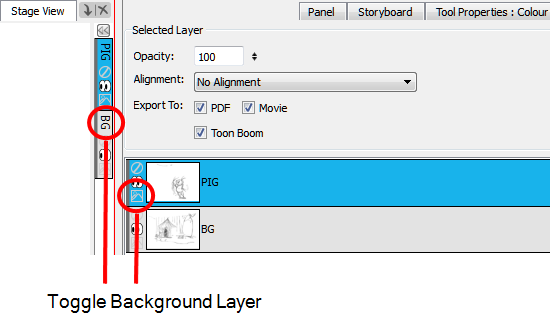
- To set a particular layer as a background element, do one of the following:
| ‣ | Click the Toggle Background Layer button. |
| ‣ | Select Layer > Toggle Background Layers. |
This layer will not have onion skinning applied to it.
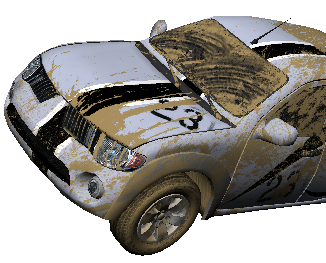
3D Object Layer Display
Each 3D object consists of multiple layers, which you can display in Storyboard Pro. It contains the following layers:
| • | Graphics that add texture to the flat areas (Shaded). |
| • | Flat areas to which textures will be applied (Flat). |
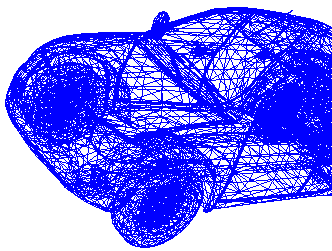
| • | Boundaries that define the edges of the object (Wireframe). |
|
Shaded |
Flat |
Wireframe |
|
|
|
|

To change the display of a 3D object:
- Open the panel that contains your 3D object.
- Select the layer that contains your 3D object from the Stage view or Layers panel.
- Right-click the layer and select one of the following:
| ‣ | Shaded: The 3D object displays the textures that cover its wireframe. |
| ‣ | Flat: The 3D object displays the surfaces that cover its wireframe. |
| ‣ | Wireframe: The 3D object displays the lines that define the area covered by the object. |
| ‣ | Wireframe on Shaded: The 3D objects displays the textures with its wireframe on top. |
| ‣ | Wireframe on Flat: The 3D objects displays the surface with its wireframe on top. |
Setting a Layer Layout as Default
Once you set up a layer layout in a panel, you can select that panel and save this layout as the default layout to use whenever a new panel is added.
To set a layer layout as the default:
| ‣ | Select the layer to use as the template and select Layer > Set Layers Layout as Default. |