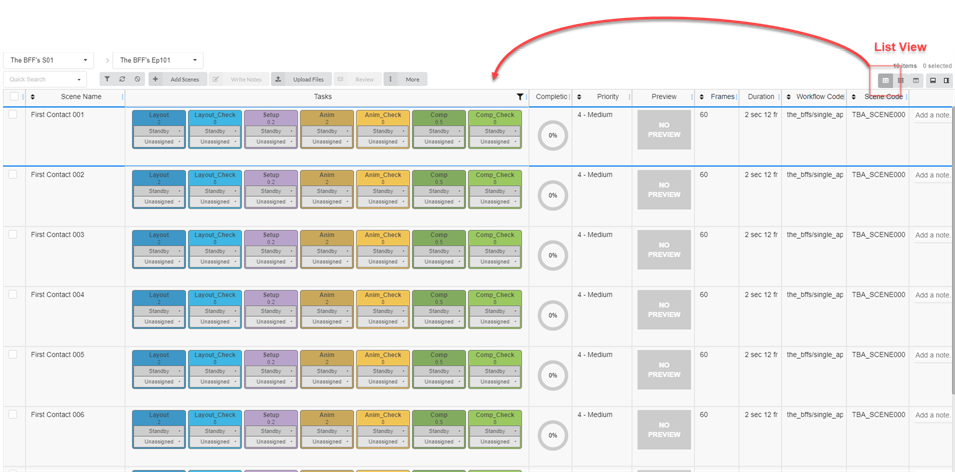
Production Toolbar
A lot of the operations in the Production and Asset pages are performed through the Production toolbar.

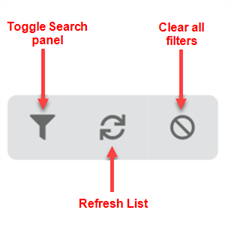
Search and Filtering Tools
You can use the Search field and filtering tools to only display scenes and assets matching specific criteria.
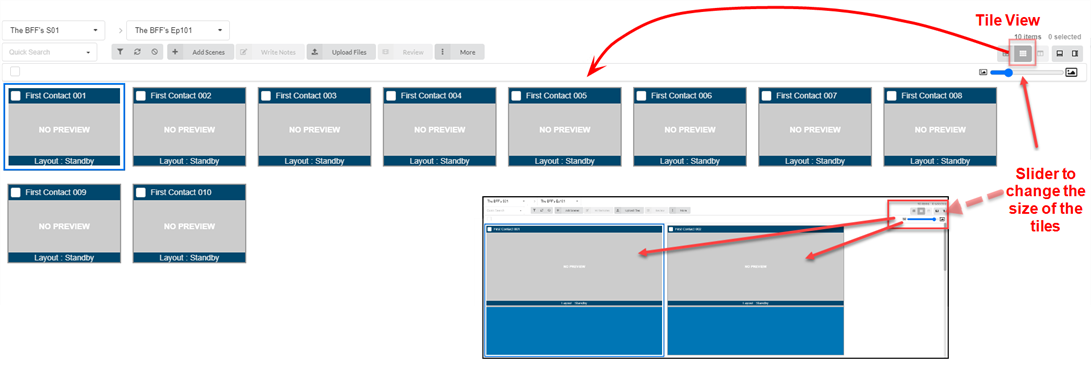
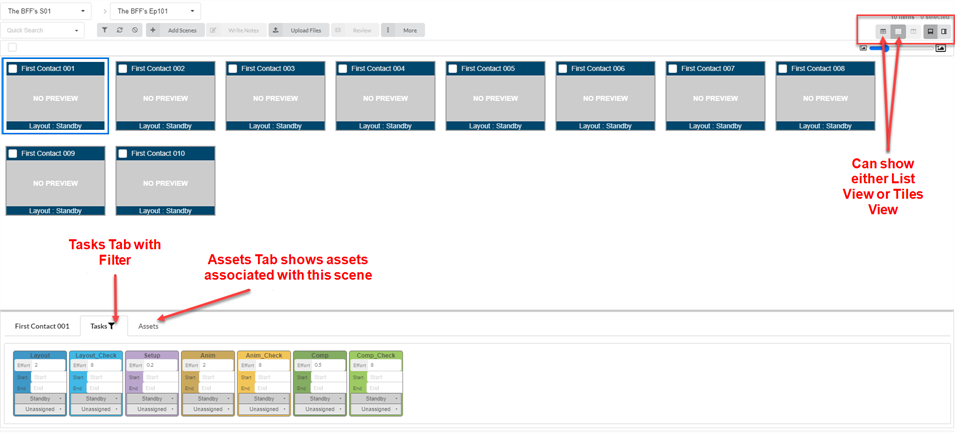
View Tools
You can change the display style of the Production and Asset tables to include more or less information. For example, you can open the detail side panel or change the view style to thumbnails.
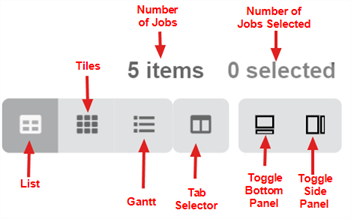
List button

Tiles button

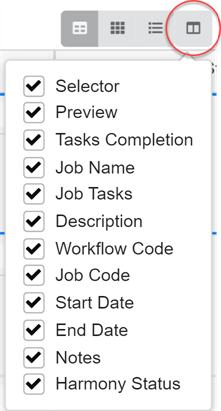
Column Selector
With the Column Selector you can choose how many columns are displayed in your main list. Uncheck the boxes on the ones you wish to hide.
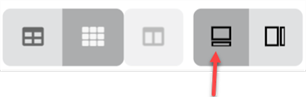
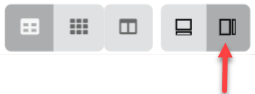
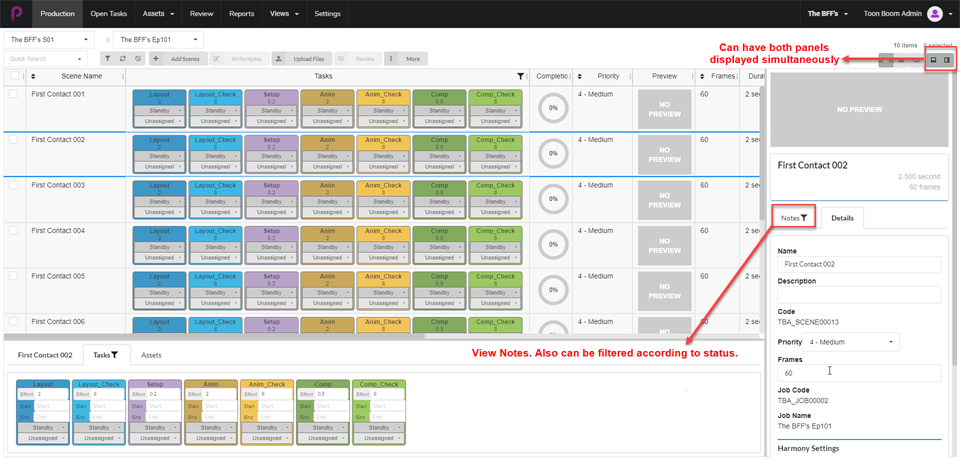
Toggle Bottom and Side Panels
You can display additional information for each selected job, scene or asset using the side and bottom panel.
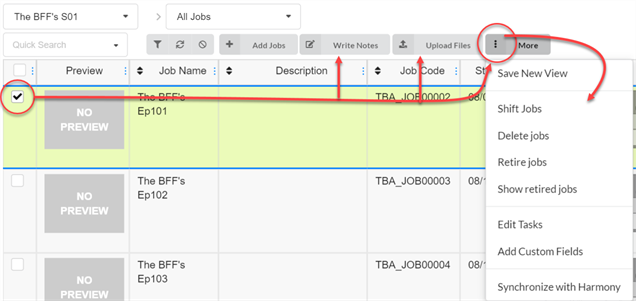
Additional Options for Selected Items
When you enable the checkbox on a Job, more options are available to edit your selection.
Adding and Removing Columns
Depending on your workflow needs, you can add and remove columns from the production or asset list.
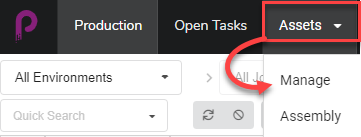
- In the top menu, click Production or Assets > Manage.
The assets list opens.
- In the toolbar in the top-right corner above the assets list, click on the Manage Columns
 icon.
icon.
A menu appears with all the available column options for the asset list. Columns that are currently displayed in the list are checked, and those that are hidden are unchecked.

- Check each column box that you wish to add, and uncheck each column box that you wish to remove.
When adding columns, the newest column added will by default appear on the right.
You should always keep the Selector column enabled. This column contains a checkbox for each asset, allowing you to perform certain actions and select several assets simultaneously.
Creating Views
You can create custom views and share them with users to display the Production or Asset list using a specific set of columns and filtering options. You can create as many views as needed.
- Select Production or Assets > Manage.
- From the page toolbar, click on the Column Selector
 icon.
icon. - Check or uncheck any boxes of columns you wish to display or hide.
NOTEThe order of the tabs will be displayed from left to right as you check the boxes in that order. You can edit this later by grabbing the name in the column header and sliding it left or right to switch the order.
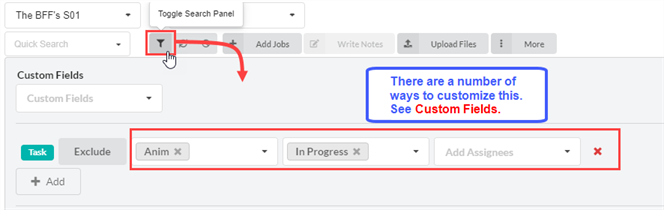
More custom fields can be entered using the Toggle Search Panel.
- When finished, in the page toolbar, go to More > Save New View.
The Save New View window opens.
- In the Name field, type in a name for the new view.
- Check or uncheck the following options:
- Save Current View Settings Only: saves the columns and ordering of columns in the view.
- Save Current Environment or Job: save the current location of the view.
- Save Search Data: saves the search data.
- In the drop-down menu, select one of the following:
- Add Link to Views: adds the link to views that you can only see.
- Add Link to Shared Views: adds a link that everyone in the production can see and use.
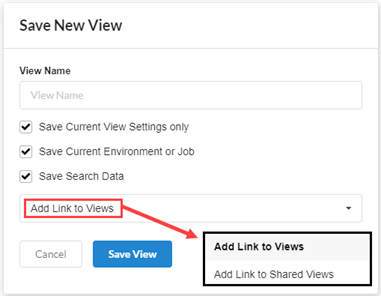
- Click Save View.
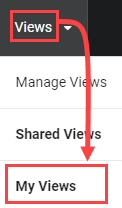
Under Shared Views in the Views tab you will see the shared views from the current production.
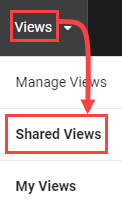
Under My Views from the Views tab you will see your personal saved views from the current production.