Uploading a Storyboard Pro Scene List
When creating a project in Storyboard Pro, the scene list is already created and an animatic movie preview for each one of these scenes can easily be exported. You can use Producer Link to automatically create scenes in Producer and upload the matching movie preview. This process is very handy if you are working on a project using Storyboard Pro but are not using Harmony Server.
-
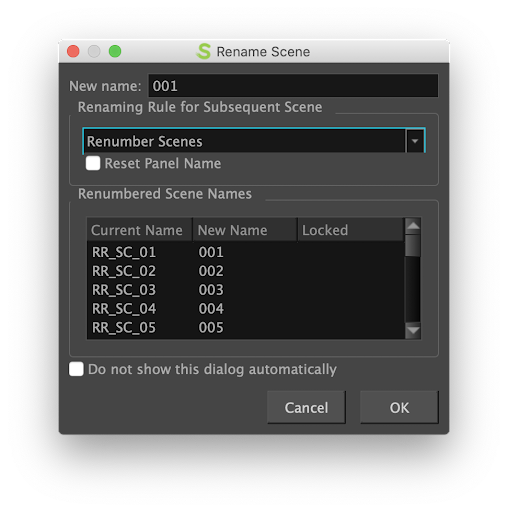
In Storyboard Pro, make sure your scenes are named with leading zeros (example: 01, 02, 03 or 001, 002, 003 and not simply 1, 2, 3). You can use the Preferences > Naming Automatically Add leading Zeros and Minimum number of characters as well as the function Storyboard > Rename.

-
Save your SBP Project.
-
From Storyboard Pro, select File > Export > CSV.
-
In the Export to CSV dialog box, in the CSV Export Options section, disable the Include Transitions option.
-
Click Export.

-
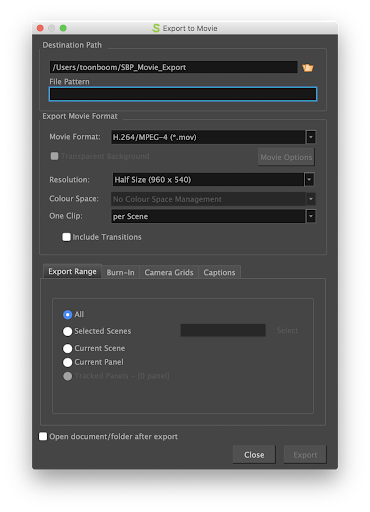
From Storyboard Pro, choose File > Export > Movie.
-
Select a Destination Path.
-
Leave the File Pattern field empty.
-
In the One Clip field, select Per Scene.
-
Click Export.
-
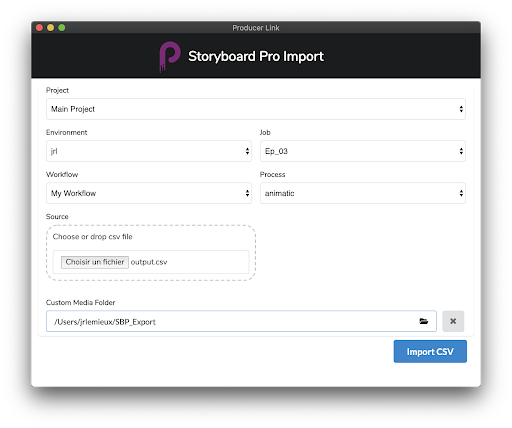
In Producer Link, select Upload > Storyboard Pro Import.
-
In the Project field, select the Producer project containing the environment you will be creating scenes for.
-
In the Environment field, select the corresponding environment.
-
In the Job field, select the corresponding job (episode, sequence, etc.).
-
In the Scene field, select the scene you are linking an asset to. As you start typing the name, existing scenes will be populated. Note that the scene must already exist in Producer.
-
In the Workflow field, select the scene workflow that will be associated to the scenes.
-
In the Process field, select the Process (task) you are linking your scenes to, most likely Layout or Animatic.

-
In the Customer Media Folder field, browse to the folder containing the rendered movie files.
-
Click Import CSV.
-
You can monitor the import process by scrolling down.
-
In your Producer, refresh your Production Page to see the new scenes.