Shaping a Path
A motion path is as easy to manipulate as shaping the vector points of a drawing layer in the Camera view. One important concept to understand is that a trajectory contains both keyframes and control points. Both can be used to shape a path, each have their own significance and behaviour, however only keyframes appear in the Timeline view.
| • | Keyframe: A marker that signifies a change (size, position, direction, etc.) along the normal of a path or function, and has an exact position and frame. |
| • | Control Point: Has a position but no fixed frame or timing. It is mainly used to deform a trajectory. There are no velocity handles available on a control point. The velocity segments are set between keyframes only, making curves and trajectories much smoother. Control points can only be added on a 3D path. |
Refer to the Library chapter to learn how to create and import Symbols.
You can edit keyframes and control point parameters, such as the position, continuity, bias, tension and lock-in-time using the Coordinates and Control Point view.
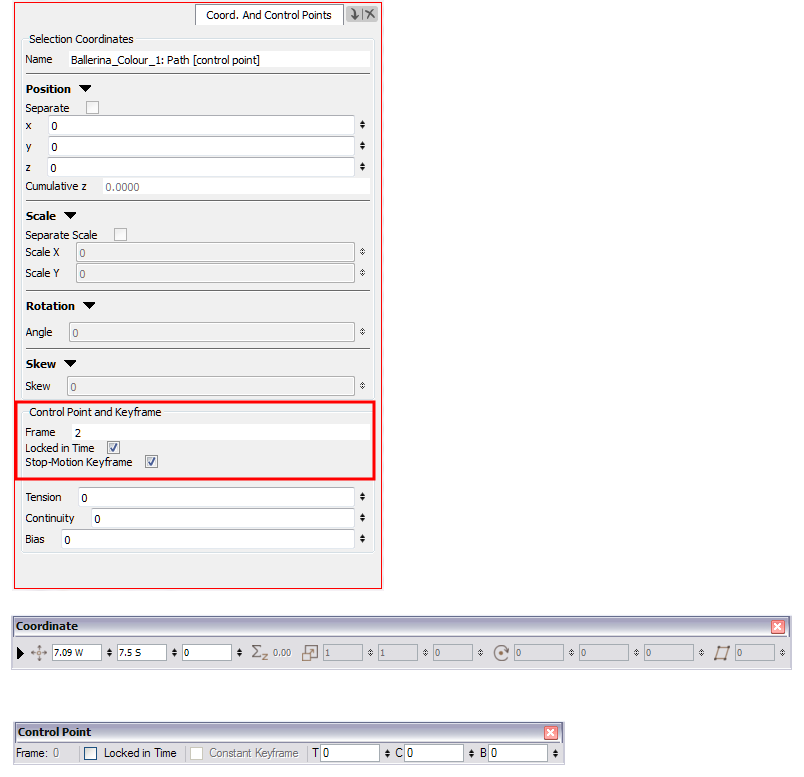
Coordinates and Control Points View
Each time a keyframe or a control point is selected in the Camera, Timeline or Xsheet view, its parameters appear in the Coordinates and Control Points view. You can also see the same information in the Coordinate and Control Point toolbars.
Adding Control Points
A control point has a position but no fixed frame or timing. It is mainly used to deform a trajectory. There are no velocity handles available on a control point. The velocity segments are set between keyframes only, making curves and trajectories much smoother.
A control point will not show in the Timeline view because it has no precise frame on which to be displayed. It appears on the function curve and in the Camera view. There are different ways to add control points:
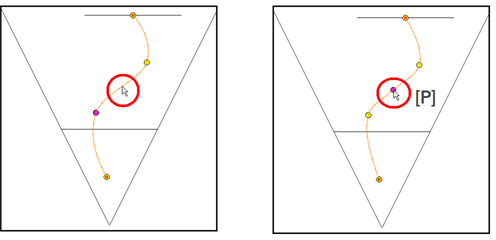
| • | Display the trajectory in the Camera view and press [P]. |
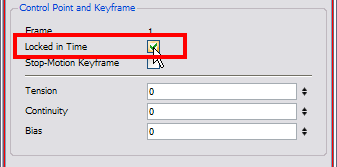
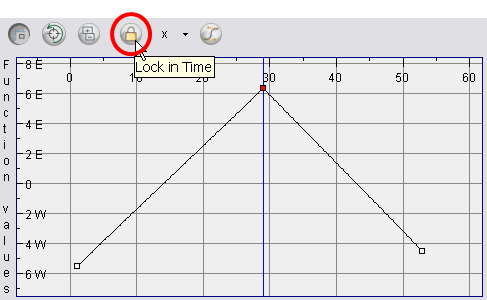
| • | Add a keyframe on the function curve and deselect the Lock in Time option. |
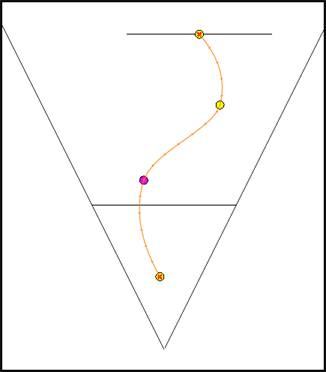
The control point is displayed as a circle.
You can display your trajectories in the Camera, Top and Side views to better understand the way the elements move in your scene. This also makes it easier to modify them. You can display a peg or layer’s controls to see where your elements are going, modify the curve, and add keyframes and control points.
To add a control point on a trajectory:
| 1. | In the Timeline or Camera view, select the peg or layer on which you want to add a control point. |
| 2. | If the selected element’s trajectory is not displayed, select View > Show > Control in the top menu or press [Shift] + [F11]. |
The Trajectory appears in the Camera, Top, Side and Perspective views.
| 3. | Add control points on a 3D path trajectory by placing the cursor where you want to add the point and pressing [P]. |
Switching between Keyframe and Control Points
To switch between keyframe and control Points:
| 1. | In the Camera view, using the Transform tool |
| 2. | To convert the point: |
| ‣ | In the Coordinates and Control Point view, enable or disable the Locked in Time option. |
| ‣ | In the top menu, select Animation > Lock in Time or press [Alt] + [L]. |
| ‣ | In the Function view or Function editor, select the keyframe to convert and click the Lock in Time |
Related Topics
| • | Adjusting the Tension, Bias and Continuity |
| • | Modifying a Path in the Camera View |