Subnode Override Node
When manipulating 3D models, by default, it is only possible to animate the transformations on the whole model. Transformations on their individual parts (subnodes) are static. These subnodes can be transformed independently in order to pose and animate 3D models that have been imported into Harmony. In order to be able to animate the subnodes in a 3D model, either a Subnode Animation node or Subnode Override node will need to be applied to the 3D model in the Node view. These nodes will store the keyframes for each subnode that you pose or animate which will be reflected on the timeline.
The Subnode Override node will enable you to pose and animate the subnodes contained within your 3D model as well as export them to Maya. The Subnode Override node takes a 3D model in its input port. As soon as a 3D model is connected to a Subnode Override node, its subnodes become animatable individually. Once you start animating the model's subnodes, the node outputs the 3D model with its subnodes animated.
Unlike the Subnode Animation node, the Subnode Override node operates using the same units as in Maya. You can export and import subnode information using an .atom, .usda or .usdz file directly through the Subnode Override node. This will allow you to work on files symbiotically between Harmony and Maya, transferring files back and forth and being able to continue working on the same 3D model, poses and animation between the two softwares.
-
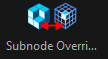
In the Node Library view, select 3D in the sections list and locate the Subnode Override node.
-
Drag and drop the Subnode Override node from the Node Library into the Node view.
-
In the Node view, connect the Subnode Override node under the element node of your 3D model.
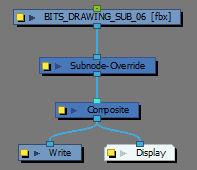
The Subnode Override node automatically appears in the Timeline view, under the layer of the 3D model.
-
In the Timeline view, select the frame where you want your first animation keyframe to be created.
-
In the Tools toolbar, select the Transform tool.
-
Do one of the following:
-
In the Camera or Perspective view, click on your 3D model once to select the whole object, then click again on the part you wish to animate to select it.
-
In the 3D Graph view, select the subnode you wish to animate.
-
-
Use the Transform tool to move, rotate or scale the individual part.
The subnode appears in the Timeline view.
-
In the Timeline view, expand the subnode layer to view its properties.
A keyframe appears in the first frame, recording the movement that was just made.
-
Continue adding keyframes and making changes to the properties values to animate the individual part of the 3D model.
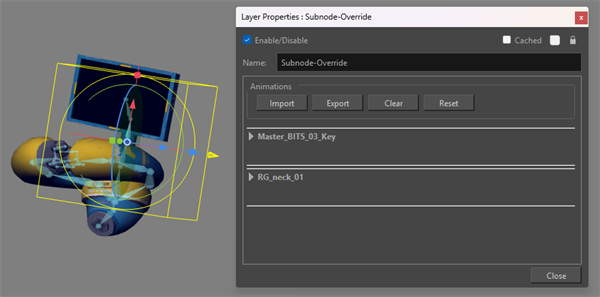
All the animatable 3D model subnodes will appear on a list in the Subnode Override Layer Properties when a keyframe is made. Expand any of the subnodes in the list to view its individual properties.
For more information about the Subnode Override Layer properties, see Subnode Override Layer.
The subnodes that appear on the subnode list can be removed within the Subnode Override Layer Properties.
The options to remove subnodes from the subnode list in the Subnode Override Layer Properties are the following:
-
Clear: Will remove all subnode keyframes from the timeline. However, the affected subnodes will remain on the subnode list contained in the Subnode Override Layer Properties.
-
Reset: Will remove all subnode keyframes as well as remove all subnodes from the subnode list contained in the Subnode Override Layer Properties.
Import
You can import 3D files containing subnode information exported from Maya directly into your scene through the Subnode Override node. The 3D files will contain all the keyframes and subnode information applied to the 3D model in Maya.
You can import 3D subnodes using one of the following file formats:
-
Maya ATOM file (.atom)
-
USDA (.usda)
-
USDZ (.usdz)
-
In the Node Library view, select 3D in the sections list and locate the Subnode Override node.
-
Drag and drop the Subnode Override node from the Node Library into the Node view.
-
In the Node view, connect the Subnode Override node under the element node of your 3D model.
The Subnode Override node automatically appears in the Timeline view, under the layer of the 3D model.
-
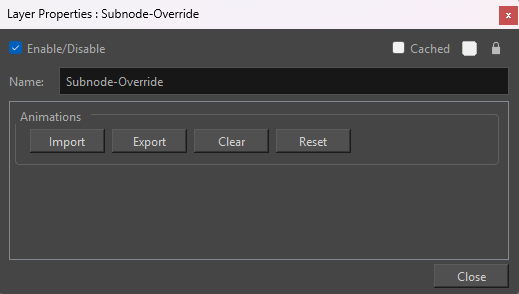
Click the yellow square on the Subnode Override node to access the Subnode Override Layer Properties.
The Subnode Override Layer Properties dialog will open.
-
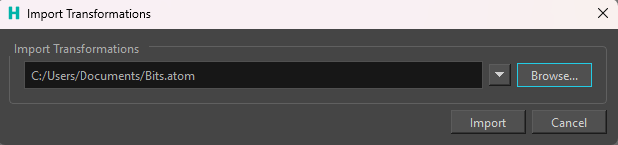
Click Import.

The Import Transformation dialog will appear.
-
Click Browse.
The File Explorer window will open.
-
Select the 3D file you wish to import.
-
Click Import.
Upon import, the poses and/or animations that are contained within the 3D file will be applied to the timeline automatically. You can scrub through the animation on the timeline as well and use the Subnode Override layer to adjust your poses or create new ones within the animation.
Export
You can export and package 3D files containing subnode information directly from yourHarmony scene through the Subnode Override node. The 3D file that Harmony will write will contain keyframes and subnode information that were applied to the 3D model. The 3D model can be imported directly into Maya containing all transformations applied to the 3D model in Harmony.

You can export your subnodes using one of the following file formats:
-
Maya ATOM file (.atom)
-
USDA (.usda)
-
USDZ (.usdz)
-
In the Node Library view, select 3D in the sections list and locate the Subnode Override node.
-
Drag and drop the Subnode Override node from the Node Library into the Node view.
-
In the Node view, connect the Subnode Override node under the element node of your 3D model.
The Subnode Override node automatically appears in the Timeline view, under the layer of the 3D model.
-
Click the yellow square on the Subnode Override node to access the Subnode Override Layer Properties.
The Subnode Override Layer Properties dialog will open.
-
Click Export.

The Export Transformation dialog will appear.
-
Click Browse.
The File Explorer window will open.
-
Select the location where you would like to export your 3D file.
-
Click Export.
Once exported, your subnode information contained within your 3D model will be packaged in a way that can be opened, read and manipulated in Maya. This allows you to continue working on 3D models that have been manipulated within Harmony without enduring any delays in the pipeline.
When performing an export, there are two additional options that are available to you. You have the option to Overwrite without asking and Bake Animated Values. By default, these options are both disabled.
The Overwrite without asking option enables you to overwrite older files without asking for permission while performing an export. When performing test exports, this option is beneficial as it will allow you to overwrite older files with the same name and file location without requiring repeated authority from you to do so. When disabled, the permission text box will appear when exporting a 3D file that has the same name and file location. However, if the file being exported is writing a brand new file, no permission text box will appear whether the option is enabled or disabled.
The Bake Animated Values option will write a 3D file with a keyframe applied to every frame of your animation. All interpolation and empty cells on your timeline will have a frame applied upon export. The Bake Animated Values option is best utilized when all the animation is complete and the 3D file is being sent back to Maya to perform final renders in the context of the scene. When the Bake Animated Values option is disabled, only the keys made intentionally using the Subnode Override node will be exported.