Creating Selection Presets
As you're animating, you might find that you are constantly selecting the same pegs, drawing layers, bezier points on a deformation envelope, part of a character rig, etc. You can create a preset that automatically selects any defined element or group of elements.
- Add the Scripting toolbar to your interface:
- Go to the top menu and select Windows > Toolbars > Scripting.
- Right-click on the empty space near the top of the interface and from the quick-access menu selecting Scripting.
- Right-click on the empty space near the top of a view and from the quick-access menu selecting Scripting.
- In the Scripting toolbar, click on the Manage Scripts
 button to open the Scripts Manager window.
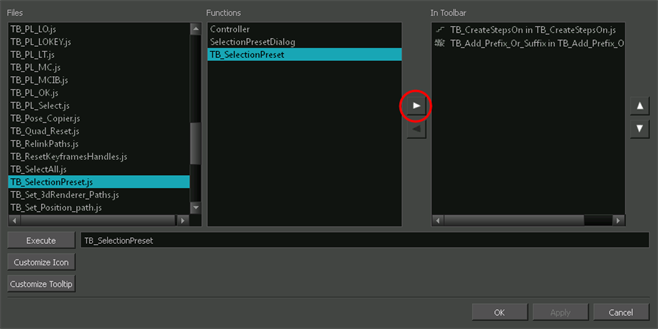
 - In the Scripts Manager, in the Files section, select the file
TB_SelectionPreset.js. - In the Functions section, select
TB_SelectionPreset. - Click on the Add script to toolbar
 button.
 - Click Apply.
- Click OK.
The functions associated with that file appear in the Functions section.
The Add script to toolbar![]() button becomes active.
button becomes active.

The TB_SelectionPreset script ![]() button is added to the Scripting toolbar.
button is added to the Scripting toolbar.
- In the Scripting toolbar, click on the TB_SelectionPreset
 button.
 - In your scene, select an individual element or group of elements. This can include, but is not limited to: pegs, drawing layers, deformation controls, part of a character (such as the entire rig of the head from the Node view).
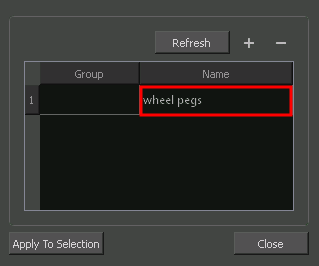
- In the Selection Presets window, click on the plus button.
- Enter a name for the new selection preset in the field provided.
- Click OK.
The Selection Presets dialog window opens.
The Save Selection As Preset dialog box opens.

The new selection preset name appears in the Selection Presets window.

- In the Scripting toolbar, click on the TB_SelectionPreset
 button.
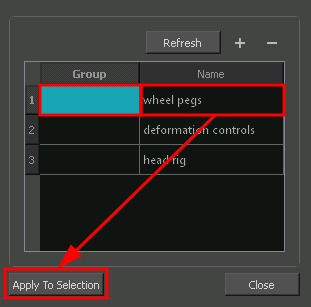
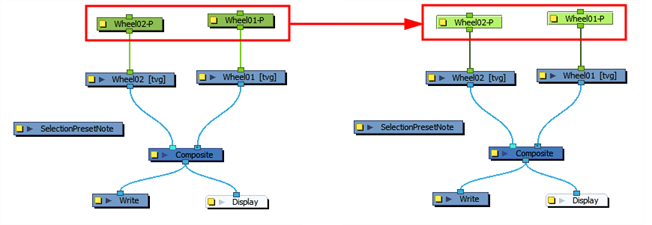
 - Double-click in the Group field next to the Selection Preset you wish to use OR select a preset from the Name column and click on the Apply To Selection button.
The Selection Presets window opens.

The defined selection is selected.

