Manipulating the 3D Object
Once you have imported the 3D model into your scene, you can easily manipulate it to set up your scene. You can even add keyframes, just like any other element, and animate it on a trajectory.
This section is divided as follows:
| • | Working in the Different Views |
| • | Using Peg Nodes to Control the Position of 3D Objects |
Working in the Different Views
Before you can properly view and set up the 3D element in your scene, you will need to use the Perspective and Camera views together, as well as the Top and Side views.
| • | Perspective View |
| • | Camera View |
| • | Top and Side Views |
Perspective View
In the Perspective view, you can see your scene in a complete 3D environment. In this environment, you can set up and animate your 3D model more easily. You can rotate the view on the three axes.
- Hold down ⌘ + Alt (Mac OS X), and click and drag.
Camera View
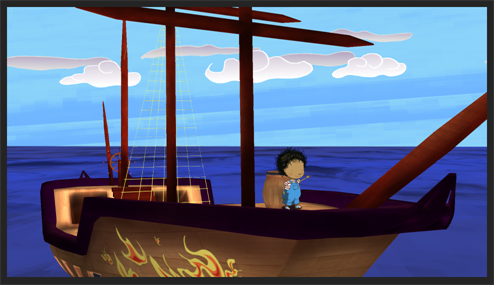
You can preview the position of your 3D model in the Camera view and see what it will look like in the camera frame. You can preview your scene in OpenGL ![]() mode.
mode.
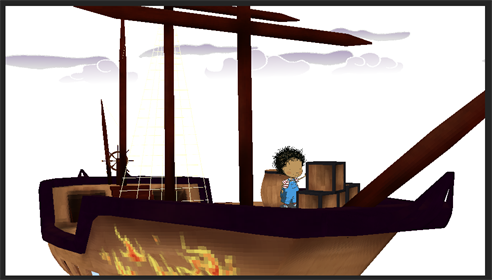
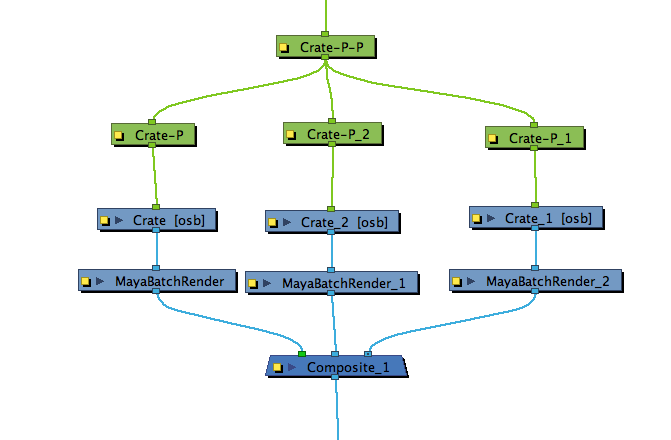
You can view your 3D objects in Render![]() mode, but only basic settings will be used to render the 3D element. To get a fully textured and lit render, you can use Autodesk Maya. If you want to render using your 3D objects using Maya as a background process, before you can view your 3D elements in Render
mode, but only basic settings will be used to render the 3D element. To get a fully textured and lit render, you can use Autodesk Maya. If you want to render using your 3D objects using Maya as a background process, before you can view your 3D elements in Render ![]() mode, you must add a Maya Batch Render node to your Node view and set up your system with the correct path to the rendering utility you will be using. Note that you will need to add your Maya project inside the 3D object's element folder in your Harmony scene. If you do not complete this setup, the 3D model will simply not appear—see Rendering 3D Models with Autodesk Maya.
mode, you must add a Maya Batch Render node to your Node view and set up your system with the correct path to the rendering utility you will be using. Note that you will need to add your Maya project inside the 3D object's element folder in your Harmony scene. If you do not complete this setup, the 3D model will simply not appear—see Rendering 3D Models with Autodesk Maya.
If you want to override the order of your 2D and 3D elements to follow the Composite node ordering rather than the Z-axis order, you can use the Flatten node—see Flatten.
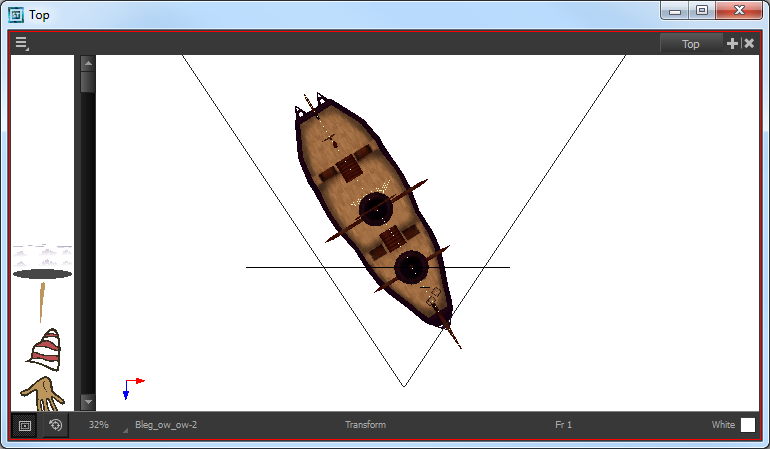
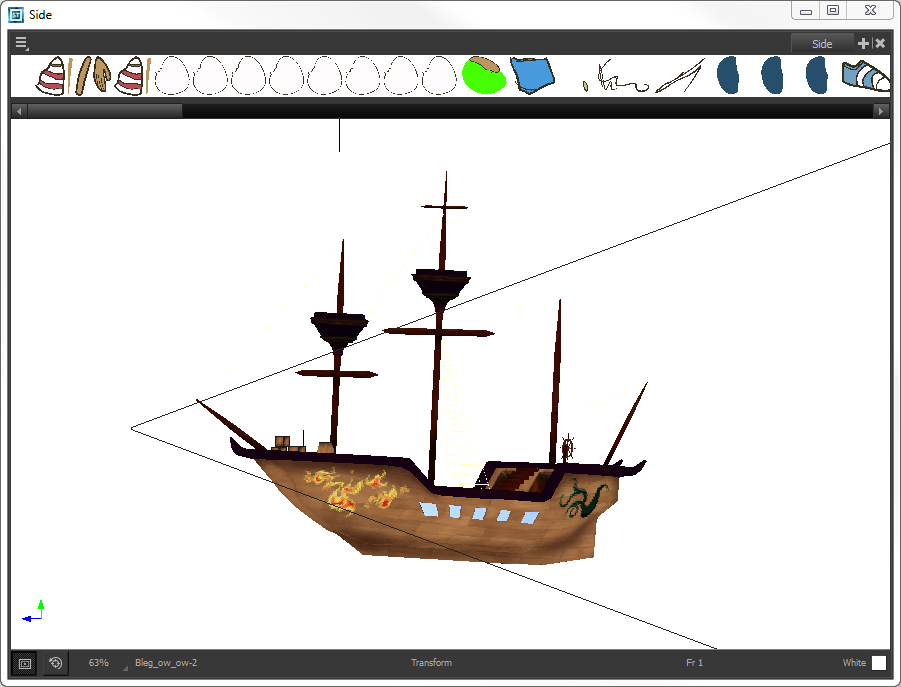
Top and Side Views
The Top and Side views help you position your element in the 3D environment. This can be really helpful for precisely visualizing the actual position of your model without perspective.
Using Peg Nodes to Control the Position of 3D Objects
You can use Peg nodes to control the position of 3D objects, and connect them as you would with 2D layers to create rigs.
Using Transformation Tools to Manipulate 3D Models
Once the 3D option is enabled, your transformation tools automatically become 3D transformation tools. This means you can now manipulate them on the Z-axis as well. The Translate ![]() , Rotate
, Rotate ![]() and Scale
and Scale ![]() tools are found in the Advanced Animation toolbars and the Transform
tools are found in the Advanced Animation toolbars and the Transform ![]() tool can be found in the Tools toolbar. You can use these tools to set up or animate your 3D model.
tool can be found in the Tools toolbar. You can use these tools to set up or animate your 3D model.
You can also set up all these position parameters using the Layer Properties window—see 3D Parameters.
Translate Tool
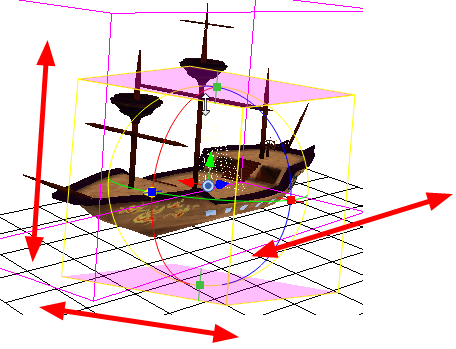
Once you enable the 3D option, the 3D Translate tool becomes available. Direction arrows appear around the pivot points to indicate the different axes.
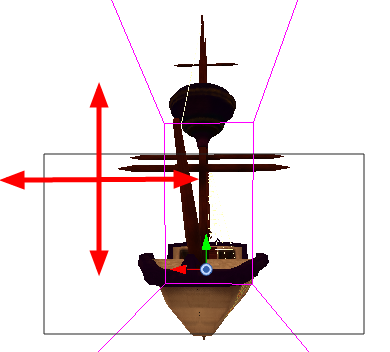
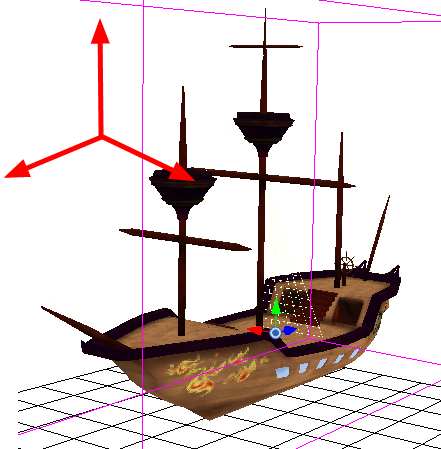
If you click on a direction arrow, you can move a layer on only one axis. If you click anywhere else, the layer can move freely on two axes at once. Once the arrow is selected, it turns pink.
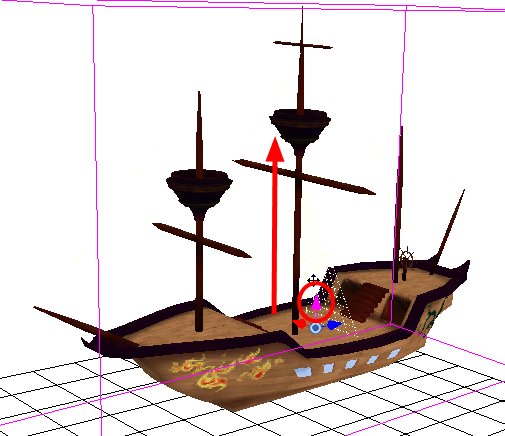
If you move the layers in the Perspective view, it may be difficult to control the motion since you may not have the optimum point of view on your stage to understand the setup. In this case, it is best to use the direction ellipses.
Rotate Tool
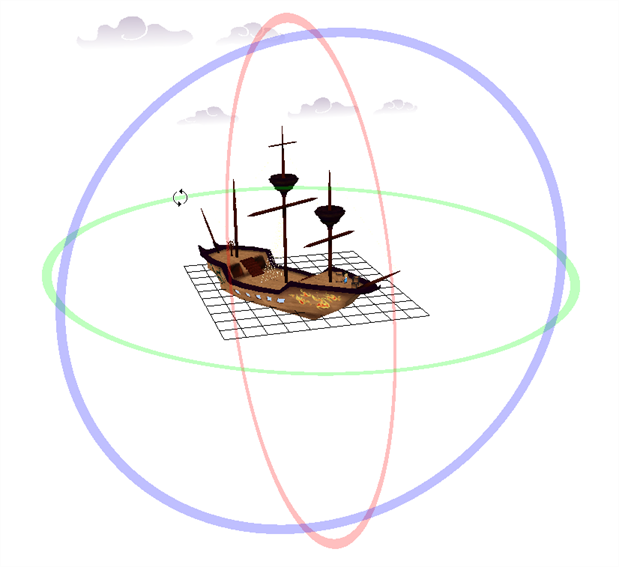
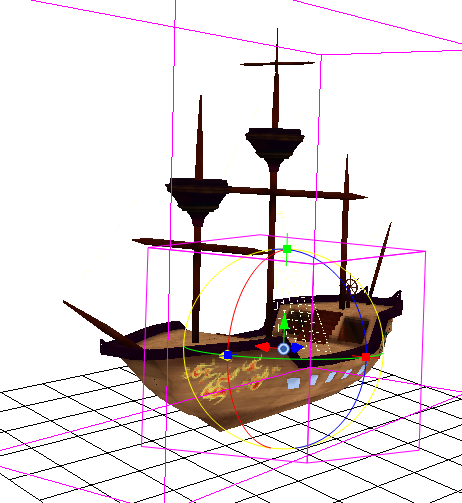
Once you enable the 3D option, the 3D Rotate tool becomes available. A rotation sphere appears around the pivot points to indicate the different axes.
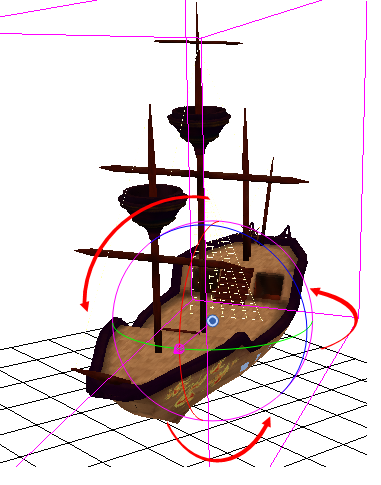
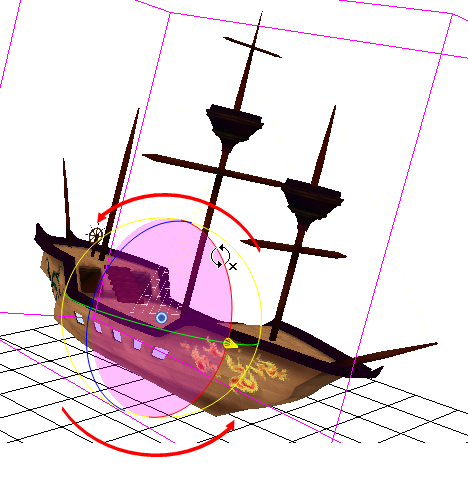
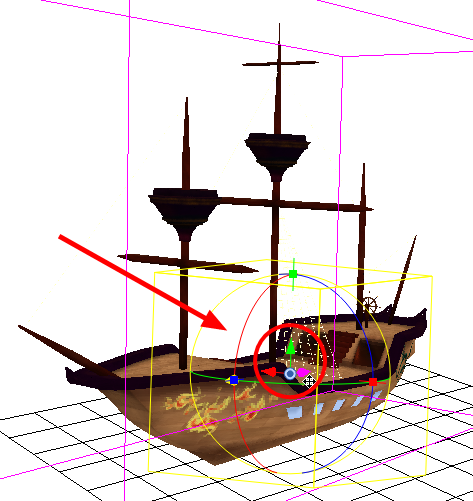
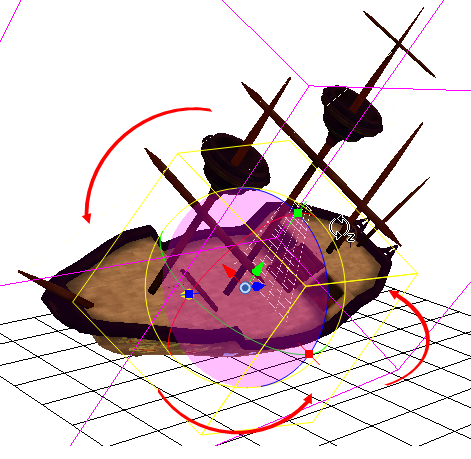
You can click on the direction ellipses to rotate your layer on one axis only. If you click anywhere else, the layer rotates freely on two axes at the same time. When the ellipse is selected, it turns pink.
If you move the layers in the Perspective view, it may be difficult to control the motion since you may not have the optimum point of view on your stage to understand the setup.
Scale Tool
Once you enable the 3D option, the 3D Scale tool is available. You will see one of two things:
| • | A scaling rectangle appears if your drawing is flat. |
| • | A scaling cube appears if your object has some rotated layers around the pivot points, indicating the different axes. If you click and drag on this scaling cube, it will scale proportionally on all axes. |
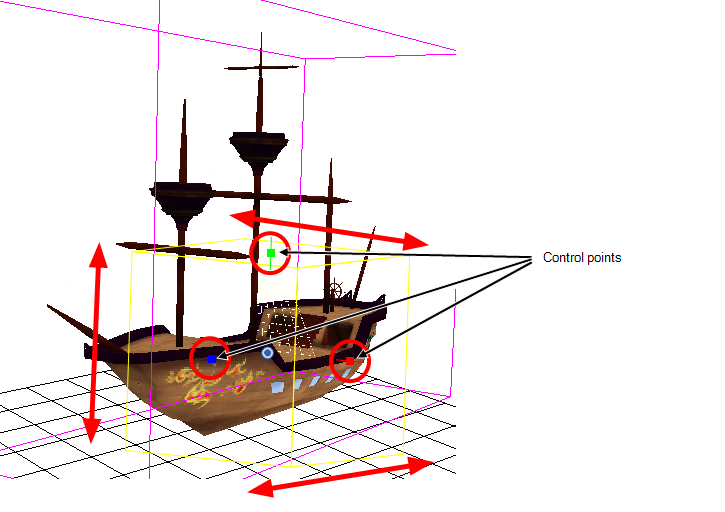
Click on one of the three control points to scale the shape on one axis. Hold down the Shift key to scale the object proportionally. When the control point is selected, it turns pink.
Transform Tool
Once you enable the 3D option, the 3D Transform tool become available. This tool is a combination of the 3D Translate, 3D Rotate and 3D Scale tools.
To translate an element, grab the direction arrows in the same way that you would with the Transform![]() tool.
tool.
To rotate an element, grab the rotation ellipses in the same way that you would with the Rotate ![]() tool.
tool.
To scale an element, grab the scaling control points in the same way that you would with the Scale ![]() tool.
tool.
If you click and drag on the scaling cube, it will scale proportionally on all axes.