


Chapter 22: How to Add Effects to a Scene
Once your animation is completed, you can add effects such as blurs and glows to make your project look even better! Harmony provides you with a series of essential effects that you can add to your layers.
About Effects
An effect always needs a drawing connection and sometimes a matte or shape connection. A matte provides drawing information that determines the area on which the effect will be applied on the drawing. The details and colours within the matte drawing don't matter, as only the shape and transparencies are used. A matte is also known as mask.
The matte principle can be demonstrated with the Cutter effect.
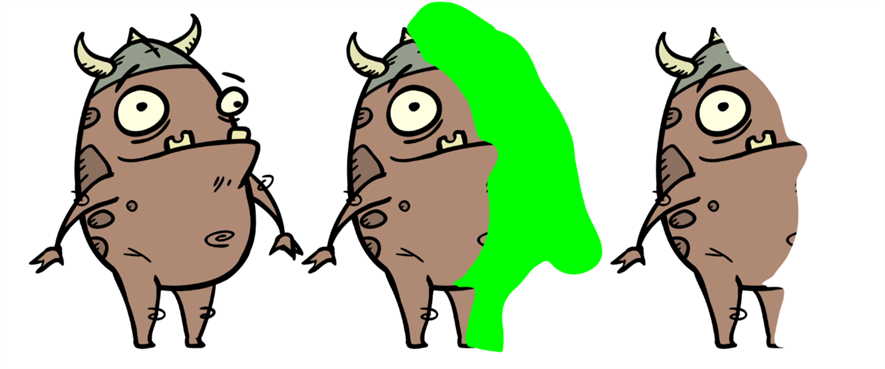
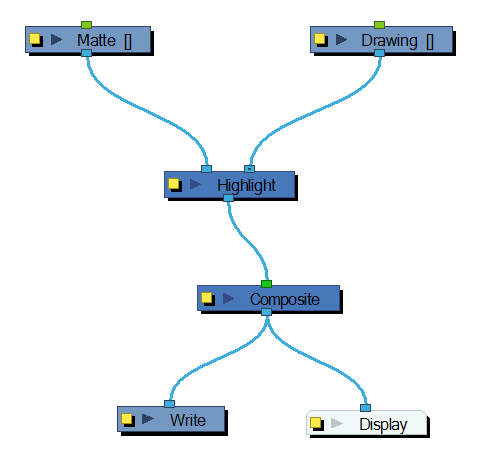
In general, a drawing layer is connected to the right port of the effect and the matte (mask) to the left.
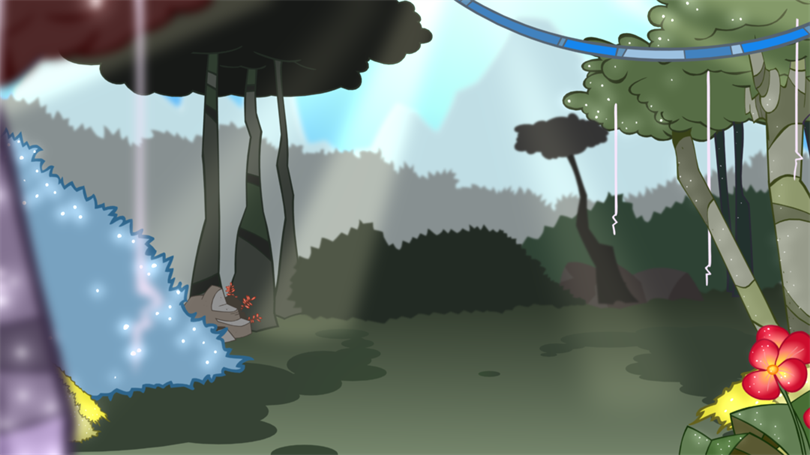
The Cutter effect cuts out a portion of an image using a matte drawing. You can use the Cutter effect to allow a character to disappear behind a background element or to cut a virtual hole into the layer itself. The Cutter requires a matte input.
Adjust the Cutter properties to invert the effect of the matte on an image. Instead of the object being hidden by the mask, it will only be visible where it intersects with the matte shape area.
You can adjust the effect parameters in the Layer Properties view and link any of them to a function column to be animated over time. This means that all of the effects can be customized.
If, in addition to having one layer cut by another layer, you still want to see the cut layer, drag another connection from that drawing node's port and connect it to the composite.
Adding Effects
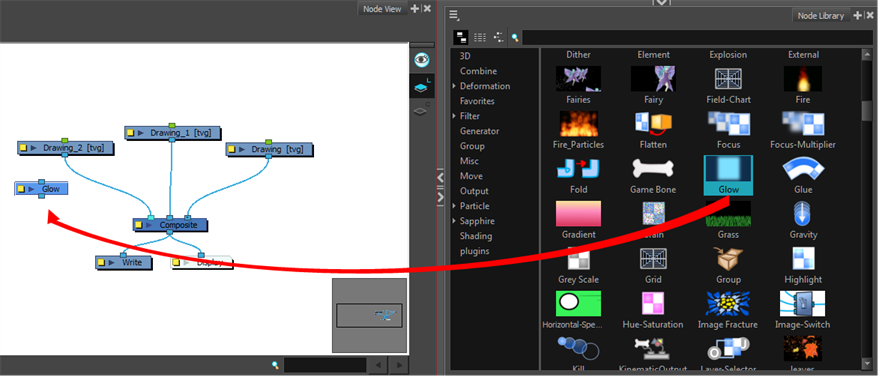
In Harmony, you can add effects through the Node view. You can select an effect from the Node Library view, drag it to the Node view and connect it to drawing layers to form a network of nodes. Then, by adjusting each node's parameters, you can achieve exactly the look you have in mind.
Although all effects should be added through the Node view, there are some effects that you can also quickly add through the Timeline view.
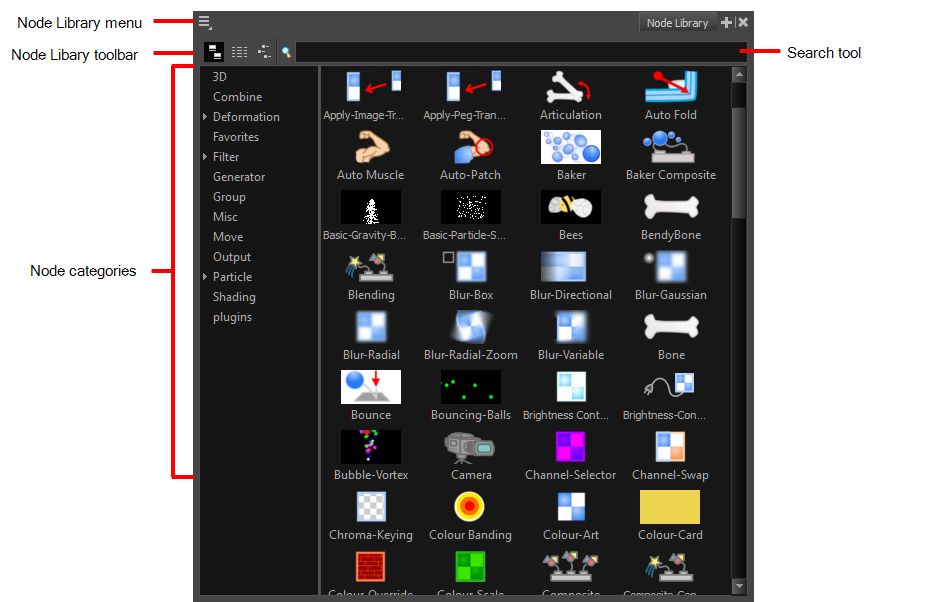
Working with the Node View and Node View Library
If you need to add new effects and other nodes to the Node view, you will need to get them from the Node Library view.
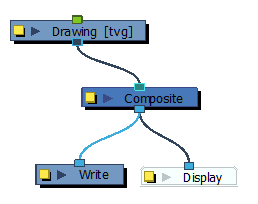
When you create a new project in Harmony, the default node system that appears in the Node view looks similar to the one below.
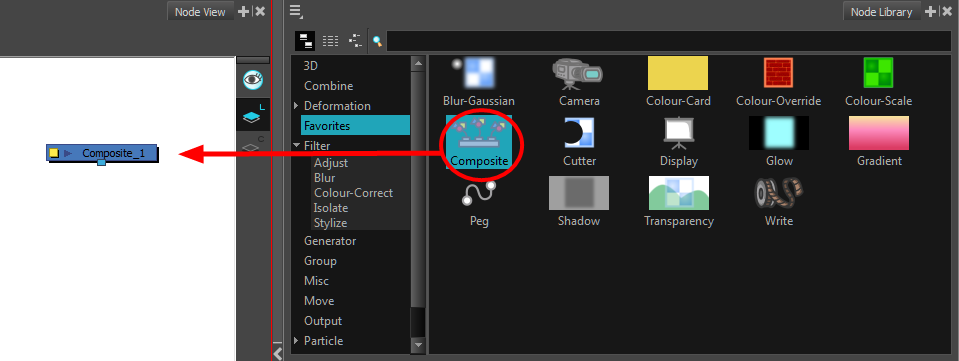
- In the Node Library view, select a node and drag it to the Node view.
- In the Node view, click on the input or output port of a node and drag out a cable.
- Connect the cable to the output port or input port of another node.
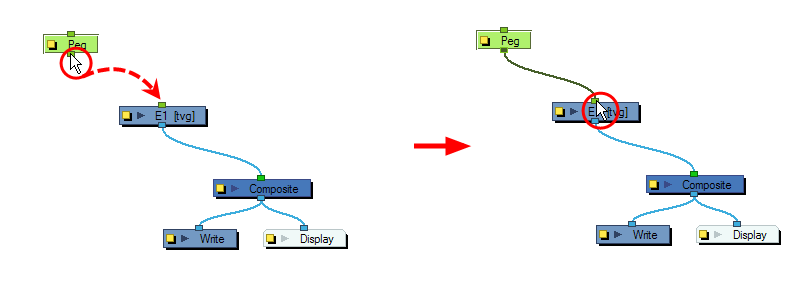
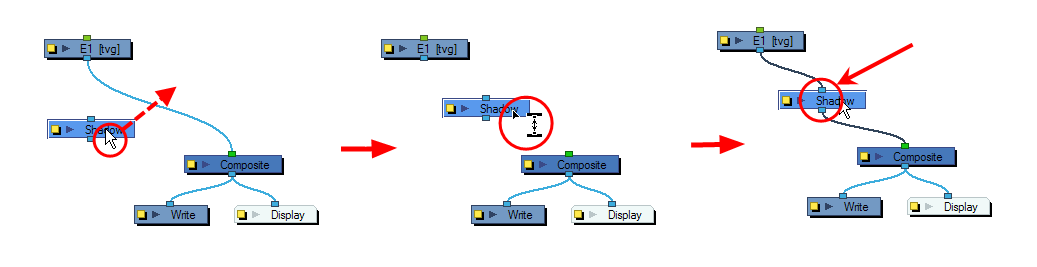
- To connect a node between two connected nodes, use the Alt key as you drag the new node over the existing cable connection. Use the same Alt key to disconnect a node.
- To remove a node, select and press Delete to remove it from the Node view.
Cutter Effect
The Cutter effect cuts out a portion of an image using a matte drawing. You can use the Cutter effect to allow a character to disappear behind a background element or to cut a virtual hole into the layer itself. The Cutter requires a matte input.
Adjust the Cutter properties to invert the effect of the matte on an image. Instead of the object being hidden by the mask, it will only be visible where it intersects with the matte shape area.
- Select a drawing layer and do one of the following:
| ‣ | From the Node Library view, select the Cutter effect and drag it to the Node view. |
| ‣ | In the Node view, right-click and select Insert > Combine > Cutter. |
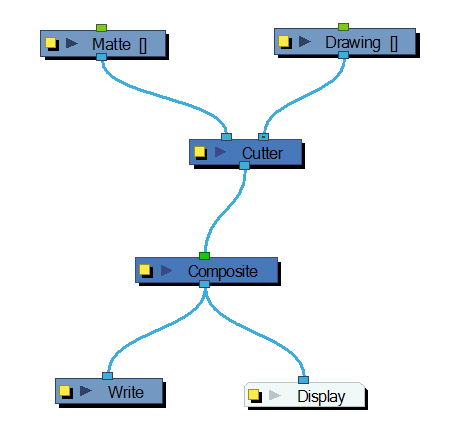
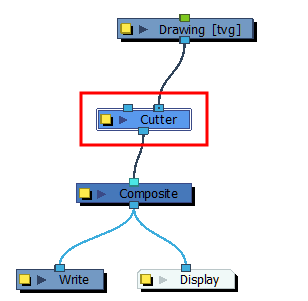
- Connect the Cutter node between the drawing and Composite node.
- In the Drawing or Camera view, create a drawing on a new layer that will act as the matte.
- In the Timeline view, click the Collapse/Expand
 button on the effect layer.
| 1. |
|
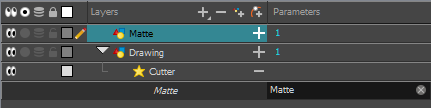
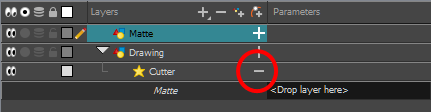
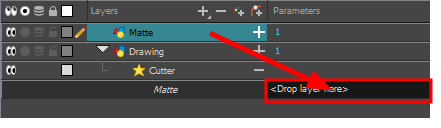
| ‣ | Drag and drop the matte layer beside the Matte field. |
| ‣ | Connect the Matte drawing to the Matte port of the Cutter node. |
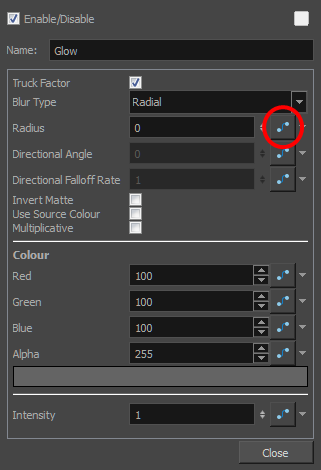
- Display the Cutter properties and adjust the properties to control the type and amount of blur and the colour of the Cutter effect.
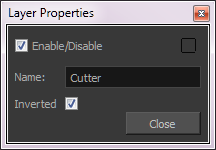
Cutter Properties
| Parameter | Description |
| Name |
Allows you to change the node's name. |
| Inverted |
When this option is enabled, the Cutter node will invert the matte shape to cut the drawing. Instead of cutting the image intersecting with the matte, it will cut any artwork outside of the matte shape. |
Animating an Effect Over Time
When compositing your scene, you will often want to animate the parameters of an effect over time. For example, you may want an object to fade in or out by changing the transparency level over time or by increasing the colour contrast on one of your drawings over a certain frame range.
To animate an effect over time, create a function curve by adding keyframes to the parameters you want to animate. To do this, you will use these views: Layer Properties
- Add an effect node to the Node view by doing one of the following:
| ‣ | Right-click in the Node view and select Insert > desired effect. |
| ‣ | Drag a node from the Node Library view to the Node view. |
- Connect the effect between the drawing element on which you want to apply the effect and a composite node. You can do this by manually unplugging and plugging, or by holding Alt as you drag it through a connection.
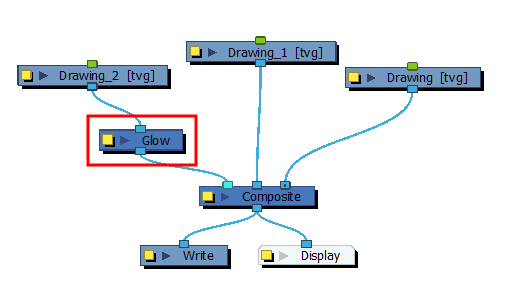
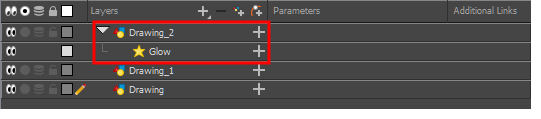
The effect also appears in the Timeline view.
- Create the function curve by doing one of the following:
| ‣ | Double-click on the effect layer to display the effect properties. Click the Function |
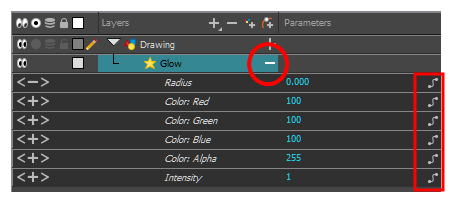
| ‣ | In the Timeline view, expand the effect layer's parameters by clicking the Collapse/Expand |
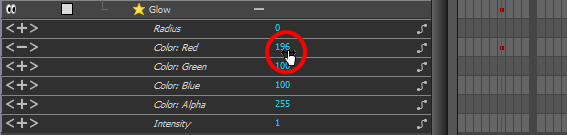
- In the Timeline view, go to the frame on which you want to start animating the effect.
- In the Timeline toolbar, click the Add Keyframe
 button.
- In the Value field of the parameter you want to animation, enter the keyframe value. If your keyframes are stop-motion keyframes, in the Timeline view, select the new keyframes. Right-click and select Set Motion Keyframe.
- Repeat this process for each keyframe to be added.