Multiple Renders
Harmony lets you simultaneously render many formats and resolutions for a scene. This saves a lot of time as you do not have to return between each render to start a new one.
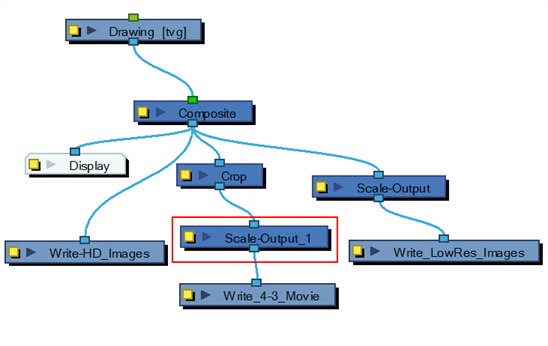
To use multiple renders, connect as many Write nodes as needed to match the required number of exports. Then, adjust each Write node’s settings to create image sequences or movies.
When you have multiple Write nodes in a scene, it is useful to rename the nodes according to their output settings such as: low_resolution_movie or HDTV_sequence.
To export different resolutions concurrently, you need to create a combination of the following:
| • | Write node—see Advanced Export |

| • | Scale-Output node |
| • | Crop node |

Once your Write nodes are connected, you need some Scale-Output nodes to change the resolution output of the Write node. For example, if you export in a high resolution and a low resolution, you need one Scale-Output node.
Set the project’s resolution to the highest resolution needed for this export and use the Scale-Output nodes to scale down the other outputs.
DO NOT scale up the output size, that will not provide a good result. It is also better to use the Scale-Output node to scale down in a same aspect ratio so that it does not distort the image.
To output two files with different aspect ratios, such as 16:9 and 4:3, you can use the Crop node. This node is used to crop the final image in order to discard excess information without distorting the render.
If you start with a higher resolution and want to crop down to a lower resolution, such as HDTV to NTSC, you will need to combine the Crop node with a Scale node.
Once you know the type of render you want to do, you will need to retrieve your nodes from the Node Library and connect them to the scene’s network.
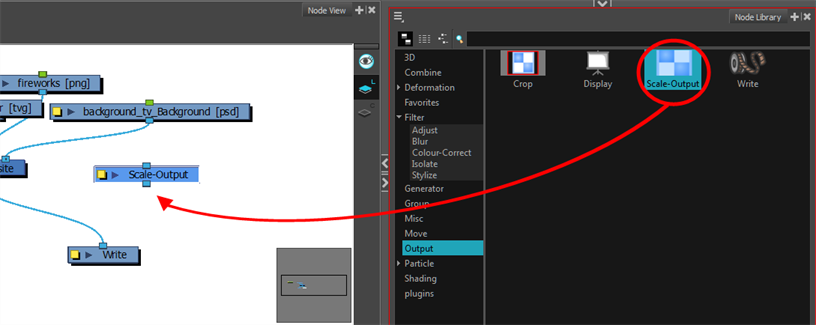
- In the Node Library view, select Scale-Output from the list of categories.
- Select the Scale-Output node and drag it to the Node view.
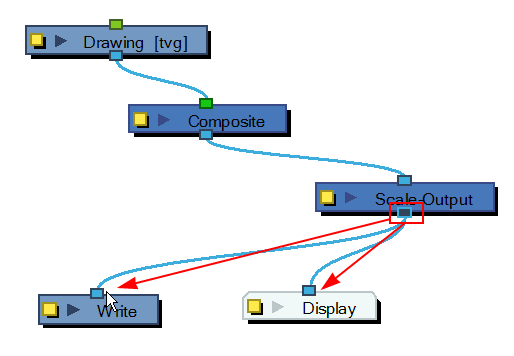
- In the Node view, connect the Composite node to the Input port of the Scale-Output node.
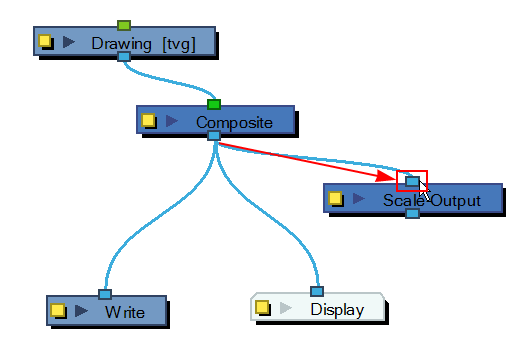
- In the Node view, connect the Scale-Output node to the input ports of both the Display node and the Write node.
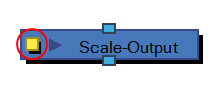
- In the Node view, open the Scale-Output node’s editor by clicking its yellow square properties button.
- In the Layer Properties dialog box, select a resolution from the suggested Resolution Name list or type in new resolution values to indicate the resolution to scale to.
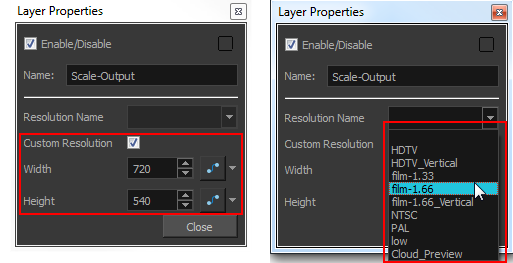
- Click Close.
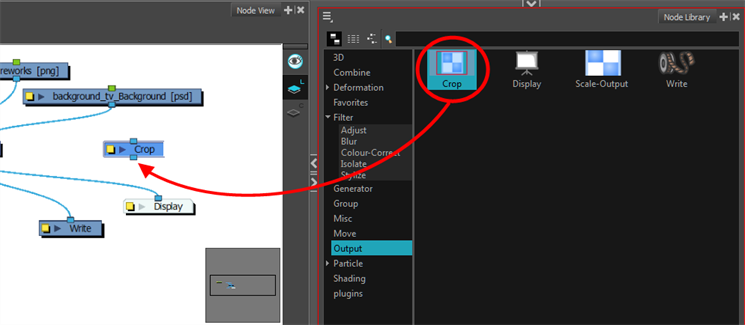
- In the Node Library view, select Output from the list of categories on the left.
- Drag the Crop node to the Node view.
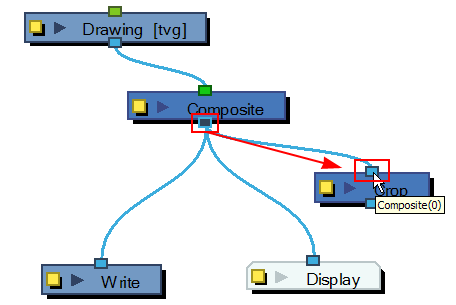
- In the Node view, connect the Composite node to the Input port of the Crop node.
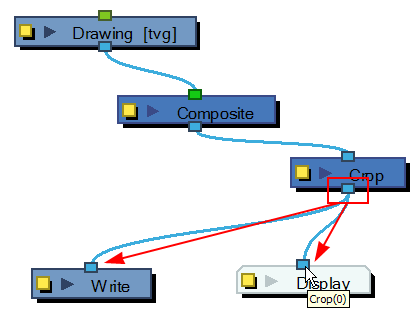
- In the Node view, connect the Crop node to the input ports of both the Display node and the Write node.
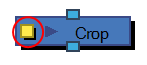
- In the Node view, open the Crop node’s property editor by clicking the yellow square properties button.
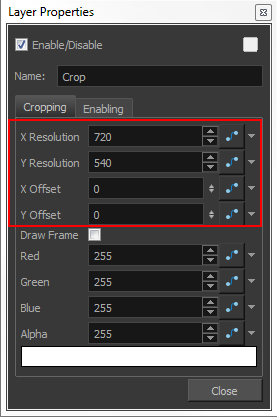
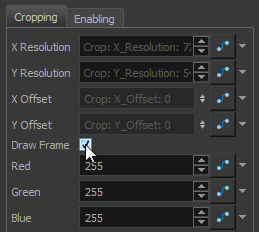
- In the Layer Properties dialog box, type new resolution values to indicate the resolution to crop to.
- You can manually enter the X -Y Offset, or move it in the Camera view. Select the right Display node in the Display toolbar. In the Advanced Animation toolbar, select the Translate
 tool and with the middle mouse button, move the crop area. If the Animate
  mode is enabled, the position of the crop area will be animated over time.
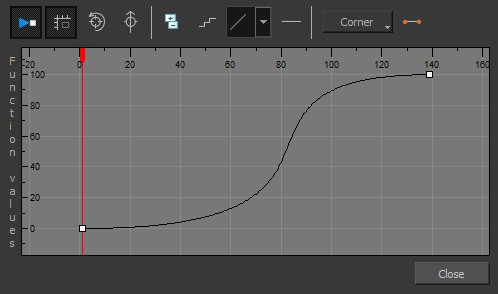
- If you want to create a Pan and Scan effect (panning the cropped selection over time to show more information), you can create a function to animate the cropped selection. Click the Function
 button beside the Local dialog box to create a Bezier or ease curve.
- If you created a function curve to animate the cropped selection, click again on the Function button and edit the curve by adding keyframes and moving the selection box in the Camera view.If you created a function curve to animate the cropped selection, click again on the Function button and edit the curve by adding keyframes and moving the selection box in the Camera view.
- Enable the Draw Frame option if, instead of cropping the images, you prefer to have Harmony draw the frame over the rendered scene.
- Click in the colour rectangle to adjust the frame colour as desired if you have enabled the Draw Frame option.
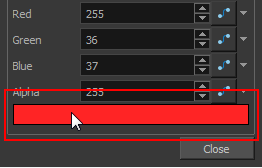
- Click Close.
The Crop node also has an advanced Enabling tab for determining when the Crop node should be activated.
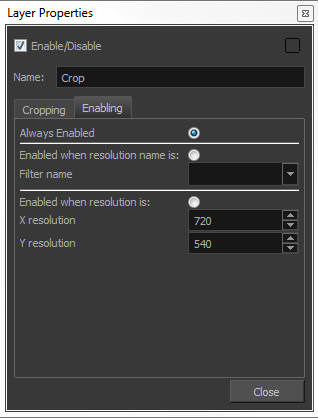
| ‣ | Always Enabled: Makes the Crop node always produce output. |
| ‣ | Enabled when resolution name is: Activates the Crop node only when the resolution of the scene matches the value in the Filter Name menu. The listed resolutions come from the Resolution/Frame Rate dialog box. |
| ‣ | Enabled when resolution is: Activates the Crop node whenever the scene’s resolution matches the values in the X and Y resolution fields. |
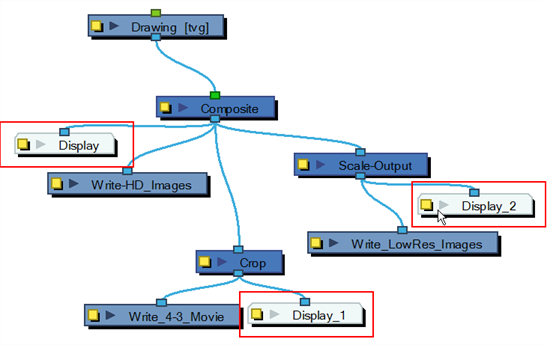
- In the Node Library view, retrieve the necessary Write, Scale-Output and Crop nodes.
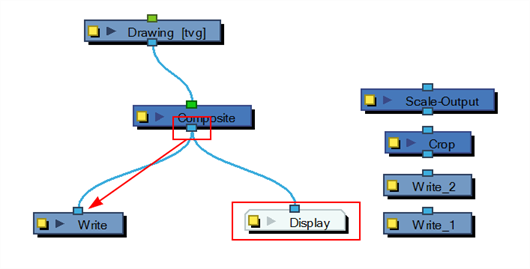
- Connect the final Composite node to the first Write node. (Make sure you have a Display node reading the same information.)
- Open the Write node’s editor by clicking on its square yellow properties button.
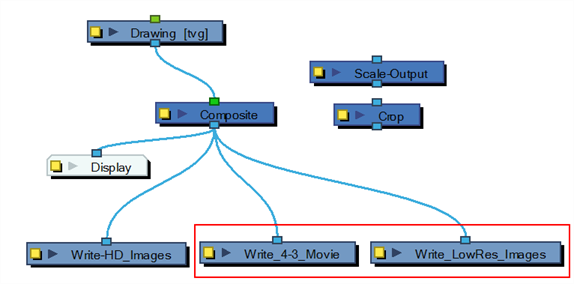
- Name the Write node according to the render type that you are planning to do.
- Set the Write node parameters—see How to set the Write node to export an image sequence.

- Connect the other Write nodes and repeat steps 2 to 5.
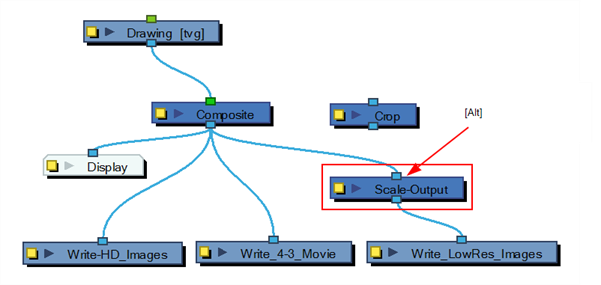
- Using the Alt key, insert the Scale-Output nodes between the final Composite node and their corresponding Write node.
- Using the Alt key, insert the Crop nodes between the final Composite node and their corresponding Write or Scale node.
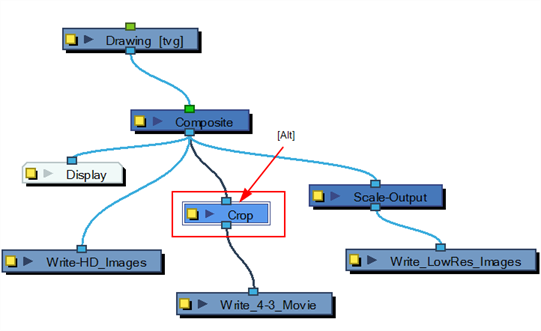
| ‣ | If the output from the Crop node has to be scaled down, use a Scale-Output node. |
- Connect a Display node to each Scale-Output or Crop node to see each final image in the Camera view.