Cleaning and Inking the Model

When your rough models are ready, it is time to clean and ink them. You can still use the default palette and colours to do so, especially if you are not the one doing the colour styling. If you have already created a palette for your model, you can add new colours for tracing.
If you want to keep your roughs and sketches, add a new drawing layer and trace in it using the Light Table. This is the equivalent of adding a sheet of paper and tracing over the rough using the animation disk light table. You only need to disable the rough layer to prevent it from appearing in the final scene render.
If you would like to separate your lines and colours on separated art layers, see Art Layers
- In the Timeline view, add a new drawing layer and name it:
clean.
- If you work in the Drawing view, enable the Light Table
 or press Shift + L.
- Do one of the following:
| ‣ | In the Tools toolbar, select a drawing tool. |
| ‣ | From the top menu, select |
- In the Timeline or Xsheet view, select the cell in which you want to draw.
- Trace the model.

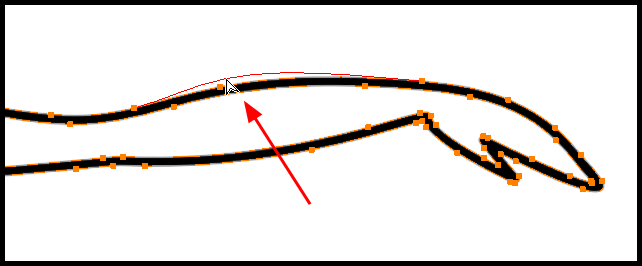
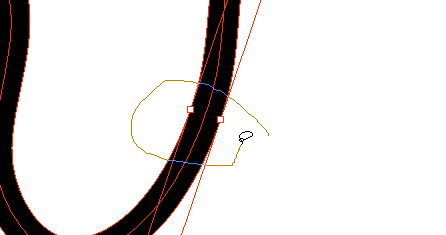
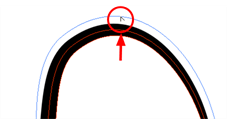
- To make perfect points and corners, you can intersect the two strokes to create a point. Using the Cutter
 tool, you can automatically trim the excess portion. In the Tool Properties view, enable the Lasso
  selection type. Make sure the Use Mouse Gesture
 button is enabled. In this mode, you can automatically delete any extra sections of line in your artwork by simply clicking, holding and dragging your mouse over it.

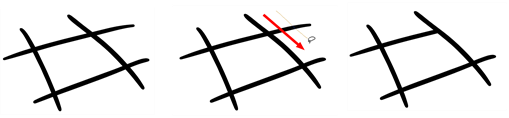
- If you are using the Pencil tool to clean your drawing, you will need to merge your pencil lines together after cropping the points.
| ‣ | In the Tools toolbar, select the Select |
| ‣ | In the |
| ‣ | In the Tool Properties view, click the Merge Pencil Lines |

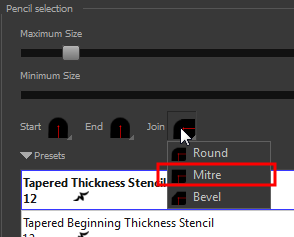
| ‣ | You can also set the Join option to Mitre. |
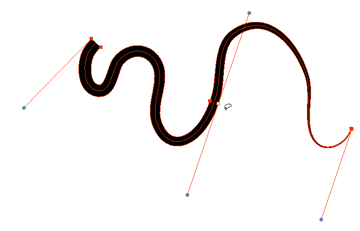
- In the Tools toolbar, select the Pencil Editor
 tool located in the Contour Editor menu.
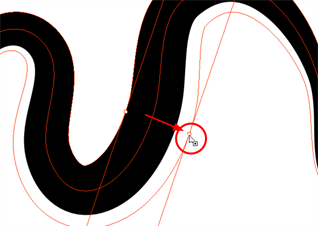
- In the Camera or Drawing view, select a pencil line and click the line to reshape it.
- Select one or several points by clicking on them or circling around.
- Press Delete to delete a selected point.
- Press Ctrl (Windows/Linux) or ⌘ (Mac OS X) and click the central spine to add a set of points to adjust the contour.
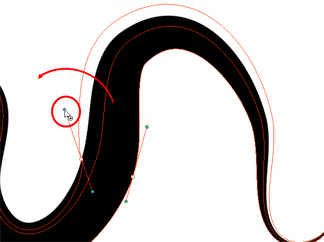
- To modify the shape, you can:
| ‣ | Move the selected points to a new area. |
| ‣ | Pull the Bézier handle to move both points' handles as one. |
| ‣ | Hold Alt down and pull one of the Bézier handles to move it independently from the other one. |
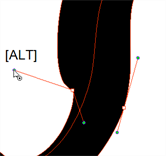
| ‣ | Pull directly on the line in-between two points. No selection is necessary. Holding down the Shift key limits the contour modification to the curve between the two first points. |
| ‣ | If an anchor point has no visible bezier, hold down the Alt key to display them. |
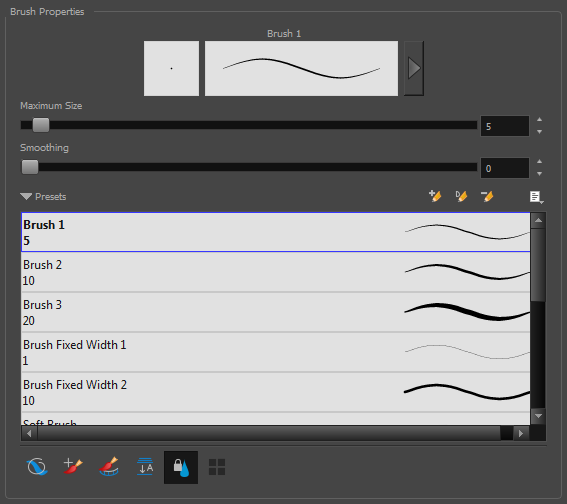
- You can also use the Brush
 tool to draw some of the lines and change the tip to an oblique shape or use a pen tablet which provides pressure sensitivity and lets you draw lines of variable thickness.
Drawing with the Brush tool does not allow you to reshape your lines as easily as with the Polyline or Pencil tool. The Brush tool creates contour vector lines (also known as fills) where the vector points are situated on the line’s contour. Pencil lines are central vector lines in which the points follow the centre of the line.