Adjusting the Velocity
To add ease in and ease out on motion paths, you can display the function curve and modify the Bezier or Ease curve. To apply ease to multiple functions and keyframes, you can use the Set Ease For Multiple Parameters script and set the amount.
The Velocity, or ease, is used on motion keyframes. The Velocity must be adjusted directly on the function curve in the Function view or Function editor. When a keyframe is selected, easing values appear in the right handle and left handle fields, as well as Bezier handle or Ease wheel controls on each selected keyframe. Pull on them to adjust the ease in and ease out, or type values in the fields.
You can reshape the velocity function using Bezier controls.

You can create a stepped curve to hold the same value over a selected number of frames. This works well when you are animating drawings on 2s, for example, and you want to hold the same value for a function over those two frames.
If you have several functions whose velocity you want to adjust at the same time, you can use the Set Ease for Multiple Parameters dialog box. It allows you to apply the same velocity parameters to all the selected keyframes in the same frame.
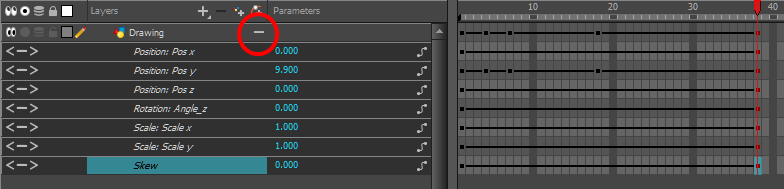
- In the Timeline view, click the Expand
 button on a layer or press Alt + F.
The layer’s functions are displayed.
- Double-click the desired function.
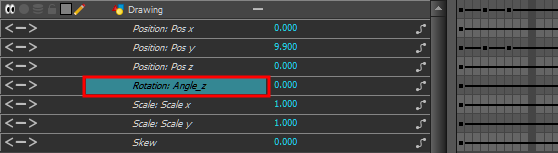
The Function Editor opens as the Bezier Editor.

The editor will not be displayed if the function does not already exist. You can reshape the function using the Bézier controls.
- Select a keyframe.
- Drag the handles to modify the shape of the curve.
- The Continuity options influence how you can move the handles:
| ‣ | Straight: Lets you move the handles together, maintaining the same angle to the point. |
| ‣ | Corner: Lets you move the handles independently. |
| ‣ | Smooth: Lets you move the handles together, maintaining the same distance and angle to the point. |
- Select a keyframe.
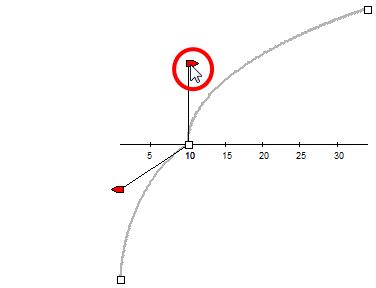
- To set the number of frames in the ease-in, press Alt, click to the right of the keyframe and drag the green line. The ease in slope is indicated in blue.
As you change the values visually, the value in the Ease In field is updated. This value represents the number of frames in the ease-in.
- To set the number of frames in the ease-out, press Alt, click to the left of the keyframe and drag the green line. The ease-out slope is indicated in red.
As you change the values visually, the value in the Ease Out field is updated. This value represents the number of frames in the ease-out.
- To adjust the ease-in or ease-out, drag the handles around the keyframe.
The Continuity options, Corner and Straight, influence how you can move the handles:
| ‣ | Straight: Lets you move the handles together, maintaining the same angle to the point. |
| ‣ | Corner: Lets you move the handles independently. |
- Click the Hold Value Editor
 button.
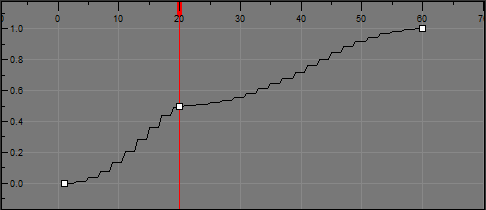
The Hold Value editor opens.
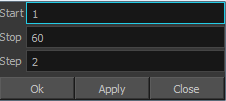
- In the Hold Value Editor, enter the following values:
| ‣ | Start: The starting frame for the effect. |
| ‣ | Stop: The last frame for the effect. |
| ‣ | Step: The number of frames to hold the value. |
The function curve is updated based on the values you entered.
You can reshape the curve to create a linear velocity, so the values are interpolated (tweened) consistently between keyframes. That is, there is no acceleration in the effect.
- In the Timeline view, select a keyframe on one or more layers.

- Do one of the following:
| ‣ | In the Timeline view, right-click and select Set Ease For Multiple Parameters. |
| ‣ | In the Timeline toolbar, click the Set Ease For Multiple Parameters |
The Set Ease For Multiple Parameters dialog box opens.
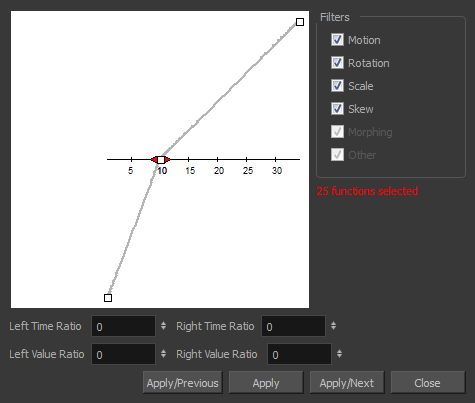
- In the graph, adjust the Bezier handles to change the velocity for all the selected functions.
- In the Filters section, you can apply the easing parameters to a specific type of function only, such as Rotation or Scale. Deselect the function types you do not want to affect.
| ‣ | Motion: Applies the easing parameters to the selected Position X, Position Y, Position Z and 3D Path functions. |
| ‣ | Rotation: Applies the easing parameters to the selected Angle functions. |
| ‣ | Scale: Applies the easing parameters to the selected Scale functions. |
| ‣ | Skew: Applies the easing parameters to the selected Skew functions. |
| ‣ | Morphing: Applies the easing parameters to the selected Morphing Velocity functions. Note that it applies to the Morphing velocity function found in the Layer Properties window, not the basic morphing ease in the Tool Properties view. |
| ‣ | Other: Applies the easing parameters to all the other the selected functions, such as all functions created to animate effect parameters. |
- You can also adjust the easing by typing values in the Time and Value Ratio fields. The values are calculated in percentage.
| ‣ | In the Left Time Ratio and Right Time Ratio fields, type the percentage value corresponding to the length of time you want the easing to last. Stay between 0% and 100%. If you go beyond 100%, your motion will overshoot. |
| ‣ | In the Left Value Ratio and Right Value Ratio fields, type the percentage value of how strong you want the easing out to be. Stay between 0% and 100%. If you go beyond 100%, your motion will overshoot. |
| ‣ | If your Time Ratio and Value Ratio values are equal, you will have a linear motion. |
- Once done, click one of the following:
| ‣ | Apply/Previous: Applies the easing parameters to the selected keyframes and then selects the previous keyframe in the timeline. |
| ‣ | Apply: Applies the easing parameters to the selected keyframes. |
| ‣ | Apply/Next: Applies the easing parameters to the selected keyframes and then selects the next keyframe in the timeline. |
| ‣ | Close: Close the dialog box. If you did not apply the modifications, they will be cancelled. |
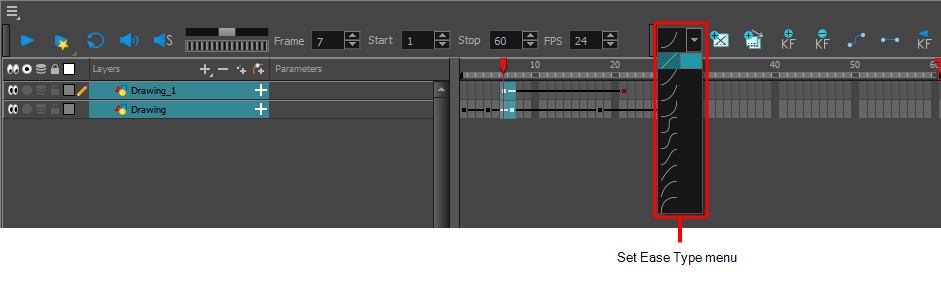
- In the Timeline view, select a keyframe on one or more layers.
- In the Timeline toolbar, select an option from the Set Ease Type menu.