


Importing FLA Files

You can export files from Flash and import them in Harmony to transfer character rigs, props and backgrounds.
Flash import is available on all three editions of Harmony on Windows and Mac OS X. It is not possible to do so on Linux versions.
On the Flash side, users can work with these versions: Adobe Flash CS5 to Adobe Flash CC. Exports from older versions of Flash are not possible.
Preparing and Exporting Files from Flash
At the scene level (top timeline), you must have a symbol, such as a movie clip or graphic. Colour shapes, shape lines, drawing objects, groups and bitmaps at the scene level won’t be exported. If these elements are present, you will be prompted to perform a clean up of the scene level. For details on importing Flash files, see Guidelines for Creating a Flash File Before Exporting to Harmony
As part of preparing to import Flash files in Harmony, you must add an extension to Flash using Adobe Extension Manager. The extension is required in order for Flash to export files to Harmony. The extension is called Export to Harmony.zxp and is located here:
| OS | Edition | Location |
| Windows | Premium | C:\Program Files (x86)\Toon Boom Animation\Toon Boom Harmony [version] Premium\resources\flash |
| Advanced | C:\Program Files (x86)\Toon Boom Animation\Toon Boom Harmony [version] Advanced\resources\flash | |
| Essentials | C:\Program Files (x86)\Toon Boom Animation\Toon Boom Harmony [version] Essentials\resources\flash | |
| Mac OS X | Premium | Applications > Toon Boom Harmony [version] Premium Network > tba > resources > flash |
| Advanced | Applications > Toon Boom Harmony [version] Advanced Network > tba > resources > flash | |
| Essentials | Applications > Essentials > tba > resources > flash |
It is important to use the correct version of Adobe Extension Manager:
| • | If more than one version of Flash is installed on your computer, be careful where you install the extension. If it's added to Adobe Extension Manager of Flash CS6, the extension will only be added in this version and not the other. |
| • | If you have a previous version of the extension, you must remove it first and install the latest extension—see How to remove a previously installed Export to Harmony.zxp extension (if applicable). |
When you export your files, a folder will be created that contains the stage.tpl and export.json files, as well as all the .swf and .txt files in your scene. The export.json file is used by a Harmony script to organize and construct the
- To remove your Harmony offline preferences (if any), open the following folder:
Windows:
• Toon Boom Harmony Premium: C:\Users\[user_name]\AppData\Roaming\Toon Boom Animation\Toon Boom Harmony
• Toon Boom Harmony Advanced: C:\Users\[user_name]\AppData\Roaming\Toon Boom Animation\Toon Boom StageAdvanced
• Toon Boom Harmony Essentials: C:\Users[\user_name]\AppData\Roaming\Toon Boom Animation\Toon Boom StageEssentials
Mac OS X:
• Toon Boom Harmony Premium: /Users/[user_name]/Library/Preferences/Toon Boom Animation/Toon Boom Harmony
• Toon Boom Harmony Advanced: /Users/[user_name]/Library/Preferences/Toon Boom Animation/Toon Boom Stage Advanced
• Toon Boom Harmony Essentials: /Users/[user_name]/Library/Preferences/Toon Boom Animation/Toon Boom Stage Essentials
On Mac OS X, the Library folder is a hidden folder. To display the display the folder, told down the Alt key.
| ‣ | Global: [Server_Name] > USA_DB > scripts |
| ‣ | Environment: [Server_Name] > USA_DB > environments > [environment_name] |
| ‣ | Job: [Server_Name] > USA_DB > jobs > [job name] |
| ‣ | User: [Server_Name] > USA_DB > users > [user_name] > stage > 1200-scripts |
- Delete these folders:
| ‣ | full-1200-pref |
| ‣ | 1200-scripts |
- In Adobe Extension Manager, click Install.
- Locate and open the Export to Harmony.zxp file.
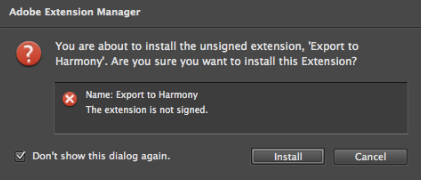
A message opens informing you that you're about to install the Export to Harmony extension.
- Click Accept.
You may see the following message confirming that you want to install the extension. Click Install.
- In order for the changes to take effect, you must close and restart Adobe Flash.
- Click OK.
- If open, close Adobe Flash.
- Start Adobe Extension Manager.
- From the Products list, select Adobe Flash.
If you have a previous version of the Export to Harmony.zxp extension installed, it will be listed in the right pane.
- Select the extension and click Remove.
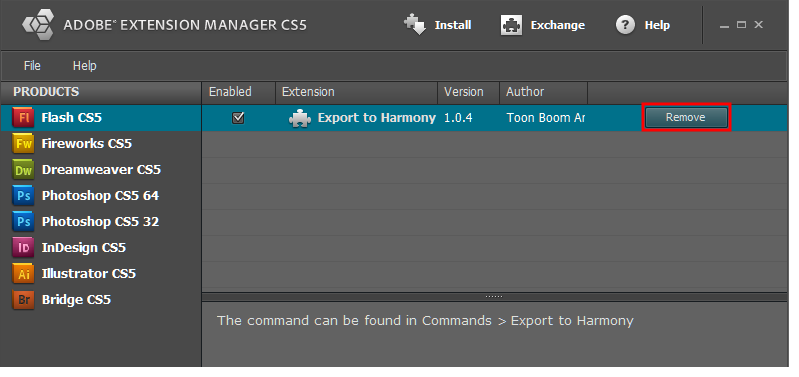
A message opens asking you to confirm the removal of the extension.
- Click Yes.
- Open your
.flafile in Adobe Flash.
- Return to the scene level.
Before exporting to Harmony, it is assumed that you are at the scene level even if you're not.
- Do one of the following:
| ‣ | Older versions of Adobe Flash: Select Window > Other Panels > Export to Harmony. |
| ‣ | Adobe Flash CC: Window > Extensions > Export to Harmony. |
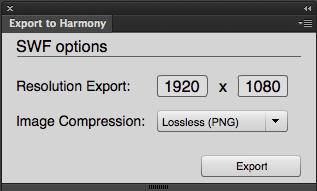
The Export to Harmony window opens from which you can set the resolution of the files as it will appear in Harmony. The default resolution is set to 1920 x 1080, like the HD default resolution value of Harmony. If needed, you can change the compression: Photo (JPG) or Lossless (PNG).
- Do one of the following:
| ‣ | In the Export to Harmony window, click Export button. |
| ‣ | Select Commands > Export to Harmony. |
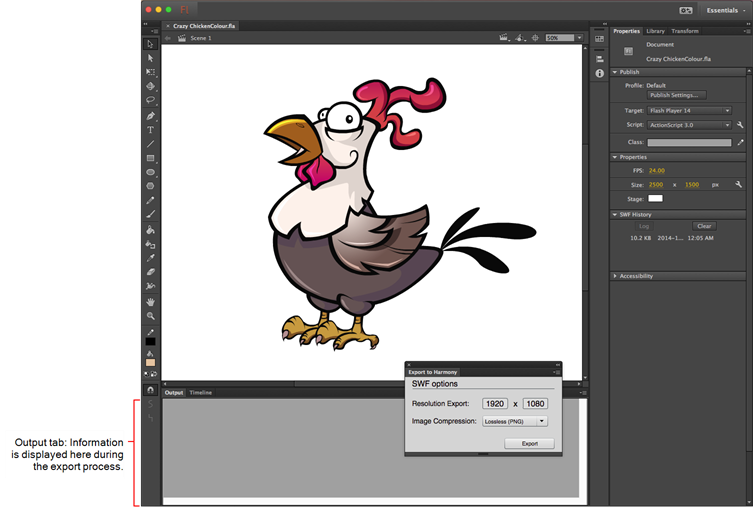
The Output tab displays information about the conversions necessary for the export including:
Distributing to layers, breaking apart, the presence of shapes at the scene level, ungrouping all groups to verify if any symbols are hidden inside, breaking drawing objects to transfer them as shapes, drawing substitutions, and so on. Problematic situations will also be mentioned. If nothing appears in the Output tab, then your.fla file is clean and does not need any conversions.
The .txt files contain the drawing substitution information and at which frame they are exposed. A .swf file is created for each symbol in Flash and a .tpl file is created of them.The corresponding export.json file is also created, which you will need when importing your Flash scene in Harmony. These files are in a folder located at the same location as the.fla file. The folder name is the same as the .fla file.
.fla file already exists, you will be prompted to replace the folder. Be aware that saving Flash projects as .xfl files will automatically create a folder with the same name as the .fla file. In this case, the folder of the export will be created inside the folder of the xfl. If this not what you want, place a copy of the.fla in another path on your computer before the export.
Importing Flash Files in Harmony
When importing Flash files, the Scripting toolbar must be displayed, which should contain the Import Flash Scene icon. If the icon does not appear in the toolbar, add it to the Scripting toolbar. Note that you will only have to do this once. After that, you can import Flash files whenever needed.
- From the top menu, select Windows > Toolbars > Scripting.
The Scripting toolbar bars appears below the File toolbar in the upper-left of the Harmony interface.

- Click the Manage Scripts
 button.
The Scripts Manager opens.
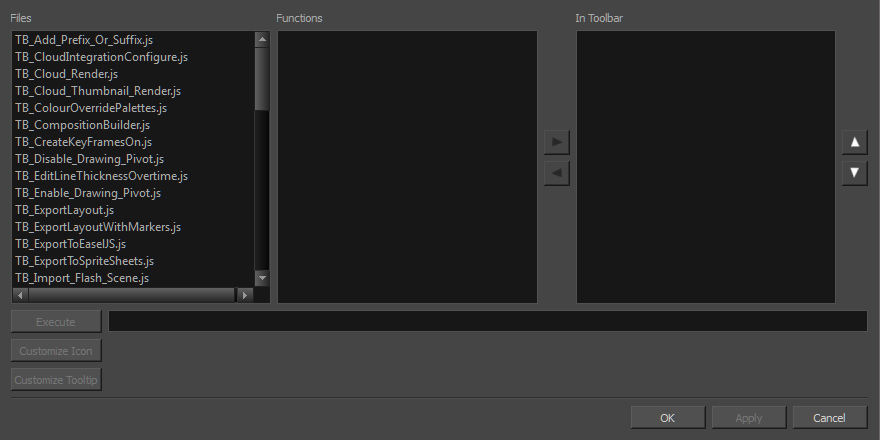
- From the Files section, select TB_Import_Flash_Scene.js.
On your computer, here is the location of the script file:
- Windows:
- Toon Boom Harmony Premium: C:\Users\[user_name]\AppData\Roaming\Toon Boom Animation\Toon Boom Harmony\1200-scripts
- Toon Boom Harmony Advanced: C:\Users\[user_name]\AppData\Roaming\Toon Boom Animation\Toon Boom StageAdvanced\1200-scripts
- Toon Boom Harmony Essentials: C:\Users[\user_name]\AppData\Roaming\Toon Boom Animation\Toon Boom StageEssentials\1200-scripts
- Mac OS X:
- Toon Boom Harmony Premium: /Users/[user_name]/Library/Preferences/Toon Boom Animation/Toon Boom Harmony/1200-scripts
- Toon Boom Harmony Advanced: /Users/[user_name]/Library/Preferences/Toon Boom Animation/Toon Boom Stage Advanced/1200-scripts
- Toon Boom Harmony Essentials: /Users/[user_name]/Library/Preferences/Toon Boom Animation/Toon Boom Stage Essentials/1200-scripts
On Mac OS X, the Library folder is a hidden folder. To display the display the folder, told down the Alt key.
- From the Functions section, select TB_Import_Flash_Scene and click the arrow button to move it to the In Toolbar section.
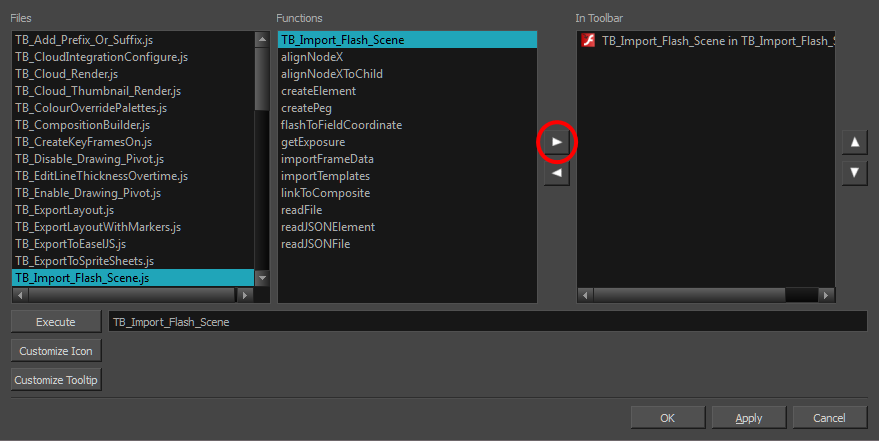
- Click OK.
The Import Flash icon appears in the Scripting toolbar. Everything is now ready to import Flash scenes.
- In the Scripting toolbar, click the Import Flash
 button.
- In the Import Files dialog box, locate the export.json file contained in the folder that was created when you exported your files from Flash.
- Click Open.
In a few moments, the colour recovery dialog box appears, requesting a colour recovery.
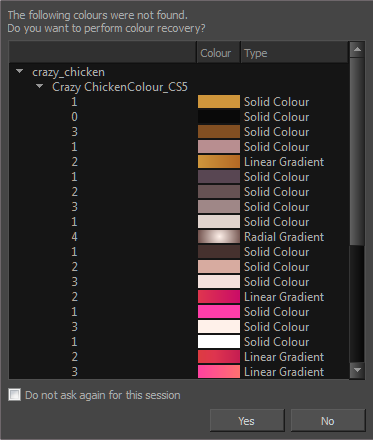
- Before clicking Yes, you have the option of selecting the Do Not Ask Again For This Session option.
In a few moments, the .fla files are imported in Harmony.

- In the Node view, press 1 to zoom out of the Node view and see the entire node system.
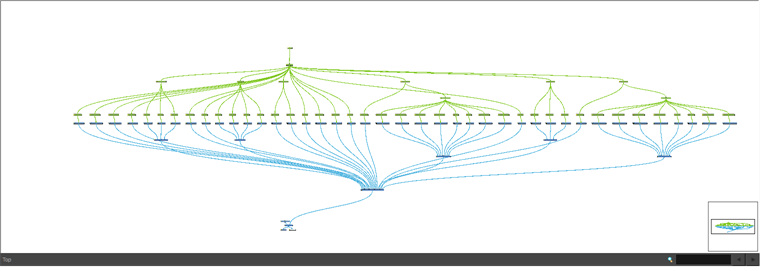
Your Flash Scene in Harmony
Once the Flash project is successfully imported into Harmony, here's how the
| • | Each symbol has its own peg in which all the transformation information is stored. |
| • | The pivot information is stored in the peg's Layer Properties (Pivot fields). The pivot information came from the rotation point of the symbol in Flash. |
| • | Registration point of the symbol in Flash represents the centre of the drawing space in Stage. Therefore, the position of the drawing inside a symbol will be exactly the same in Stage. |
| • | One colour palette is created for each Flash import. One colour swatch is created per RGB value. If you have more than one zone using the same colour, they will be linked to the same colour swatch. |
| • | If there are masks in your Flash project, they will reconstructed in Harmony using Cutter effects. Stage Advanced is now able to understand when more than one symbol share the same mask in Flash. Each symbol sharing the same mask will be grouped by a composite and connected to the cutter. |