


Chapter 17: How to Set Up a Scene
Setting up your scene can be compared to building a set for a television show. This is the point when you position each scene element such as the camera frame, the background elements and the characters.
Positioning the Camera
The scene action occurs inside the camera frame, so it’s really important to set it up correctly. You can adjust the camera resolution and other parameters in the Scene Settings window
The Camera layer is static which means that if you need to animate it, you must add a peg
You need to add a camera layer to your scene, so you can edit the camera frame. You can only see one camera at a time. If you add several cameras to your scene, you can use the Camera list to select the active one. You could use this feature if you are still working on your scene composition and have different camera framing to try out.
You can reposition your camera frame directly in the Camera view, using the advanced animation tools. Another way to set up your camera frame is to type the coordinates directly in the camera's properties. Doing this positions the camera precisely where you want it to be rather than gauging it visually
You can easily reset the camera to its original position. Using the Reset command, you can reset the value of the selected element to the initial value of the active tool. For example, if the Rotate![]() tool is active, the transformation angle will be reset to 0 and if the Transform
tool is active, the transformation angle will be reset to 0 and if the Transform![]() tool is active, then all parameters values will be reset.
tool is active, then all parameters values will be reset.
- Do one of the following:
| ‣ | In the Timeline view, click the Add Layer |
| ‣ | From the top menu, select Insert > Camera. |
A new camera layer is added to the scene and appears in the Timeline view.
- In the Tools toolbar, disable the Animate
 mode.
mode.
- Do one of the following:
| ‣ | From the top menu, select Animation > Tools > Translate. |
| ‣ | In the Advanced Animation toolbar, click the Translate |
| ‣ | Press Alt + 2. |
- In the Camera view, click on the camera frame (thin rectangle) to select it. You can also select the camera layer from the Timeline view.
The selected camera frame is highlighted.
- Drag the camera frame to a new position.
- To tilt the camera frame, do one of the following to select the Rotate tool:
| ‣ | From the top menu, select Animation > Tools > Rotate. |
| ‣ | In the Advanced Animation toolbar, select the Rotate |
| ‣ | Pres Alt + 3. |
- In the Camera view, drag to rotate the camera frame until it reaches the desired rotation angle.
- In the Tools toolbar, select the Transform
 tool or press Shift + T.
- In the Timeline or Camera view, select the camera layer.
- From the top menu, select Animation > Reset or press Shift + R.
The camera automatically returns to its original position.
Positioning Objects
Setting up the scene also involves positioning the different scene elements within the camera frame.
- In the Tools toolbar, disable the Animate mode.
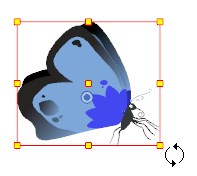
- In the Tools toolbar, select the Transform tool or press Shift + T.
- In the Tool Properties view, make sure the Peg Selection Mode
 is deselected.
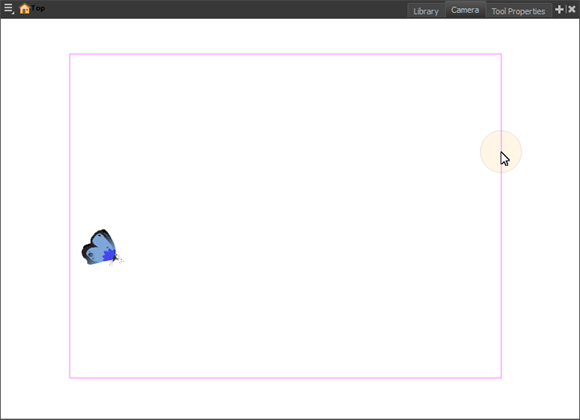
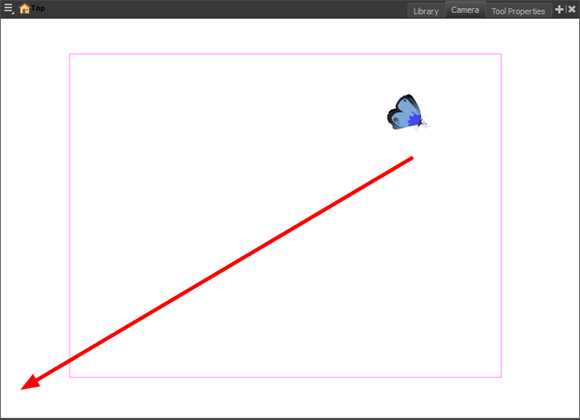
- In the Camera view, select a drawing layer and drag the selection to a new area. You can select multiple layers to reposition them at the same time. Hold down Shift and select the different layers.
![]()
- In the Tools toolbar, disable the Animate mode.
- In the Tools toolbar, select the Transform tool or press Shift + T.
- In the Tool Properties view, make sure the Peg Selection Mode is deselected.
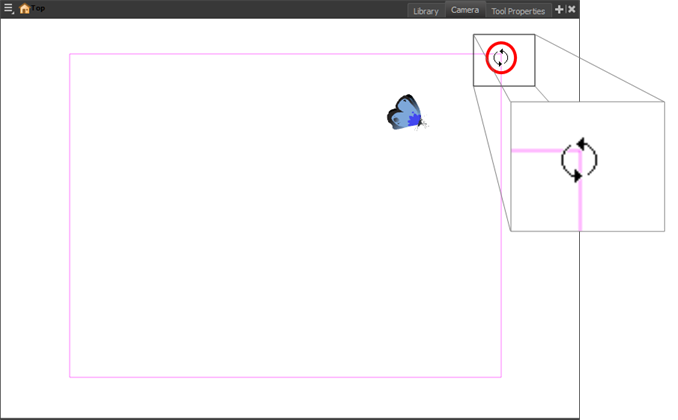
- In the Camera view, select a drawing layer.
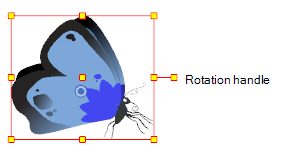
- Place the pointer outside of a corner of the bounding box and drag to rotate.
![]()
![]()
You can display a rotation handle on the bounding box when transforming a layer. In the Preferences dialog box, select the Camera tab and then select the Use Rotation Lever with Transformation Tools option. This preference is off by default.
- In the Tools toolbar, disable the Animate mode.
- In the Tools toolbar, select the Transform tool or press Shift + T.
- In the Tool Properties view, make sure the Peg Selection Mode is deselected.
- In the Camera view, select a drawing layer and push or pull on the size, top, or corner control point. Hold down Shift to lock the selection's aspect ratio.
![]()
- In the Tools toolbar, disable the Animate mode.
- In the Tools toolbar, select the Transform tool or press Shift + T.
- In the Tool Properties view, make sure the Peg Selection Mode is deselected.
- In the Camera view, select a drawing layer.
- Place the pointer between two controls points and drag sideways or up and down.
![]()
Repositioning the Pivot
Transformations, such as rotation, scale, skew and flip, are made relative to the pivot point position. You can reposition this pivot point anywhere using the advanced animation tools.
- In the Advanced Animation toolbar, select the Translate
 , Rotate
  , Scale
  , or Skew
  tool.
tool.
- In the Camera view, Ctrl + click (Windows/Linux) or ⌘ + click (Mac OS X) to select your element.
The pivot point appears in the Camera view.
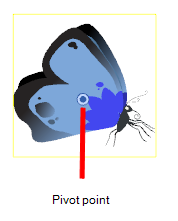
- Drag the pivot point to a new position.
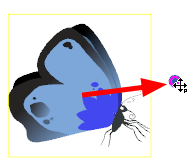
All transformations, including existing ones will be recalculated from this new pivot postion.