Motion and Stop-motion Keyframes
Interpolation is the computer-generated motion between two keyframes. Some animators and compositors like to create their own in-betweens, while others like to have the computer do it. Harmony has stop-motion (no interpolation) and motion keyframes (computer-generated interpolation).
In stop-motion keyframes, there is no computer-generated motion between two keyframes. The segment is constant or flat. The drawing remains still until the playback reaches the next keyframe, then the drawing pops to its new location.
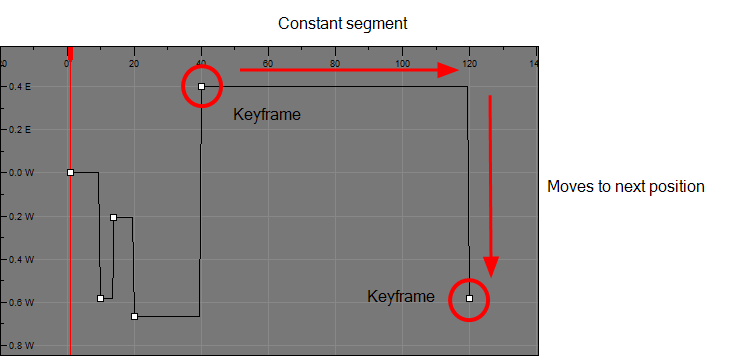
In motion keyframes, there is no automatic interpolation created between the selected point and the next one. The layer will maintain its position until the animation reaches the frame of the next point and will then jump to the new position. Deselect this option to generate interpolation and get the layer to progressively move to the next position.
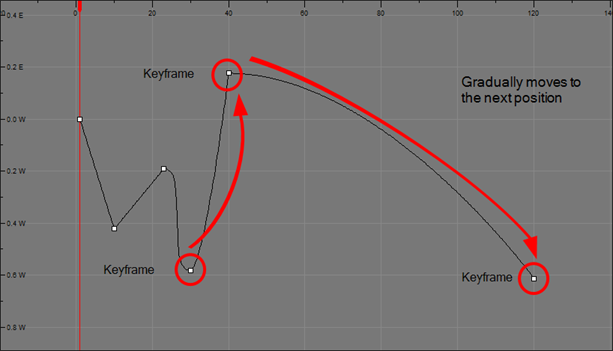
You can switch a keyframe from stop-motion to motion at any time in the Timeline view and Function Editor.
To easily identify stop-motion keyframes in the Timeline view, you can customize the colour In the Preferences dialog box.

- On the right side of the Timeline view, select one or more keyframes to modify.

- Switch between motion and stop-motion by doing one of the following:
| ‣ | Right-click on the selected keyframes and select Set Motion Keyframes or Set Stop-Motion Keyframes. |
| ‣ | Press Ctrl + K (Windows/Linux) or ⌘ + K (Mac OS X) for motion keyframes and Ctrl + L (Windows/Linux) or ⌘ + L (Mac OS X) for stop-motion keyframes. |
| ‣ | In the Timeline View toolbar, click the Motion Keyframe |
- Open the Function view.
- In the Timeline view, double-click on the layer that contains the keyframes you want to convert.
The Layer Properties window opens.
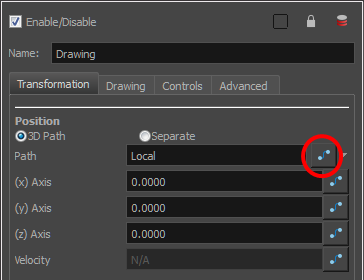
- Do one of the following:
| ‣ | In the Transformation tab, click the Function Editor |
| ‣ | In the Timeline view, click the Expand Function |
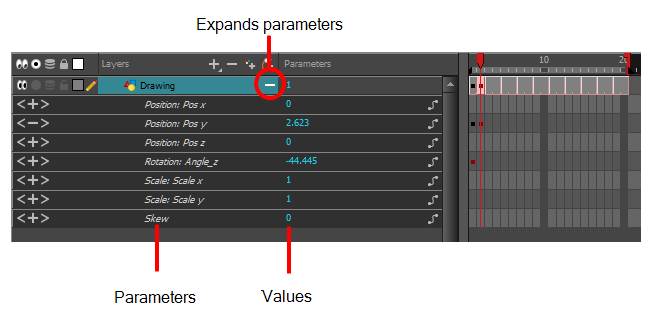
- On the function curve, select one or more keyframes to modify.
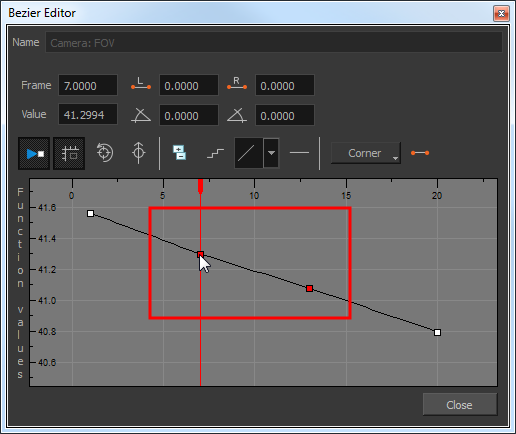
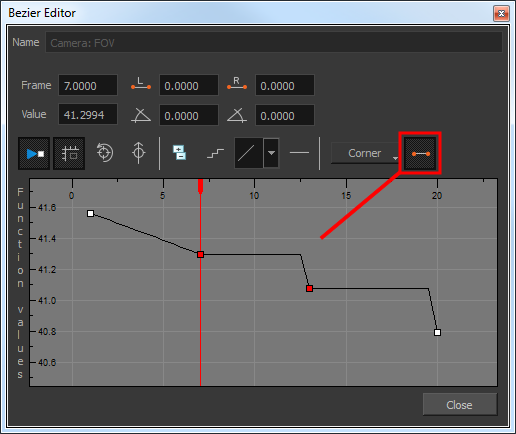
- Select or deselect the Stop-motion Keyframe
 button to set a stop-motion or motion keyframe.
- Open the Preferences dialog box by pressing Ctrl + U (Windows/Linux) or ⌘ + U (Mac OS X).
- Select the General tab.
- In the Colours section, click Edit Colours.
- In the Colours dialog box, select the Xsheet and Timeline tab.
- In the Timeline section, click the Stop Motion Keyframe swatch.
- In the Select Colour window, select a new colour and close the windows.


