Drawing with Textured Brushes

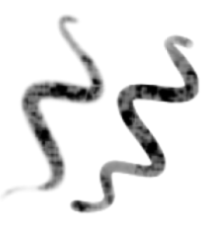
In Harmony, you can use the Brush  tool to draw with bitmap textured lines.
In the Brush Tool Properties view, you will find a series of default textured brushes, but you can also create your own collection by importing PSD or TGA files in the Preset list.
To create your own texture brush, you must prepare your texture file in a third-party software, such as Adobe Photoshop. If your image has transparency in it, it will be supported. The texture file must be either a PSD or TGA file. It is recommended that you maintain your texture resolution between 100 x 100 pixels and 400 x 400 pixels.
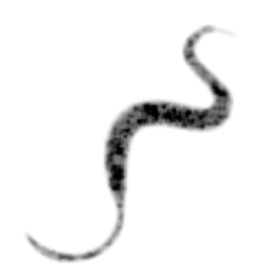
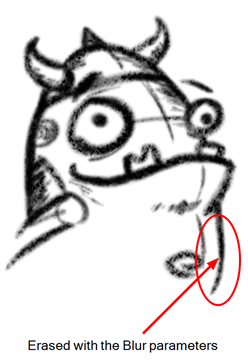
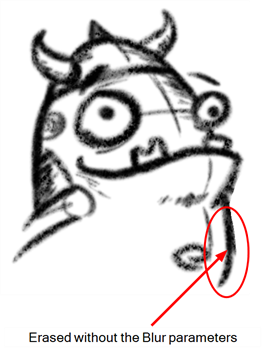
When you use the Eraser tool to erase a portion of a textured line, the vector frame is cut straight and you lose the feather created while drawing with the Brush tool. In Harmony, a special option in the Eraser tool lets you create a soft edge on your textured lines. You can also cut or keep the vector frame as is.
Sometimes you need to hide the line texture to see the complete vector frame around your lines. This is useful to help you see any dirt floating around your drawing.
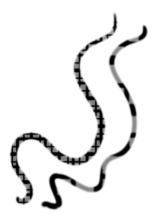
At some point, you may want to modify the look of a textured drawing. Maybe you find that your line is too smooth or too faint. You can adjust those parameters by using the Adjust Line Texture Opacity command.
To hide the line texture in the Camera view, you must enable the Show Drawing on Top option. From the top menu, select View > Show > Current Drawing on Top—see Current Drawing on Top.
To draw with textured lines, use the Brush tool and the correct pen in the list. You can also draw with pencil line texture—see Pencil Line Texture
 How to draw with textured lines
|
1.
|
In the Tools toolbar, select the Brush tool or press Alt + B. |
|
2.
|
In the Tool Properties view, select a brush and click the Arrow button to open the Brush Properties view. |

|
3.
|
In the Texture section, select the Select Texture option. |

|
4.
|
Set the following parameters: |
|
‣
|
Hardness: The hardness value corresponds to the smoothness of the line edge. The lower the value, the more blurry and smooth the line edge will be. The higher the value, the sharper the line edge will be. |
|
‣
|
Minimum Opacity: This value corresponds to the transparency of the brush when the pressure is very light. Values closer to 0 produce a more transparent line. |
|
‣
|
Maximum Opacity: This value corresponds to the transparency of the brush when the pressure is heavy. Values closer to 1 produce a more opaque line. |
|
‣
|
Select Texture: Lets you use and select a texture for your brush. The thumbnail displays the current texture. You can also browse for a texture file to import. Browsing for a texture file in a brush already using texture will replace the file currently in use, although it will not replace the texture in the lines already drawn. If your image has transparency in it, it will be supported. The texture file must be either a PSD or TGA file. It is recommended that you maintain your texture resolution between 100 x 100 pixels and 400 x 400 pixels. |
|
‣
|
Texture Scale: Changes the size of the texture in the lines you draw. If you are using a plaid texture, the squares will be larger if you increase the value and smaller if you decrease it. |
|
5.
|
In the Camera or Drawing view, start drawing. |
How to erase textured lines
|
1.
|
In the Tools toolbar, select the Eraser  tool, press Alt + E. tool, press Alt + E. |
|
2.
|
In the Tool Properties view, click the arrow button. |
The Brush Properties window opens.

|
‣
|
Maximum/Minimum Size: Defines the minimum and maximum width of the stroke. |
|
‣
|
Smoothing: Defines the number of control points added to the centre line. |
|
‣
|
Contour Smoothing: Defines the number of control points added to the contour boundaries (around the line). Lower values mean that the line will appear as you draw it (with more control points added along the centre line). Higher values mean that the line will be smoothed out (removing control points from the centre line). |
|
‣
|
Tip Shape: Lets you select a shape for the tip of the eraser. There are a variety of tips to choose from: round, square, oval, star-shaped, and more. This option is only available when the textured tip is not in use. |


|
‣
|
Soft Tip: Gives the tip of your stroke a soft edge. |
|
‣
|
Keep Vectors: Keeps your vector frames and does not cut them. |
|
‣
|
Hardness: The smoothness of the line edge. The lower the value, the more blurry and smooth the line edge will be. The higher the value, the sharper the line edge will be. |
|
‣
|
Saturation: The intensity of line colour. |
|
‣
|
Maximum Opacity: The transparency of the brush when the pressure is heavy. Values closer to 1 produce a more opaque line. |
|
‣
|
Minimum Opacity: The transparency of the brush when the pressure is very light. Values closer to 0 produce a more transparent line. |
|
4.
|
In the Camera or Drawing view, erase your textures lines. |
How to adjust the line texture opacity
|
2.
|
In the Timeline or Xsheet view, select the drawing that contains the opacity you want to adjust. |
|
3.
|
In the Camera or Drawing view menu, select Drawing > Adjust Line Texture Opacity. |
The Adjust Line Texture Opacity dialog box opens.

|
4.
|
Drag the sliders toward the middle to increase the contrast and opacity of the textured lines. |
|
5.
|
If you want to apply the changes to all drawings exposed on the layer, select the Apply to All Drawings option and click OK. |