Chapter 20: How to Import Sound and Add Lip-Sync
If you decide to add sound to your movie, you must first prepare the sound outside of Harmony. Once this is done, you must add a sound element in Harmony to the organize the sound files in your animation. Sound will play in the movie until it reaches the end of the file or a stop frame that you have created in the Sound Element Editor.
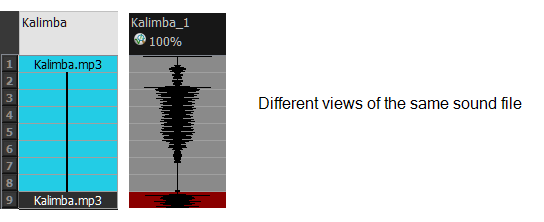
You can import WAV, AIFF or MP3 sound files.
 How to import a sound file
|
1.
|
Do one of the following: |
|
‣
|
From the top menu, select File > Import > Sounds. |
|
‣
|
In the Xsheet view, right-click anywhere in the frame area of the Xsheet view and select Import > Sounds. |
|
‣
|
From the Xsheet view menu, select File > Import > Sounds. |
|
‣
|
From the Timeline view menu, select Import > Sounds. |
The Select Sound File dialog box opens.
|
2.
|
From the Select Sound File dialog box, find and select a sound file. |
The sound file appears as a layer in the Timeline and Xsheet views.

Lip-Sync
Adding a lip-sync to a project can really enhance its quality and storytelling. However, it can be difficult to shape a character's mouth to match the sound at a precise frame.
To solve this problem, Harmony provides a lip-sync feature which analyzes the contents of a sound element and generates a mouth chart (see below) based on the eight animation phonemes (A, B, C, D, E, F, G, and X, which is used to represent silence).
The mouth shapes used by Harmony are based on the conventional mouth chart used in the animation industry.
The letters used to represent the shapes do NOT correspond to an actual sound.
If you are doing cut-out animation, refer to the Cut-out Animation Guide, Character Building chapter, "Adding Extra Drawings" topic to learn how to add extra drawings to your character.
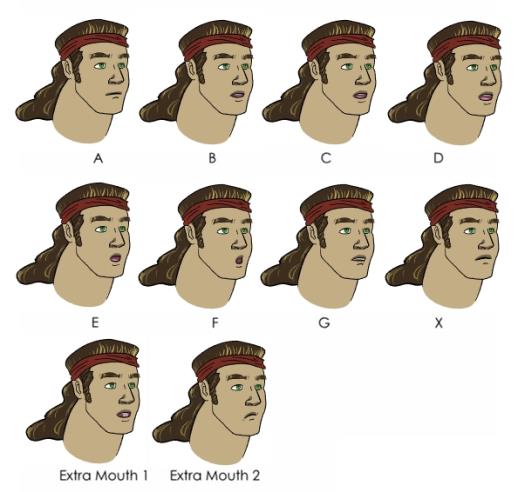
Here is an approximation of which sound each mouth shape can produce:
|
•
|
X: Silence, undetermined sound |
You can lip-sync the traditional way or let the system automatically create the basic detection.
You can refer to the mouth chart positions as you draw the shape of your character's mouth.
Automatic Lip-Sync Detection
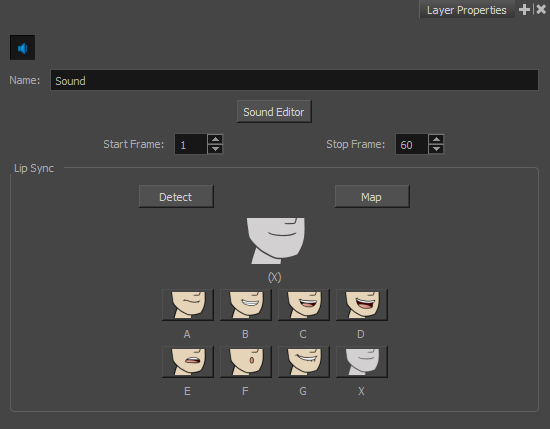
Harmony can automatically map drawings in an element to the mouth chart you have generated for a sound. This can save time when you are lip-synching a voice track.
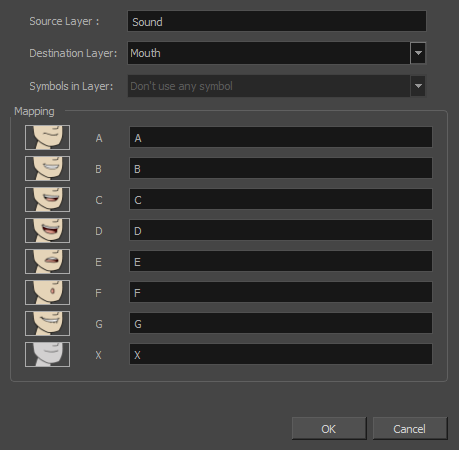
In the Lip-Sync Mapping dialog box, you can identify each lip drawing of a character. Harmony then automatically labels all of the cells in the character's element with the appropriate name.
How to automatically map lip-sync drawings to a mouth layer
|
1.
|
In the Timeline or Xsheet view, select your sound layer and the options for that layer will appear in the Layer Properties view. |
|
2.
|
In the Layer Properties, click Map. |
The Lip-Sync Mapping dialog box opens.
|
3.
|
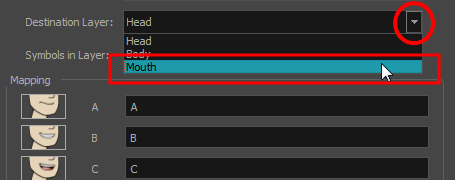
From the Destination Layer menu, select the layer that contains the mouth positions for the character's voice track. |
|
4.
|
If the selected layer contains symbols, you can map the lip-sync using drawings located directly on the layer or use the symbol's frames. In the Symbol Layer field select Don't Use Any Symbol if you want to use the drawings or select the desired symbol from the drop-down menu. |
|
5.
|
In the Mapping section, type the drawing name or Symbol frames in the field to the right of the phoneme it represents. If your drawings are already named with the phoneme letters, you do not have to do anything. |
|
7.
|
Press the Play  button in the Playback toolbar to see and hear the results in the Camera view. To play back your scene with sound, enable the Sound button in the Playback toolbar to see and hear the results in the Camera view. To play back your scene with sound, enable the Sound  button in the Playback toolbar. button in the Playback toolbar. |


