Chapter 17: How to Animate Objects and the Camera
When it comes to animating objects, you will do this on layers by creating motion paths. You can also animate the camera which is just like any other object you can animate.
Animating a Layer
You can create a motion path directly on layers (animated layers).
You can control and define a trajectory using several different parameters, including:
|
•
|
X, Y and Z positions (3D Path or Separate Positions) |
|
•
|
Euler Angle or Quaternion Angle (when 3D option is enabled) |
|
•
|
Z Scale (when 3D option is enabled) |
Each parameter has its own function curve where you can add keyframes and control the easing.
If you are not familiar with graphs and function curves, Harmony has a series of easy-to-use tools for visually controlling trajectories in the Camera and Timeline view.

 How to animate a layer
|
1.
|
In the Tools toolbar, select the Transform  tool or press Shift + T. tool or press Shift + T. |
|
2.
|
In the Tool Properties view, make sure that the Peg Selection Mode  is deselected. is deselected. |
|
3.
|
In the Tools toolbar, enable the Animate  mode. This will create keyframes at the current frame when moving objects. mode. This will create keyframes at the current frame when moving objects. |
|
4.
|
In the Timeline view, go to the first frame. |

|
5.
|
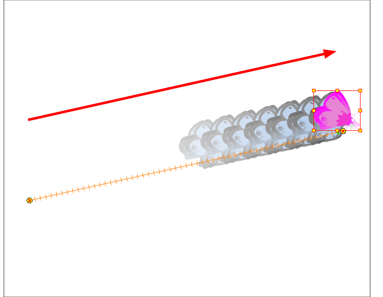
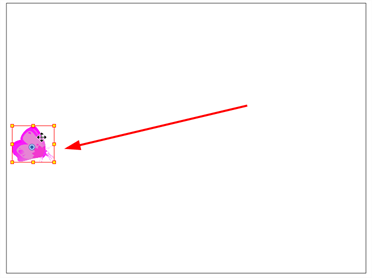
In the Camera view, select the element to animate and move it to its first position. |
A keyframe is created on the first frame of the Timeline view.

|
6.
|
In the Timeline view, go to the frame on which you want to set the second position. |

|
7.
|
In the Camera view, move the element to its second position. |
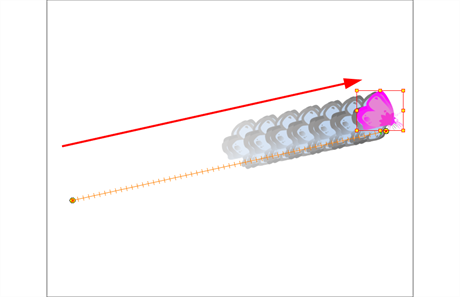
A second keyframe is created on the Timeline view.

|
8.
|
Play back  your animation. your animation. |
To see your motion animations in the Top, Side or Perspective views while you play back, you must turn on the Playback option. From the top menu, select Play > Enable Playback > Top View or Side View or Perspective View.
Animating the Camera
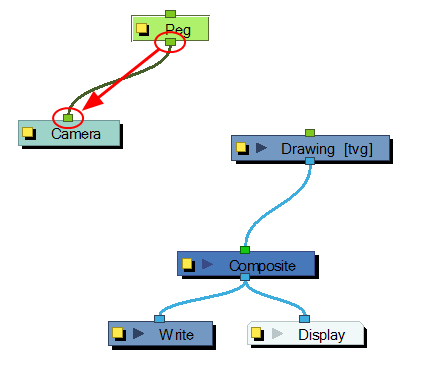
The camera is treated the same way as any other element. The same tools and selection modes are used to offset or animate it, but the camera is a static object. To animate the camera, you need to connect it to a peg layer. A peg is a trajectory layer.

While making camera moves, you can use the Top, Side, and Camera views.
How to open the Top and Side views
|
‣
|
From the top menu, select Windows > Top or Side. |
|
‣
|
From any existing window already open in your project, click the Add View  button at the top-right corner and select Top or Side. button at the top-right corner and select Top or Side. |
How to add a camera and parent it to a peg
|
1.
|
If you do not already have a camera layer, do one of the following: |
|
‣
|
From the top menu, select Insert > Camera. |
|
‣
|
From the Timeline view layers toolbar, click the Add Layers  button and select Camera. button and select Camera. |
|
‣
|
From the Module Library view, select a Camera module and drag it to the Network view. |
A new camera layer is added to the scene and appears in the Timeline view.
|
2.
|
In the Timeline view, select the Camera layer. |
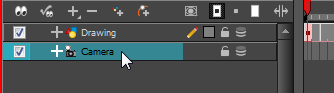
|
3.
|
From the Timeline View Layer toolbar, click the Add Peg  button. button. |
A Peg layer appears directly above the Camera layer. The Camera layer is automatically attached to it.
The Peg layer automatically takes the name of the camera and adds the suffix -P to indicate that it is a Peg layer, for example Camera-P.

If the new Peg layer did not appear directly above the camera, you may have clicked elsewhere in the scene, which deactivated the layer on which you want to add the Peg layer.
|
‣
|
Select the Camera layer and drag and drop it under the new Peg layer. Or delete the misplaced Peg layer, select the Camera layer and click the Add Peg button again. |
|
‣
|
From the Module Library view, you can select a Peg module and drag it to the Network view. Then you can connect the peg’s output port to the camera’s input port. |
How to animate the camera
|
1.
|
In the Tools toolbar, enable the Animate mode. |
|
2.
|
In the Tools toolbar, select the Transform tool or press Shift + T. |
|
3.
|
On the right side of the Timeline view, on the Camera Peg layer, select the frame at which you want the camera move to start. |
|
4.
|
Do one of the following: |
|
‣
|
Right-click and select Insert Keyframe. |
|
‣
|
In the Timeline View toolbar, click the Add Keyframe  button. button. |

A keyframe appears in that cell. Any frames preceding this keyframe cell will hold the same camera position as in this keyframe.
|
5.
|
In the Top, Side or Camera view, select the camera (the large V-shaped cone) and move it to the desired position. In the Camera view, the camera is represented by a thin frame. You need to click directly on one of the edges. |

|
6.
|
On the Timeline view, click on another cell a bit further down in time to indicate where the camera move will end. |
|
7.
|
Select the camera in the Camera, Top or Side view and move it to the desired position. |

A second keyframe appears and a line is created between the two frames to indicate that the subsequent motion between the frames will be calculated and rendered by the program.
|
8.
|
Play back your animation. |


