Copying and Pasting a Motion
In the Timeline view, you can easily drag keyframes to change the animation timing, delete them, cycle them and even copy them.
As you animate, you will find that you reuse many positions, drawings, and keys. However, you may only want to paste the drawings or just the keys or maybe everything. There are different paste options available in the Timeline view which give you maximum flexibility when reusing and pasting.
Note that these modes also apply when you use drag instead of copy and paste.
There are three different modes for pasting your selection:
|
•
|
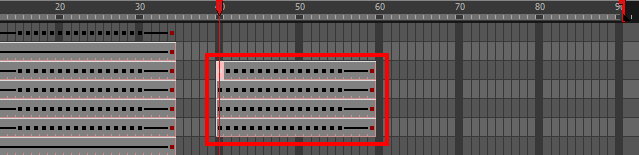
 Paste Mode: All Drawing Attributes: Pastes the drawing exposure and keyframes. Paste Mode: All Drawing Attributes: Pastes the drawing exposure and keyframes. |
|
•
|
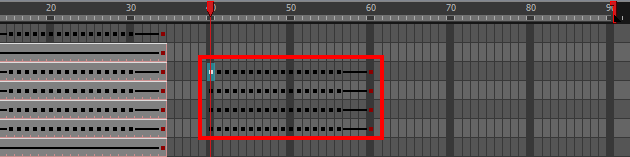
 Paste Mode: Keyframes Only: Pastes only the keyframes. Paste Mode: Keyframes Only: Pastes only the keyframes. |
|
•
|
 Paste Mode: Exposures Only: Pastes only the drawing exposure. Paste Mode: Exposures Only: Pastes only the drawing exposure. |
When you have position keyframes set in your drawing layer and you want to move them around when moving your drawing's timing, you can use the Paste Special feature to only move selected keyframes.
You can also use the Paste Cycle and Paste Reverse feature to cycle your selection including keyframes and drawings.
If you want to cycle a portion of your animation, you can use the Paste Cycle command. You can also use the Paste Reverse command to completely reverse the flow of your animation.
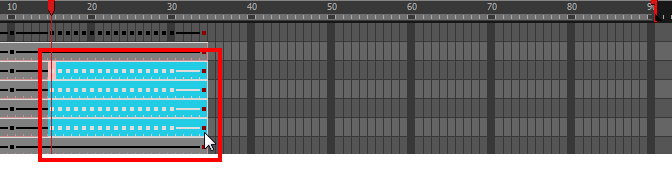
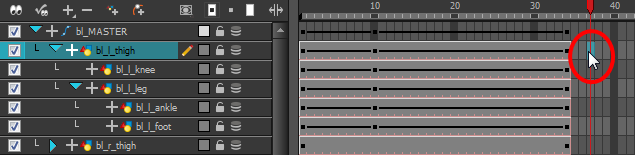
 How to paste a selection using the different Timeline pasting and dragging modes
|
1.
|
In the Timeline view, select the cells you want to copy and paste. |
|
2.
|
In the Timeline view's left side, enable the desired Paste mode. |
|
3.
|
From the top menu, select Edit > Copy cells from the Timeline or press Ctrl + C (Windows/Linux) or ⌘ + C (Mac OS X). |
|
4.
|
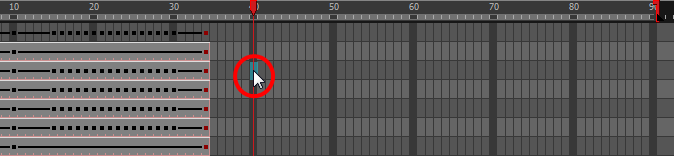
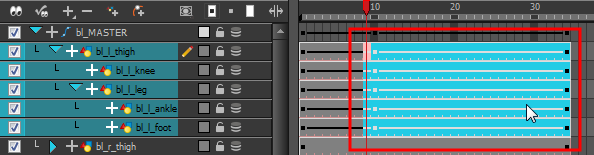
In the Timeline view's right side, select the cell on which you want to paste your selection. |
|
5.
|
From the top menu, select Edit > Paste Cells in the Timeline or press Ctrl + V (Windows/Linux) or ⌘ + V (Mac OS X). |
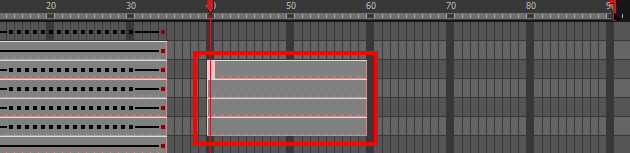
Paste Mode: All Drawing Attributes
Paste Mode: Keyframes Only
Paste Mode: Exposures Only
How to copy and paste a motion using Paste Special
|
1.
|
In the Timeline view, select the keyframes, to copy and paste. If you want to move the keyframes, move on to step 3. |

|
2.
|
In the top menu, select Edit > Copy. |
|
3.
|
Edit your selection by doing the following: |
|
‣
|
To paste the selection, in the Timeline view, select the first cell on which you want to paste your keyframes and from the top menu, select Edit > Paste Special. |
|
‣
|
To move the selection, in the Timeline view, drag the selection and hold down Alt (Windows/Linux) or ⌘ (Mac OS X). Drop the selection where you need it and release the hot key. |

The Paste Special window opens.
|
4.
|
Set the Drawing, Pegs and Functions, and Cycles parameters. |

How to open the Paste Special dialog box
|
1.
|
In the Library view, select the symbol or template to import. |
|
2.
|
While dragging the selection to the Timeline view, hold down the Alt (Windows/Linux) or ⌘ (Mac OS X). Drop the selection in the Timeline view before releasing the hot key. |
The Paste Special window opens.
How to cycle a portion of an animation
|
1.
|
In the Xsheet or Timeline view, select the cell range and keyframes to loop. |
|
2.
|
From the top menu, select Edit > Copy. |
|
3.
|
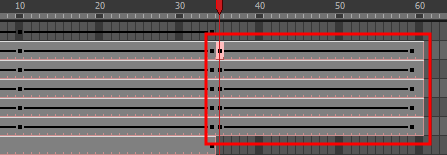
In the Xsheet or Timeline view, select the cell on which you want the cycles to start. |
|
4.
|
From the top menu, select Edit > Paste Cycle or press Ctrl + / (Windows/Linux) or ⌘ + / (Mac OS X). |
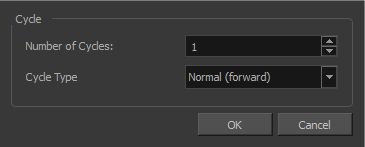
The Paste Cycle dialog box opens.
|
5.
|
In the Number of Cycles field, increase or decrease the number of cycles you want to paste. |
|
6.
|
In the Cycle Type, select the type of cycle to paste. |

|
‣
|
Normal (forward): Pastes your selection as it is, starting with the first cell and ending with the last. |
|
‣
|
Reverse: Pastes your selection reversed, starting with the last cell and ending with the first. |
|
‣
|
Forward > Reverse: Pastes your selection as a yo-yo, starting with the first cell, going to the last one and ending with the first cell. |
|
‣
|
Reverse > Forward: Pastes your selection as a reversed yo-yo, starting with the last cell, going to the first one and ending with the last cell. |
How to reverse the animation flow
|
1.
|
In the Xsheet or Timeline view, select the cell range and keyframes to paste inverted. |
|
2.
|
From the top menu, select Edit > Copy. |
|
3.
|
In the Xsheet or Timeline view, select the cell on which you want the cycles to start. |
|
4.
|
From the top menu, select Edit > Paste Reverse or press Ctrl + . (Windows/Linux) or ⌘ + . (Mac OS X). |
Paste Special Options
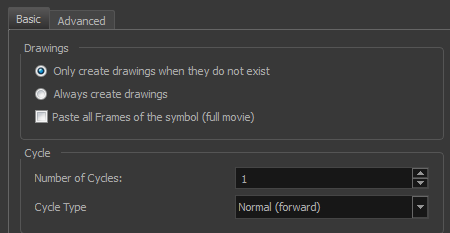
Basic Tab
| Parameter
|
Description
|
| Drawings |
Only create drawing files when they do not exist: When adding exposures to a drawing layer, new drawings will be created only when drawings with the same name do not already exist in the destination. |
| Always create drawing files: When adding exposures to a drawing layer, new drawings will always be created. If drawing files with the same name already exist, Harmony will create a new name for the drawing. |
| Paste all Frames of the Symbols (full movie): When enabled, the Paste Special command will expose all the Symbol's frames instead of the first one only. |
| Cycle |
Number of Cycles: Use the up and down arrows to increase or decrease the number of cycles you want to paste. You can also type the value directly in the field.
|
|
Cycle Type
|
•
|
Normal (forward): This pastes your selection as it is, starting with the first cell and ending with the last one. |
|
•
|
Reverse: This pastes your selection in reverse, starting with the last cell and ending with the first one. |
|
•
|
Forward -> Reverse: This pastes your selection as a yo-yo, starting with the first cell, going to the last one and ending with the first cell. |
|
•
|
Reverse -> Forward: This pastes your selection as a reverse yo-yo, starting with the last cell, going to the first one and ending with the last cell. |
|
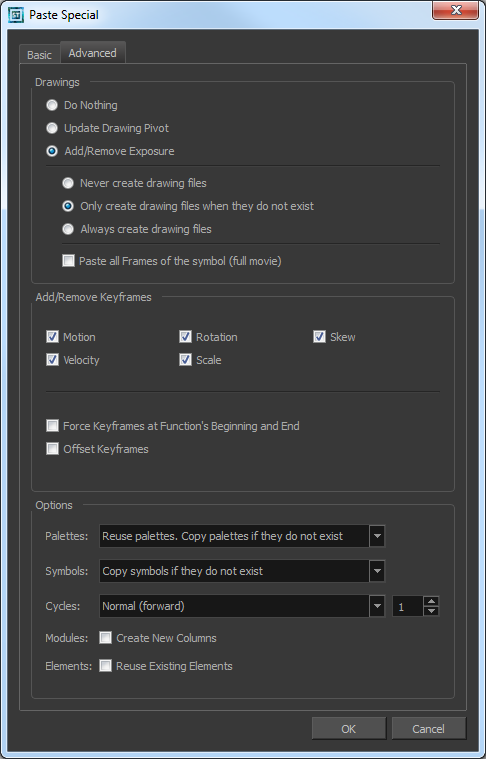
Advanced Tab
| Parameter
|
Description
|
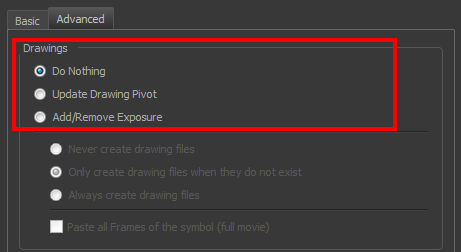
| Drawings |
Do Nothing: Does not create or overwrite drawings.
|
|
Update Drawing Pivot: Revises the drawing pivot in the destination to use the same drawing pivot as the first drawing in the template. If you have a range of drawings selected in the destination, the pivot points of all selected drawings will be updated.
|
|
Add/Remove Exposure: Creates/deletes exposure values in the selected layer.
|
|
You have the following choices as to how to treat drawings that will be created when adding an exposure:
|
•
|
Never create drawing files: When adding exposures to a drawing layer, drawing files will not be created. |
|
•
|
Only create drawing files when they do not exist: When adding exposures to a drawing layer, new drawings will be created only when drawings with the same name do not already exist in the destination. |
|
•
|
Always create drawing files: When adding exposures to a drawing layer, new drawings will always be created. If drawing files with the same name already exist, Harmony will create a new name for the drawing. |
|
•
|
Extend Exposure: Extends the exposure of drawings to fill the range of cells to the destination frame. |
|
•
|
Key Drawing Mode (Substitution): Pasting an exposure value replaces the cell value in the current frame and in all frames following in sequence with the original cell value. |
|
•
|
Paste all Frames of the Symbols (full movie): When enabled, the Paste Special command exposes all the Symbol's frames instead of only the first one. |
|
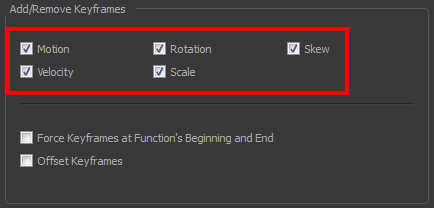
| Add/Remove Keyframes |
Motion: Copies the properties of the selected motion keyframe to the new frame.
|
|
Velocity: Copies the properties of the selected velocity keyframe to the new frame.
|
|
Rotation: Copies the properties of the selected rotation keyframe to the new frame.
|
|
Skew: Copies the properties of the selected skew keyframe to the new frame.
|
|
Scale: Copies the properties of the selected scale keyframe to the new frame.
|
|
Force Keyframes at Function's Beginning and End: Adds a keyframe to the beginning and end of the pasted function, reproducing the source function.
|
|
Offset Keyframes: When pasting functions, this option offsets the keyframes from the function's last value by the values in the pasted function. This will continue the progression of a function rather than repeat the values.
|
| Options |
Palettes
|
•
|
Do nothing: Does not create, overwrite, merge or link palettes. |
|
•
|
Reuse palettes. Copy palettes if they do not exist: Palettes in the destination drawings are left as they are. |
|
•
|
Copy and overwrite existing palettes: Overwrites destination palettes with the palettes from the source drawings. |
|
•
|
Copy and create new palette files: Creates new palette files, placing them at the same relative environment and scene level as the source. If the palettes in the templates were stored at the environment level of the source scene, the paste operation will place the palettes in the environment level of the destination scene. |
|
•
|
Copy and create new palette files in element folder: Creates new palette files in the element folders of the destination scene, rather than in the same relative job or environment. |
|
•
|
Copy palette and merge colours. Add new colours only: Adds new colours to the destination palettes and ignores colours that are the same in the two palettes. |
|
•
|
Copy palette and update existing colours only: Adds new colours to the destination palette and updates duplicate colours in the destination with colour values from the source. |
|
•
|
Link to original palettes (colour model): Links the colour palettes in the destination scene to the palettes in the source. Use this to link drawings to the palettes in a colour model. |
|
•
|
Copy scene palettes and merge colours. Add new colours only: Adds new colours to the destination scene palettes and ignores colours that are the same in the two palettes. |
|
•
|
Copy scene palettes and update existing colours: Adds new colours to the destination scene palette and updates duplicate colours in the destination with the colour values from the source. |
|
•
|
Duplicate All Symbol Content: Instead of linking the Symbol instance to the original one, the Symbol will be duplicated. A new Symbol is created in the Library. |
|
|
Symbols
|
•
|
Copy symbols if they do not exist: This is the default setting for this operation and will prevent Symbols in an Action template from being copied. |
|
•
|
Duplicate symbols: Creates a duplicate of the symbol instead of linking the Symbol instance to the original one. The new Symbol is created in the Library. |
|
•
|
Overwrite symbols: If a modification was made to a Symbol that does not exist in the basic rig template for a character, select this option to overwrite the previous Symbol. |
|
|
Cycles
|
•
|
Normal (forward): Pastes your selection as is, starting with the first cell and ending with the last. |
|
•
|
Reverse: Pastes your selection in reverse, starting with the last cell and ending with the first. |
|
•
|
Forward > Reverse: Pastes your selection as a yo-yo, starting with the first cell, going to the last one and ending with the first cell. |
|
•
|
Reverse > Forward: Pastes your selection as a reverse yo-yo, starting with the last cell, going to the first one and ending with the last cell. |
|
•
|
Number of Cycles: Lets you set the number of cycles. |
|
|
Modules: Create New Columns: A new column is created when you copy and paste modules from the Network view or Layer in the Timeline view. If the layers are linked to function curves, the function curves, drawings and timing will be duplicated.
|
| Elements: Reuse existing elements: Lets you paste existing elements without creating new ones. This should be used only when pasting within versions of the same scene. |


