Chapter 11: Installing Harmony Cloud on Windows
You can use the Toon Boom Harmony Installation Wizard at any time to install Harmony Cloud Server as a service.
Configuring Toon Boom Harmony Cloud
 How to install Harmony Cloud as a service
|
1.
|
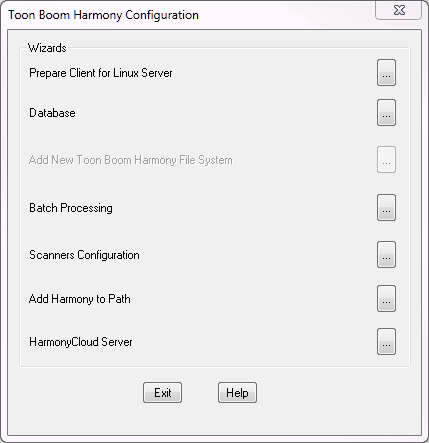
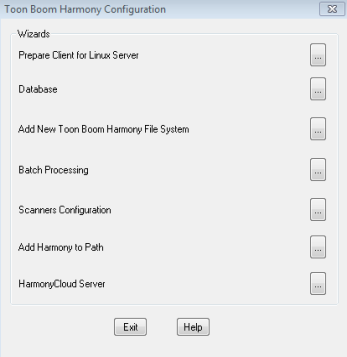
In the Toon Boom Harmony Configuration dialog box, click Harmony Cloud Server. |
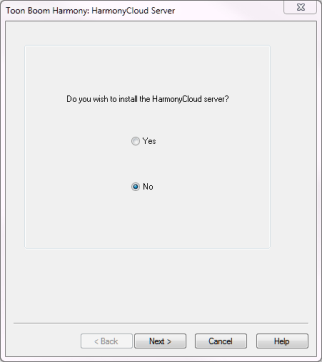
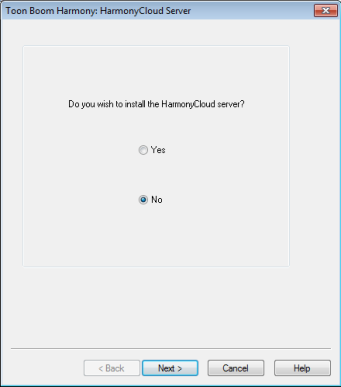
The Harmony Cloud Server window opens.
|
2.
|
Select the Yes option and click Next. |
|
3.
|
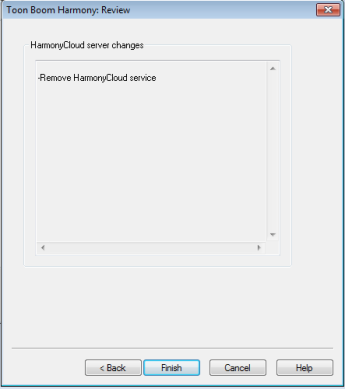
Review the information in the window. If it is correct, click Finish. |
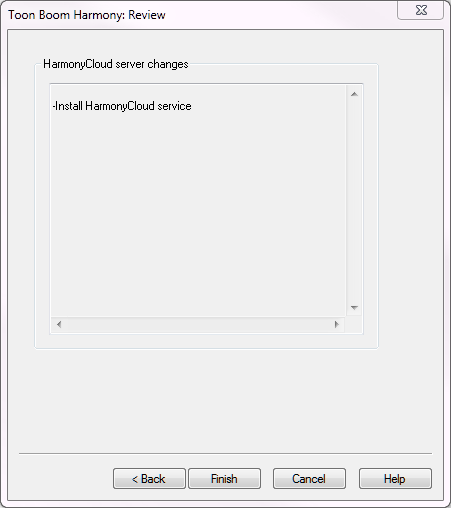
When the configuration wizard is finished, a dialog box opens which indicates the success of the process.
Customizing the Harmony Cloud Service
The Harmony Control Panel can be used to customize the parameters for the Harmony Cloud service.
How to customize the Harmony Cloud Service
|
1.
|
From the Start menu, select All Programs > Toon Boom Harmony 11.2 > Tools > Control Panel. |
|
2.
|
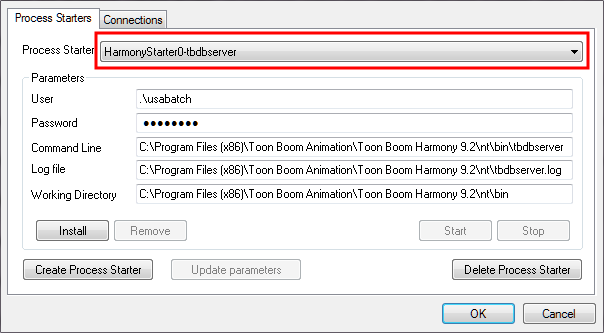
On the Process Starters tab, select HarmonyStarterX-HarmonyCloud from the Process Starter menu. |
|
3.
|
If the service is running, click Stop. |
|
4.
|
In the Command Line field, modify the parameters you want to change. The customizable parameters are: |
|
‣
|
--http-port the port to deploy to |
|
‣
|
--http-addressIPv4 (e.g. 0.0.0.0) or IPv6 Address (e.g. 0::0) |
|
‣
|
--threadsnumber of threads |
|
5.
|
Click Update parameters. |
Running Harmony Cloud Manually
If you do not want to run Harmony Cloud as a service, you have the option of manually starting the Harmony Cloud server—see Customizing the Harmony Cloud Service.
How to run Harmony Cloud manually
|
1.
|
Using a command window, navigate to the installed directory of Toon Boom Harmony 11.2. This is usually located in: |
C:\Program Files (x86)\Toon Boom Animation\Toon Boom Harmony 11.2
|
2.
|
Navigate to win64\bin folder. |
You can change the default port used by Harmony Cloud by modifying the HarmonyCloud.bat file. Open the file using your favourite text editor and update the value of the parameter –http-port to the desired value. See bolded text below:
HarmonyCloud.exe --docroot ../../resources/cloud --http-address 0.0.0.0 --http-port 8080 --config ../../resources/cloud/wt_config.xml
Managing the Harmony Cloud Service
Using the Harmony Control Panel
If at any point you want to stop/start Harmony Cloud Services, you can do so through the Harmony Control Panel.
How to use the Harmony Control Panel
|
1.
|
From the Start menu, select All Programs > Toon Boom Harmony 11.2 > Tools > Control Panel. |
|
2.
|
On the Process Starters tab, select HarmonyStarterX-HarmonyCloud from the Process Starter menu. |
|
3.
|
Click Start or Stop to start or stop the service respectively. |

Using Windows Services
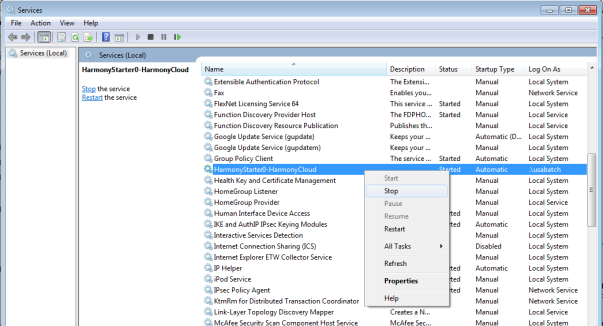
If at any point you need to start/stop or restart the Harmony Cloud server, you can do so through the Administrative Tools in Windows.
How to access a list of running services on your computer
|
1.
|
Navigate to your system's Control Panel. |
|
2.
|
Depending on your setup, select System and Security > Administrative Tools > Services or Administrative Tools > Services. |
|
3.
|
Locate HarmonyStarterX-HarmonyCloud from the list of services and right-click and select Start or Stop to start or stop the service. |
Uninstalling the Harmony Cloud Service
How to uninstall the Harmony Cloud Service
|
1.
|
In the Toon Boom Harmony Configuration dialog box, click Harmony Cloud Server. |
|
2.
|
Select the No option, and click Next. |
|
3.
|
Review the information in the window. If it is correct, click Finish. |
|
4.
|
When the configuration wizard is finished, a dialog box opens which indicates the success of the process. |
Alternatively, you can use the Harmony Control Panel to remove the Harmony Cloud service or delete the Harmony Cloud process starter.
How to uninstall through the Harmony Control Panel
|
1.
|
From the Start menu, select All Programs > Toon Boom Harmony 11.2 > Tools > Control Panel. |
|
2.
|
On the Process Starters tab, select HarmonyStarterX-HarmonyCloud from the Process Starter menu. |
|
3.
|
Click Remove then click Delete Process Starter. |
Network Setup
If your server does not have a assigned IP address on your DNS server, you should set up a static IP.
Setting Up a Static IP
How to set up a static IP for accessing the Harmony Cloud application
|
1.
|
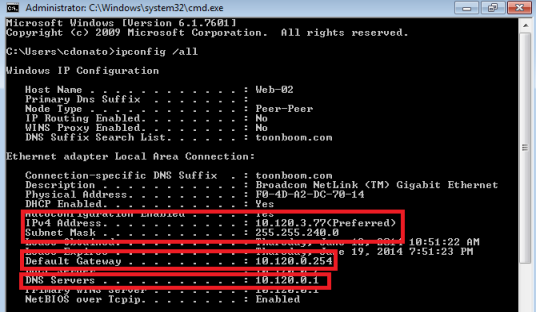
Click the Start menu and type cmd in the Search programs and files field. Press Enter. |
|
2.
|
In the command prompt that opens, type: |
ipconfig /all
|
3.
|
Make a note of the following information from the screen: IPv4 Address, Subnet Mask, Default Gateway and DNS Servers. |
|
4.
|
From the Start menu, select Control Panel. |
|
5.
|
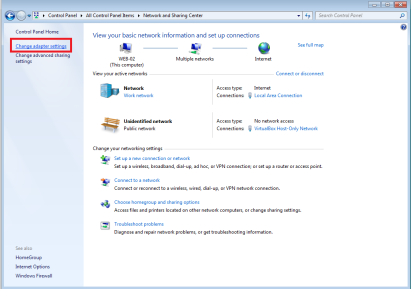
Click View network status and tasks. |
|
6.
|
On the top-left side of the screen, click Change adapter settings. |
|
7.
|
It is possible to have multiple connections listed. You need to determine which adapter is your connection to the Internet. Right-click on your network adapter and select Properties. |
The Local Area Connection Properties opens.
|
8.
|
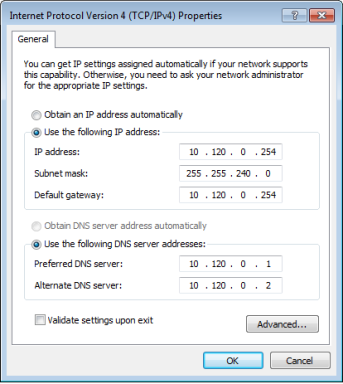
Select Internet Protocol Version 4 (TCP/IPv4) and click Properties. |
The Internet Protocol Version 4 (TCP/IPv4) Properties dialog box opens.
|
9.
|
Select the Use the following IP address option. Enter the IP address, Subnet Mask, and Default Gateway information you obtained in step 3. |
|
10.
|
Select the Use the following DNS server addresses option. Enter the DNS addresses you obtained in step 3. |
|
13.
|
Add your DNS suffix obtained in step 3. |
Opening a Port for External Connection
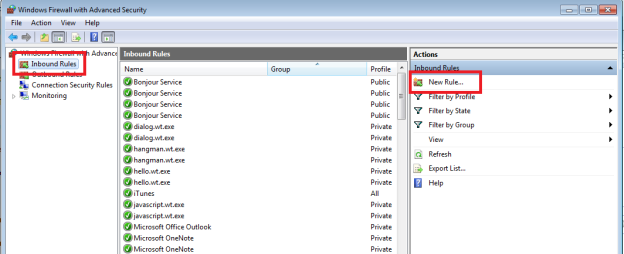
It is necessary to open a port in your firewall to allow other computers to access your Harmony Cloud server. Harmony Cloud is using port 8080 by default.
How to open a port for external connection | 1. | From the Start menu, select Control Panel. |
| 2. | Depending on your setup, you might need to click System and Security before moving to the next step. |
| 3. | Click Windows Firewall. |
| 4. | On the top-left side, click Advanced settings. |
| 5. | On the left pane, click Inbound Rules. |
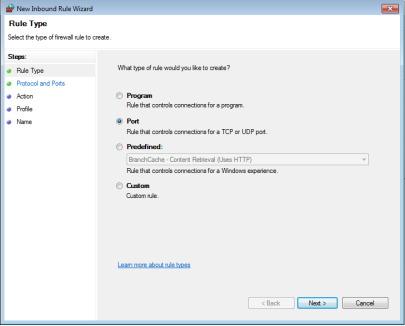
| 6. | On the right pane, click New Rule. |
| 7. | Select Port and click Next. |
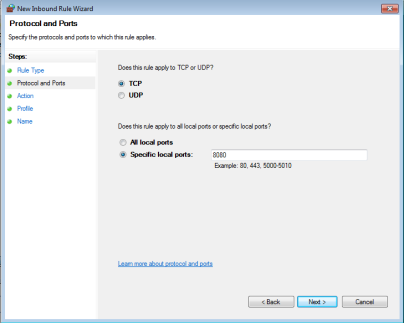
| 8. | Select the TCP and Specific local ports options. |
| 9. | In the Specific local ports field, type in 8080 and click Next. |
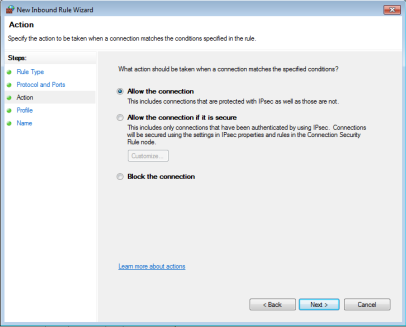
| 10. | Select the Allow the connection option and click Next. |
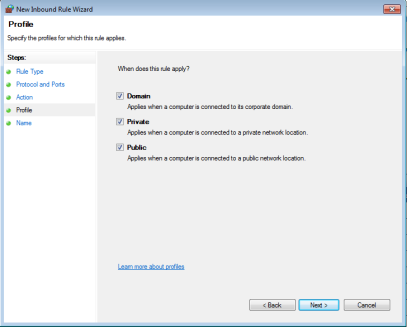
| 11. | Select the Domain, Private and Public options and click Next. |
| 12. | In the Name field, type in Toon Boom Harmony Cloud and click Finish. |