Configuration
After installing Toon Boom Harmony, you need to configure the database parameters depending on your machine's setup and third-party software, and restart your anti-virus settings.
Configuring Toon Boom Harmony
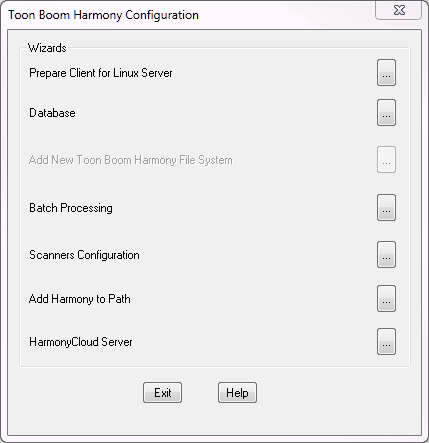
You can use the Toon Boom Harmony Installation Wizard at any time to:
|
•
|
Modify the Toon Boom Harmony server or client configuration |
|
•
|
Configure batch processing |
|
•
|
Prepare a client to be the client of a Linux server |
|
•
|
Add Harmony's path to the Path environment variable |
After installation, you must set up the database configuration for computers running Toon Boom Harmony.
Setting Up the Database Server
The Database Server controls all interactions with the contents of the Toon Boom Harmony database. It processes all requests to open, read or update files, keeping track of files that are locked so others cannot edit them.
 How to set up the Database Server
|
1.
|
In the Toon Boom Harmony Configuration dialog box, click the Database button. |
|
2.
|
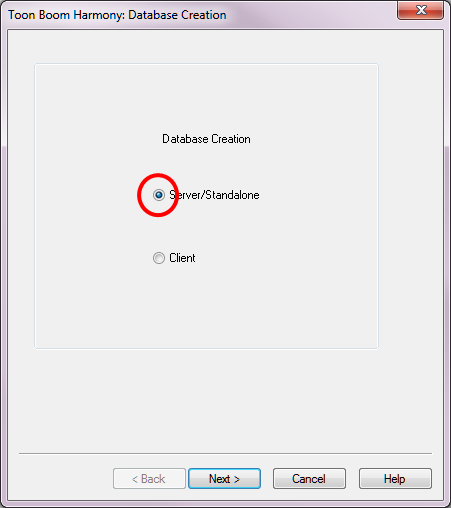
Select the Server/Standalone option and click Next. |
|
3.
|
Select the location of the database from the drop-list and set a username and password for the user who will be running the database services.
The default account is usabatch. If the account specified does not exist, it will be created by the wizard. |
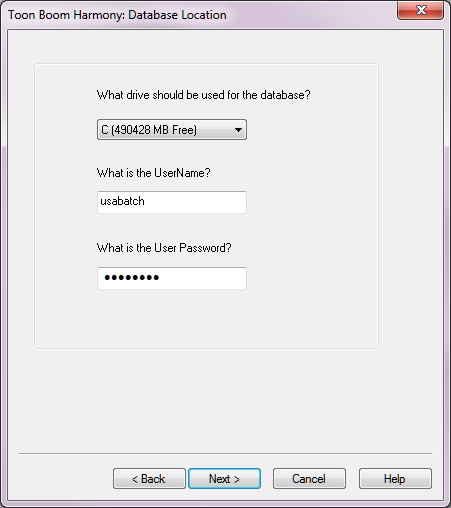
Make sure to take note of the account name and password if an account other than the default one is used. This information will be required later on for client workstations to connect to the server.
|
4.
|
Click Next.
The configuration program creates the USA_DB database in the location you specified. The USA_DB database tracks the location of the scene data on the file system. You can have multiple file systems, but only one USA_DB. |
If you are upgrading from a previous version of Harmony or Opus and you have renamed USA_DB for backup, you need to create new USA_DB at the same location where the previous USA_DB was located.
|
5.
|
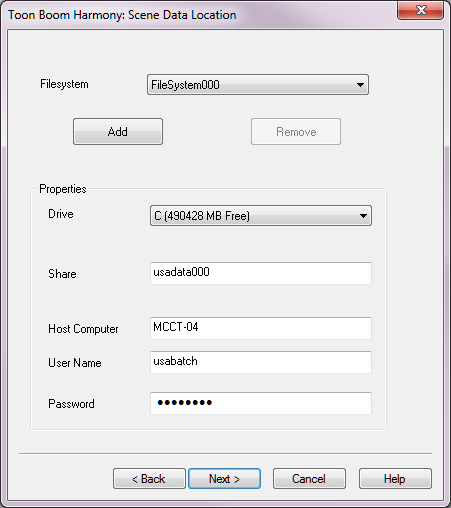
In the Scene Data Location window, create the storage locations for the database. |
|
‣
|
Filesystem: Select the file system you want to add. The first File system is already created for you. If you want to create additional file systems to, for example, store scene data across multiple drives or computers, click Add. |
|
‣
|
Drive: Select the drive on which you want to create the file system. |
|
‣
|
Share: In this field is the name of the file system that will be created. You can change this value. However, it is recommended to leave the default name, which increments from usadata000. |
|
‣
|
Host Computer: Enter the name of the computer on which this file system will be created. By default, the current computer's name appears here. You can create file systems on other computers if necessary. |
|
‣
|
User Name and Password: Specify the user name and password that will be used to connect to the file system. It is recommended to use the same user name and password as the one used for the database. |
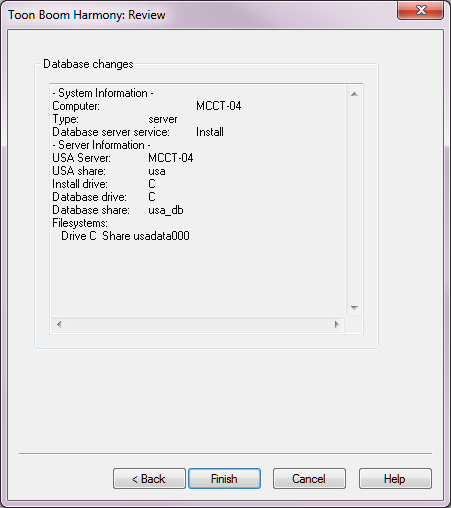
The Toon Boom Harmony: Review window opens.
|
7.
|
Review the information in the window. If it is correct, click Finish. |
Setting Up the Database Client
After you have configured your server, you can configure all the client machines that will connect to the server. Use the Toon Boom Harmony Configuration Wizard to connect client computers to the database.
How to set up the Database client
|
1.
|
In the Toon Boom Harmony Configuration dialog box, click the Database button. |
|
2.
|
In the Database Creation window, select the Client option and click Next. |
|
3.
|
In the Server Name window, enter the name of the Toon Boom Harmony server and click Next. |
|
4.
|
In the Review window, verify the database changes and click Finish. |
A message appears when the client computer is successfully connected to the database server.
It is possible to change the user account used to connect to USA_DB or the different file systems using the Toon Boom Control Panel, which you can start from Start > Programs > Harmony 11 > Tools > Control Panel.
Sharing Toon Boom Harmony Related Directories
Sharing Toon Boom Harmony related directories does not need to be done in a typical installation. This is required only when the shares were not created correctly during server configuration. For example, this can happen when simple file sharing was not turned off before running the Configuration Wizard on the server. Or when you have backed up the usadb and usadata folders before installation, you may have to share them when putting them back into place.
If you are upgrading from a previous version and you have changed the USA_DB and USADATA name during upgrade, make sure to return to the normal names before continuing.
How to activate file sharing for the Toon Boom Harmony folder
|
1.
|
Open Windows Explorer. |
|
2.
|
Locate the following folder: C:\Program Files (x86)\Toon Boom Animation\Harmony 11. |
|
3.
|
Right-click on the Harmony 11 folder and select Properties. |
|
4.
|
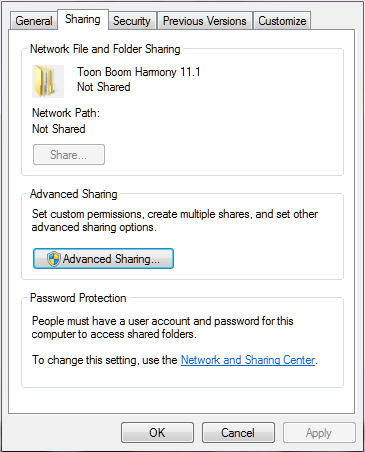
Select the Sharing tab. |
|
5.
|
Select the Share this folder option. |
|
6.
|
Click Advanced Sharing. |
|
7.
|
In the Share Name field, type usa. |
Changing the name of the share to usa must only be done when sharing the Harmony folder. The USA_DB and USADATA folders should keep their original name.
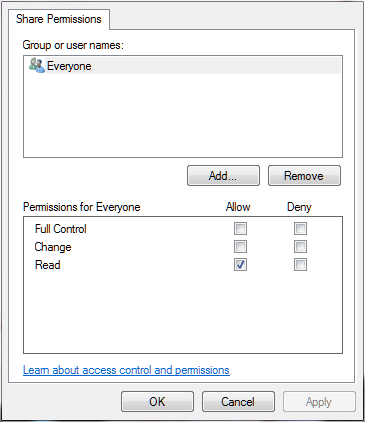
The Permissions dialog box displays.
|
9.
|
Set all permissions in the Everyone group to Allow and click OK. |
|
10.
|
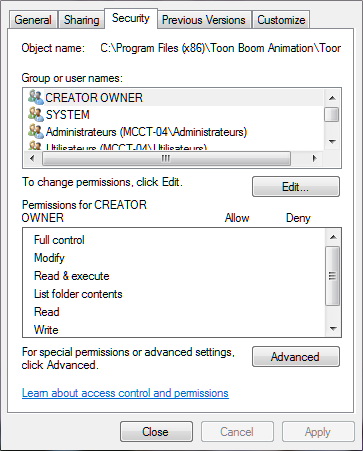
Back in the File Properties window, select the Security tab. |
|
11.
|
Click Edit to prompt the permissions window. Set all permissions in each group or user to all. |
|
13.
|
Repeat steps 3 to 10 with the USA_DB and USADATA folders. |
Configuring the License
How to configuring the license server
|
1.
|
From the Start menu, select All Programs > Harmony 11 > License Tools > LicenseWizard. |
Depending on how the License Wizard was started, the first page of the License Wizard will be as following:
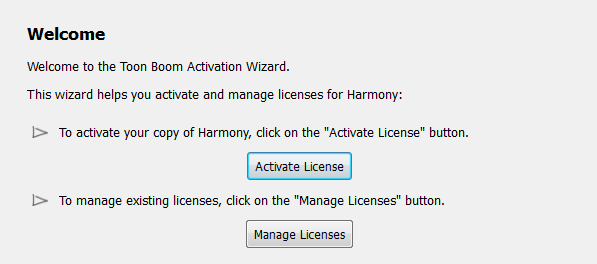
Click Activate License to open the Activation Options screen.
|
2.
|
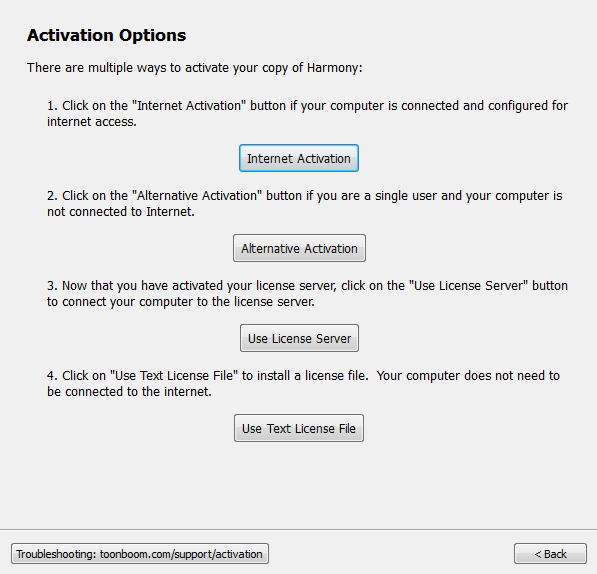
Click Internet Activation. |
The Internet Activation Options screen appears.

|
3.
|
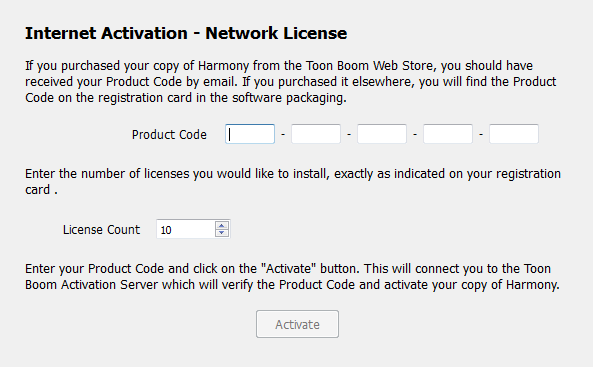
Click Network License. |
The Internet Activation - Network License screen appears.
|
4.
|
Type or copy/paste the product code and type in the number of licenses this product code grants you. |
Once activated, a server license cannot be returned to the activation server. Make sure you are activating the license on the correct computer with the proper license count.
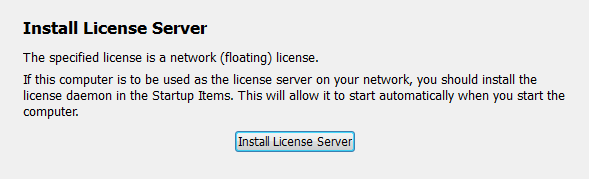
The Install License Server screen appears.
|
6.
|
Click Install License Server. |
The license.dat file is created and placed in /usr/local/flexlm/licenses/license.dat. The license.dat file contains the following information:
SERVER this_host 0 ANY
VENDOR toonboom
USE_SERVER
It will also configure and start the License Server service.
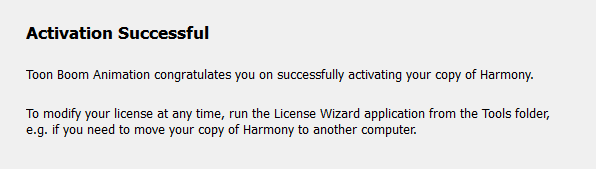
The Activation Successful screen appears.
|
7.
|
Click Finish to exit the wizard. |
|
8.
|
Look at the lmgrd.log to make sure it was started properly. |
C:\flexlm\lmgrd.log
|
9.
|
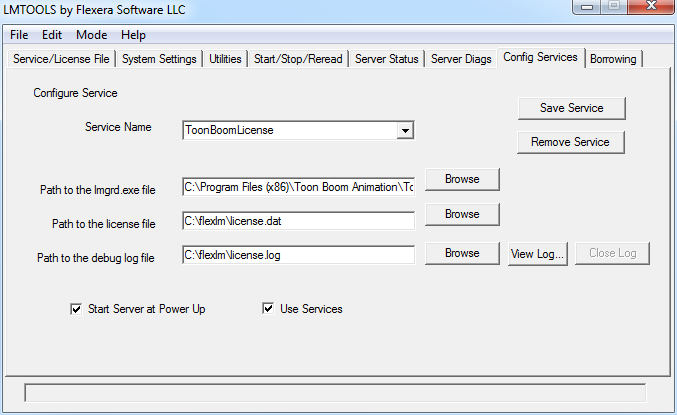
From the Start menu, select All Programs > Toon Boom Harmony 11.2> License Tools > FlexLM Tools and verify that the license server has been configured properly and that it is running. |
Below are the default parameters for the license service.
|
10.
|
It is good practice to verify that the license service it properly running by going in the Server Status tab and clicking Perform Status Enquiry. |
Restoring Backed Up Data
How to restore backed up data
|
1.
|
Open the Toon Boom Harmony Control Panel and select HarmonyStart0-tbdbserver from the Process Starter menu and click Stop. |
|
2.
|
Press Ctrl + Alt + Delete to open the Task Manager. Select the Processes tab and verify that the tbdbserver is no longer there. |
|
3.
|
Open the File Explorer and rename the new empty USA_DB database folder to USA_DB_NEW . |
|
4.
|
Rename the USA_DB_BAK (the one that was backed up earlier) to USA_DB to restore the previous database. |
|
5.
|
Copy the dicts files from the new database (USA_DB_NEW/dicts) to the one you restored (USA_DB/dicts). |
Dicts files can also be copied from C:\Program Files\Toon Boom Animation x86)\harmony_11.2\etc\USADB_templates\dicts
|
6.
|
Share the USA_DB folder giving full control every one. Make sure that simple file sharing is turned off before doing this. |
If you cannot set permissions per use for the share, it means that simple file sharing is turned on.
|
7.
|
Rename the new empty usadata000 folder (and any other file system folder) to usadata000_NEW. |
|
8.
|
Share the usadata000 folder (and any other folder you have restored) giving full control to everyone. |
|
9.
|
Start the tbdbserver by opening the Toon Boom Harmony Control Panel. Select HarmonyStart0-tbdbserver from the list and click Start. After starting the tbdbserver, look at the tbdbserver.log to make sure it was started properly. |
C:\ProgramData\Toon Boom Animation\Toon Boom Harmony
|
10.
|
Verify that you can open Harmony and scenes from the server. |
Setting Up the License on Client Workstations
An Admin account is required to set this up. After activation, you can log in as client.
How to set up the license on a client workstation
|
1.
|
Open the License Wizard on the Client machine. |
|
2.
|
Click Activate License. |
The Activation Options screen appears.
|
3.
|
Click Use License Server. |
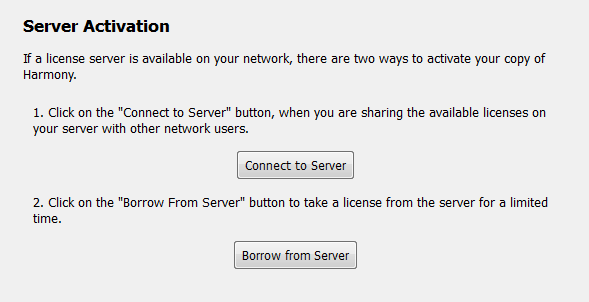
The Server Activation screen appears.
|
4.
|
Click Connectto Server. |
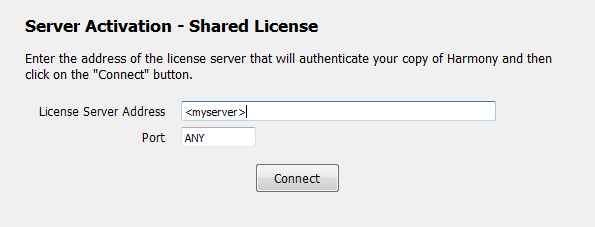
The Server Activation - Shared License dialog appears.
|
5.
|
In the License Server Address field, enter the hostname or the IP Address. |
You are prompted for a password.
|
7.
|
Enter the password and click OK. |
|
8.
|
Click Finish to close the License Wizard. |
Turning on the Anti-Virus Software
Inform your System Administrator before turning your anti-virus software back on.
Turning on the Firewall
The process to do this is basically the reverse of the procedure used to deactivate the firewall.
Inform your System Administrator before proceeding with this task.
How to turn on the firewall
|
1.
|
From the Start menu, select Control Panel. |
|
2.
|
Double-click on the Windows Firewall  icon. icon. |
|
3.
|
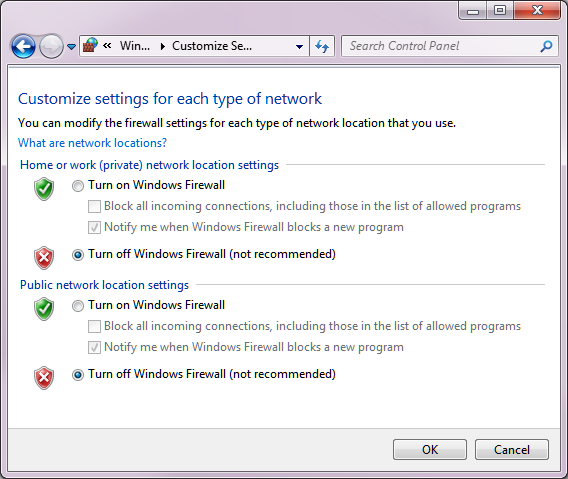
In the Windows Firewall window, click Turn Windows Firewall On or Off on the left side of the window. |
The Customize Settings for Each Type of Network dialog box displays.
|
4.
|
Select the Turn on Windows Firewall option. |
Creating Inbound Rules
How to create inbound rules
|
1.
|
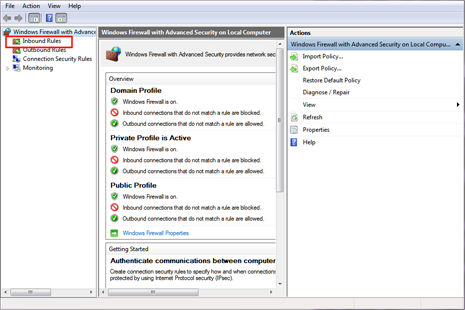
Back in the Windows Firewall window, click the Advanced Settings link. |

|
2.
|
Click Inbound Rules to display the list of inbound rules. |
|
3.
|
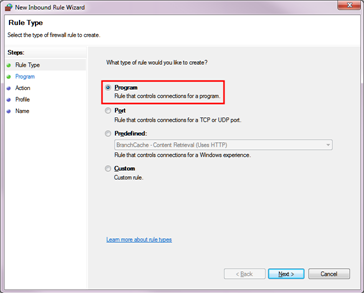
On the right side of the window, click New Rule. |

|
4.
|
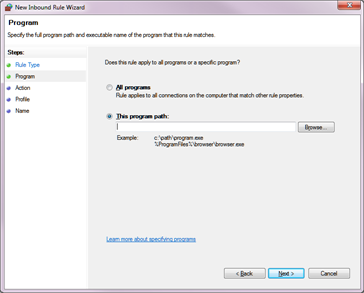
Select the Program option and click Next. |
|
5.
|
Select the This Program Path option and click Browse. |
|
6.
|
Navigate to the Harmony installation path and select tbdbserver.exe. Click Open. |

|
7.
|
Click Next and select the Allow the Connection option |
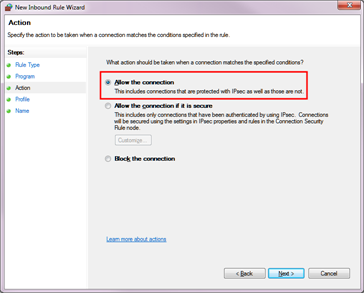 .
.
|
8.
|
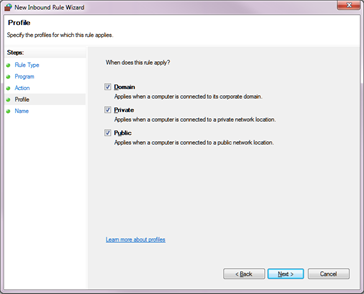
Select the profiles for which this rule will be applied according to your network configuration and click Next. |
|
9.
|
Finish the Rule creation process by clicking Finish. |
|
10.
|
Repeat steps 1 to 9 for tbprocess.exe and toonboom.exe. |
|
11.
|
Repeat steps 1 to 9 for lmgrd.exe if this computer will be used as a license server. |


