Managing Scenes
After you create a scene, you can view the corresponding elements and drawings in the Control Center window. When you select the environment and the job, the corresponding scenes for the selected job appears in the Scenes list in the Control Center window.
For each scene in your job, you must create a unique exposure sheet to lay out the drawings, camera effects, audio tracks, and other special effects for that scene.
When creating your scene, you must select the path where you want to store the scene data and where you want the new scene to appear in the Scenes list. You can create a single scene or create multiple scenes all at once.
You do not have to enter the word "scene" when entering scene names. The system automatically adds scene- in front of the name. For example, when you type"3" in the Scene Name field, the scene name automatically displays as "scene-3" throughout the file system. The scene name will have "scene-" as a prefix, but that will only be visible when looking at the scene on the file system. The scene will appear without this prefix in all the Harmony applications.
When you delete a scene, you not only remove the scene from the Control Center window, but you also permanently remove all the information associated with the scene including:
|
•
|
Exposure sheet (and all associated versions) |
|
•
|
Any palettes stored in that scene's palette library |
Before you delete a scene:
|
•
|
Make sure that you really want to remove all this information from the system |
|
•
|
Are you going to use the scene in the future? |
|
•
|
Do you need to archive the scene for future use? |
|
•
|
Make sure no one else is currently using the scene. |
failure to do this may result in file corruption and loss of your work.
|
•
|
Wait until everyone is offline. This ensures no one can open the scene while you delete it. |
 How to create a scene
|
1.
|
In the Environments section, select the environment containing the job you want to add scenes in. |
|
2.
|
In the Jobs section, select the job you want to add scenes in. |
|
3.
|
Do one of the following: |
|
‣
|
In the Scene section, select Scene> Create. |
|
‣
|
Right-click in the Scenes section and select Create. |
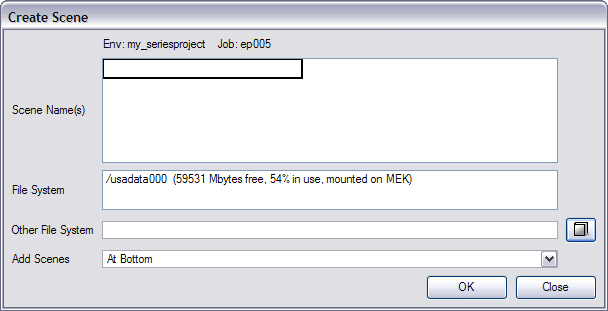
The Create Scene dialog box appears.
|
4.
|
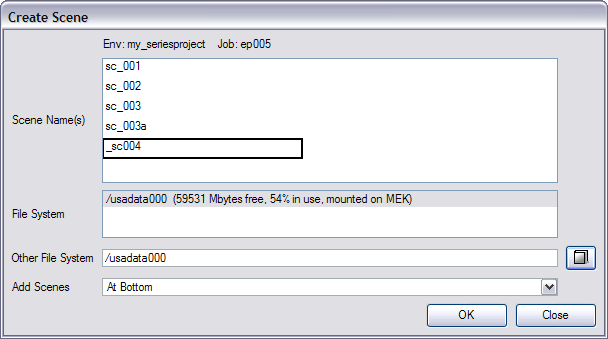
Click in the Scene Name(s) field and enter the name for the first scene you want to create. |
|
5.
|
Press the Enter/Return keyboard shortcut to move onto the next scene. |
|
6.
|
Enter the name of the next scene you want to create. |
When creating a new scene or renaming a scene, the scene's name cannot exceed 23 characters.
When creating scenes in the Control Center module, you should enter the scene names exactly as they appear on the actual animation. This ensures that the information in your environment is consistent with the actual animation.
The job and scene names are alphanumeric and can include underscores (_), but no spaces, or other special characters. The environment name is case-sensitive.
|
7.
|
Repeat the previous steps until you have named all the scenes you want to create. |
|
8.
|
In the File System list, click the path where you want to store the files. |
If you do not see the desired path in the list, specify a different path in the Other File System field.
If you are unsure which disk drive to select, consult your technical director or system administrator.
The information in the File System list displays:
|
‣
|
Available drives on which you can store new scenes |
|
‣
|
Space that is currently available (in megabytes) |
|
‣
|
The percentage of space the drives are currently using |
Although you can add as many scenes as you wish, you can only select one path at a time. Therefore, the Control Center module stores all scenes you create in one session at the same place (same path).
|
9.
|
Select where you want to place the scene in the Scenes list from the Add Scenes menu. These are the options: |
|
‣
|
At Bottom: Places the new scenes at the bottom of the list |
|
‣
|
At Top: Places the new scenes at the top of the list |
|
‣
|
Before Selected: Places the new scenes before the selected scene |
|
‣
|
After Selected: Places the new scenes after the selected scene |
|
‣
|
Name Sort: Arranges the new scenes alphabetically. |
To use the After Selected and Before Selected options, you must select another scene from the Scene list in the Control Center window.
The new scene is created and displayed in the Scenes list. If you do not want to create the scene, click Cancel.
How to delete a scene
|
1.
|
In the Scenes list, select the scene name you want to delete. |
|
2.
|
Select Scene > Delete or right-click anywhere in the Scenes list and select Delete. |
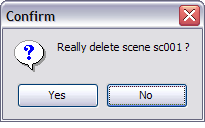
The Confirm dialog box appears.
|
3.
|
Click Yes to delete the scene and all its related information. |
The scene name and all its associated files are deleted.


