Brush Tool Options
When you select the Brush  tool, its properties and options appear in the Tool Properties view.
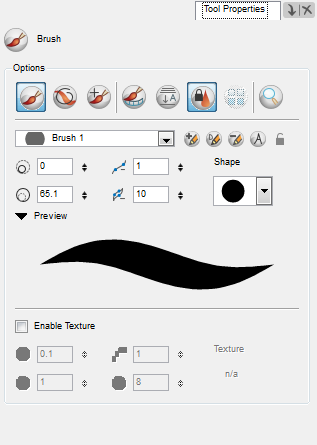
These are the options available for the Brush tool:
The Normal Brush Mode creates contour lines as you draw, adding each brush lines on top of the last ones.
Draw Behind

When the Draw Behind  mode is enabled, the lines you draw will appear behind the art that already exists.
Repaint Brush Mode
The Repaint Brush  is used to repaint zones that have already been painted, it will not affect empty zones or pencil lines. It also automatically flattens each of its brush lines so it does not add new brush lines on top of existing ones. You can use this mode to paint tones or highlights onto your character.
Create Colour Art Automatically
As you draw in the Line Art layer, the Create Colour Art Automatically  automatically creates the corresponding strokes in the Colour Art layer.
Auto-Flatten Mode
When enabled, the Auto-Flatten mode automatically flattens the new lines created with the existing artwork as you draw in the Drawing or Camera view. Brush strokes will flatten with brush strokes and pencil lines will flatten with pencil lines.
Respect Protected Colour
The Respect Protected Colour  option prevent the colours you marked as protected in the Colour view to be repainted using the Repaint Brush mode or any of the painting tools.
Use Stored Colour Gradient
The Use Stored Colour Gradient  option makes your tool use the previously stored gradient position. This way, every new brush line or colour fill will use the stored gradient position.
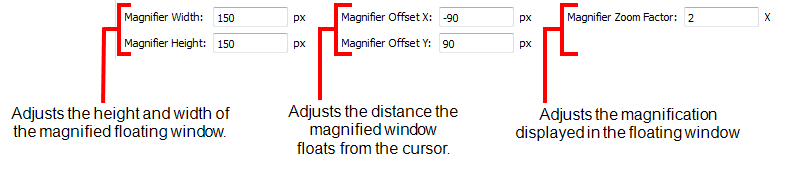
Drawing Magnifier
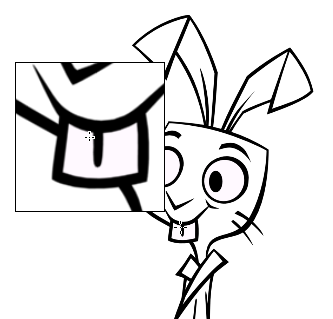
The Drawing Magnifier  tool allows you to magnify portions of your drawing. When this option is enabled, you can hover over your drawings to see a close up of your lines in the Magnifier box.
This feature only works in the Drawing view.
To adjust the settings for the Drawing Magnifier:
|
1.
|
In the top menu, select Edit > Preferences > Drawing. |
|
2.
|
Adjust the Magnifier window Width, Height, X-Axis Offset, Y-Axis Offset, and Zoom Factor. |
Brush Styles
A variety of brush styles are provided allowing you to create and save your own. This way you can create brushes with precise sizes and parameters and save them so you can draw and design—see Brush Styles
Dynamic Brush
A Dynamic Brush  can be created to allow you to draw using patterns created from your artwork—see Dynamic Brush
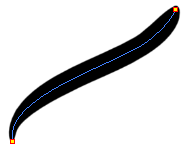
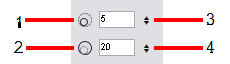
Minimum and Maximum Size
This is where you set the minimum and maximum sizes of your drawing tool which will produce the thick and thin effect on your stroke. This works with the pressure sensitivity of a pen tablet.
|
1.
|
Minimum Size field: Type a value in this field to set the minimum width of the line. |
|
2.
|
Maximum Size field: Type a value in this field to set the maximum width of the line. |
|
3.
|
Up/Down arrows: Use the up and down arrows to set the minimum size value. |
|
4.
|
Up/Down arrows: Use the up and down arrows to set the maximum size value. |
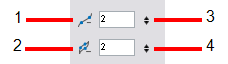
Central Line Smoothness
You can modify the Central Line Smoothness  of your line using this option. This parameter smoothes the initial movement of your line. Increasing the value will result in a smoother line with fewer control points.
Contour Optimization
You can optimize the Contour Line Smoothness of you line using this option. This parameter will smooth the contour of your line once the line has been traced, the higher the value the less control points will compose your line.
|
1.
|
Smoothness field: Type a value to set the smoothness of the line. |
|
2.
|
Contour Optimization field: Type a value to set the contour optimization of the line. |
|
3.
|
Up/Down arrows: Use the up and down arrows to set smoothness value. |
|
4.
|
Up/Down arrows: Use the up and down arrows to set the contour optimization value. |
Brush Tips

In this drop-down menu, you can find a variety of tip shapes from round and square ones to star shaped, select the one you need.
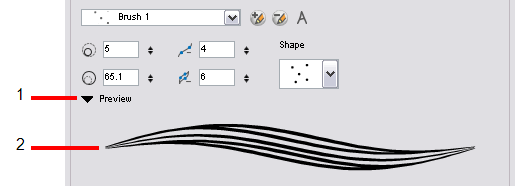
Preview
The Preview field lets you see a preview of the style that will be produced after you customize the different parameters in the Tool Properties view.
|
1.
|
The Arrow button lets you show or hide the Preview area. |
|
2.
|
The Preview field is where the brush line is displayed. |
Line Texture
In Toon Boom Harmony, you can draw with a textured line. Textured lines are a mixed bitmap image contained in a vector frame. This allows you to sketch as if you are drawing on paper.
Related Topics