Creating and Opening a Scene
All scenes created via Harmony are independent and local to the computer.
You can either create a new scene using the Welcome Screen or the File menu:
| • | Creating a Scene Using the Welcome Screen |
| • | Creating a Scene Using the File Menu |
| • | New Scene Startup Script |
Creating a Scene Using the Welcome Screen
To create a scene from the Welcome screen:
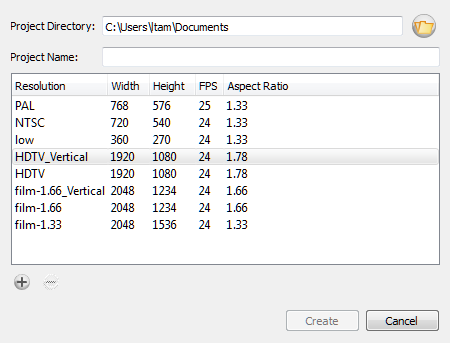
| 1. | To select the scene’s location, in the Project Directory section, browse the files by clicking Browse |

| 2. | In the Project Name field, type the scene’s name. |

| 3. | Set the scene resolution by doing one of the following: |
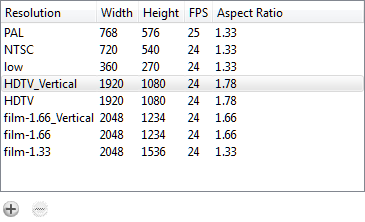
| ‣ | In the Resolution window, select the scene’s resolution and click Create. |
Your new scene is created.
| ‣ | Add a new resolution to list by clicking the Add |
In the New Resolution dialog box, fill in the following fields and click Create.
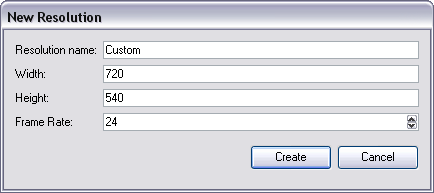
Resolution Name: Name your new resolution.
Width: Type the resolution width in pixels.
Height: Type the resolution height in pixels.
Frame Rate: Type the scene’s frame rate per second.
To open a scene from the Welcome screen:
| 1. | In the Recent Scenes section, click Open Scene. |
The Open Scene browser opens.
| 2. |
*.xstage file. |
| 3. | Click Open to open the scene. |
To open a recent scene from the Welcome screen:
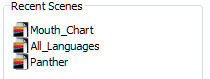
| ‣ | In the Recent Scenes section, select a scene from the list. |
Creating a Scene Using the File Menu
If a scene is already open and you want to create a new one, you can use the File menu.
To create a scene from the File menu:
| 1. | Do one of the following: |
| ‣ | From the top menu, select File > New. |
| ‣ | In the File toolbar, click the New |
| ‣ | Press [Ctrl] + [N] (Windows/Linux) or [⌘] + [N] (Mac OS X). |
The New Scene dialog box opens.
| 2. | Select a scene directory by clicking the Browse |
| 3. | In the Project Name field, type the scene's name. |
| 4. | Set the scene resolution by doing one of the following: |
| ‣ | In the Resolution window, select the scene’s resolution and click Create. |
Your new scene is created.
| ‣ | Add a new resolution to list by clicking the Add |
In the New Resolution dialog box, fill in the following fields and click Create.
Resolution Name: Name your new resolution.
Width: Type the resolution width in pixels.
Height: Type the resolution height in pixels.
Frame Rate: Type the scene’s frame rate per second.
To open a scene from the File menu:
| 1. | Do one of the following: |
| ‣ | From the top menu, select File > Open. |
| ‣ | In the File toolbar, click the Browse |
| ‣ | Press [Ctrl] + [O] (Windows/Linux) or [⌘] + [O] (Mac OS X). |
The Open Scene browser opens.
| 2. |
*.xstage file. |
| 3. | Click Open. |
New Scene Startup Script
When you create a new scene, the TB_sceneCreated script will automatically set the scene length to 60 frames and add one of each of the following modules: drawing element, composite, display and write.
You can customize this script to fit your current project needs. This way, you can set the default scene length to any number of frames you want, or even decide which types of elements and modules you wish to be in your scene when you create it.
Refer to the Toon Boom Harmony Scripting Guide to learn more about using, creating and customizing scripts.
Saving a Scene
It is important to regularly save your scene. As you make changes to a scene, an asterisk (*) appears in the title bar beside the scene name to indicate that the scene contains unsaved changes.
To save a scene, do one of the following:
| ‣ | Select File > Save. |
| ‣ | Press [Ctrl] + [S] (Windows/Linux) or [⌘] + [S] (Mac OS X). |
Related Topics
| • | Welcome Screen |