Changing a Job's Queue Priority
Before you send a job's scenes to be vectorized or rendered, you can change the job's priority level in the processing queue. Increasing a job's priority lets the system process it before other jobs in the processing queue.
Use the Choose New Priority dialog box to change a job's rendering and vectorization queue priority. The priority is set using a sliding scale where 0 is the highest priority and 10 is the lowest.
For example, If Job B is before Job A in the queue, you can change the priority so that Job A is processed first.
Changing's a job's priority doesn't affect vectorizing or rendering Jobs that are already sent in the queue. It will only affect Jobs that are sent after making the change. If you want to change a job's priority after it's been sent to the queue, use the Change Priority button in the Queue window.
To change a job's priority:
| 1. | In the Environments section, select the environment containing the job you want to change the priority for. |
| 2. | In the Jobs section, select the job whose priority you want to change. |
| 3. | In the top menu, select Job > Change Priority or you can also right-click in the Jobs section and select Change Stage. |
The Choose New Priority dialog box appears.
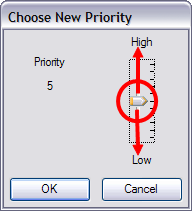
| 4. | Drag the slider to the desired priority (0 means the Job has the highest priority for processing through the Vectorize or Render queue and a job with a priority of 10 is the least important). |
| 5. | Click on the OK button. When you send this job to be vectorized or rendered, it will have this new priority in the processing queue. |
Related Topics
| • | Modifying Entries in the Vectorize Queue |
| • | Modifying the Entries in the Render Queue |